Note that the process described in this guide is applicable only to Institutional Managers. If you would like to create an institutional account on Eigo.AI please contact us.
Add users to your institution
Joining an institution is a process that must be completed from a student account. As an institutional manager, you first need to add a class, then have students join the class using the Join Code and PIN code. See our guide about how to join an institution from the student perspective for more information.
View users in your institution
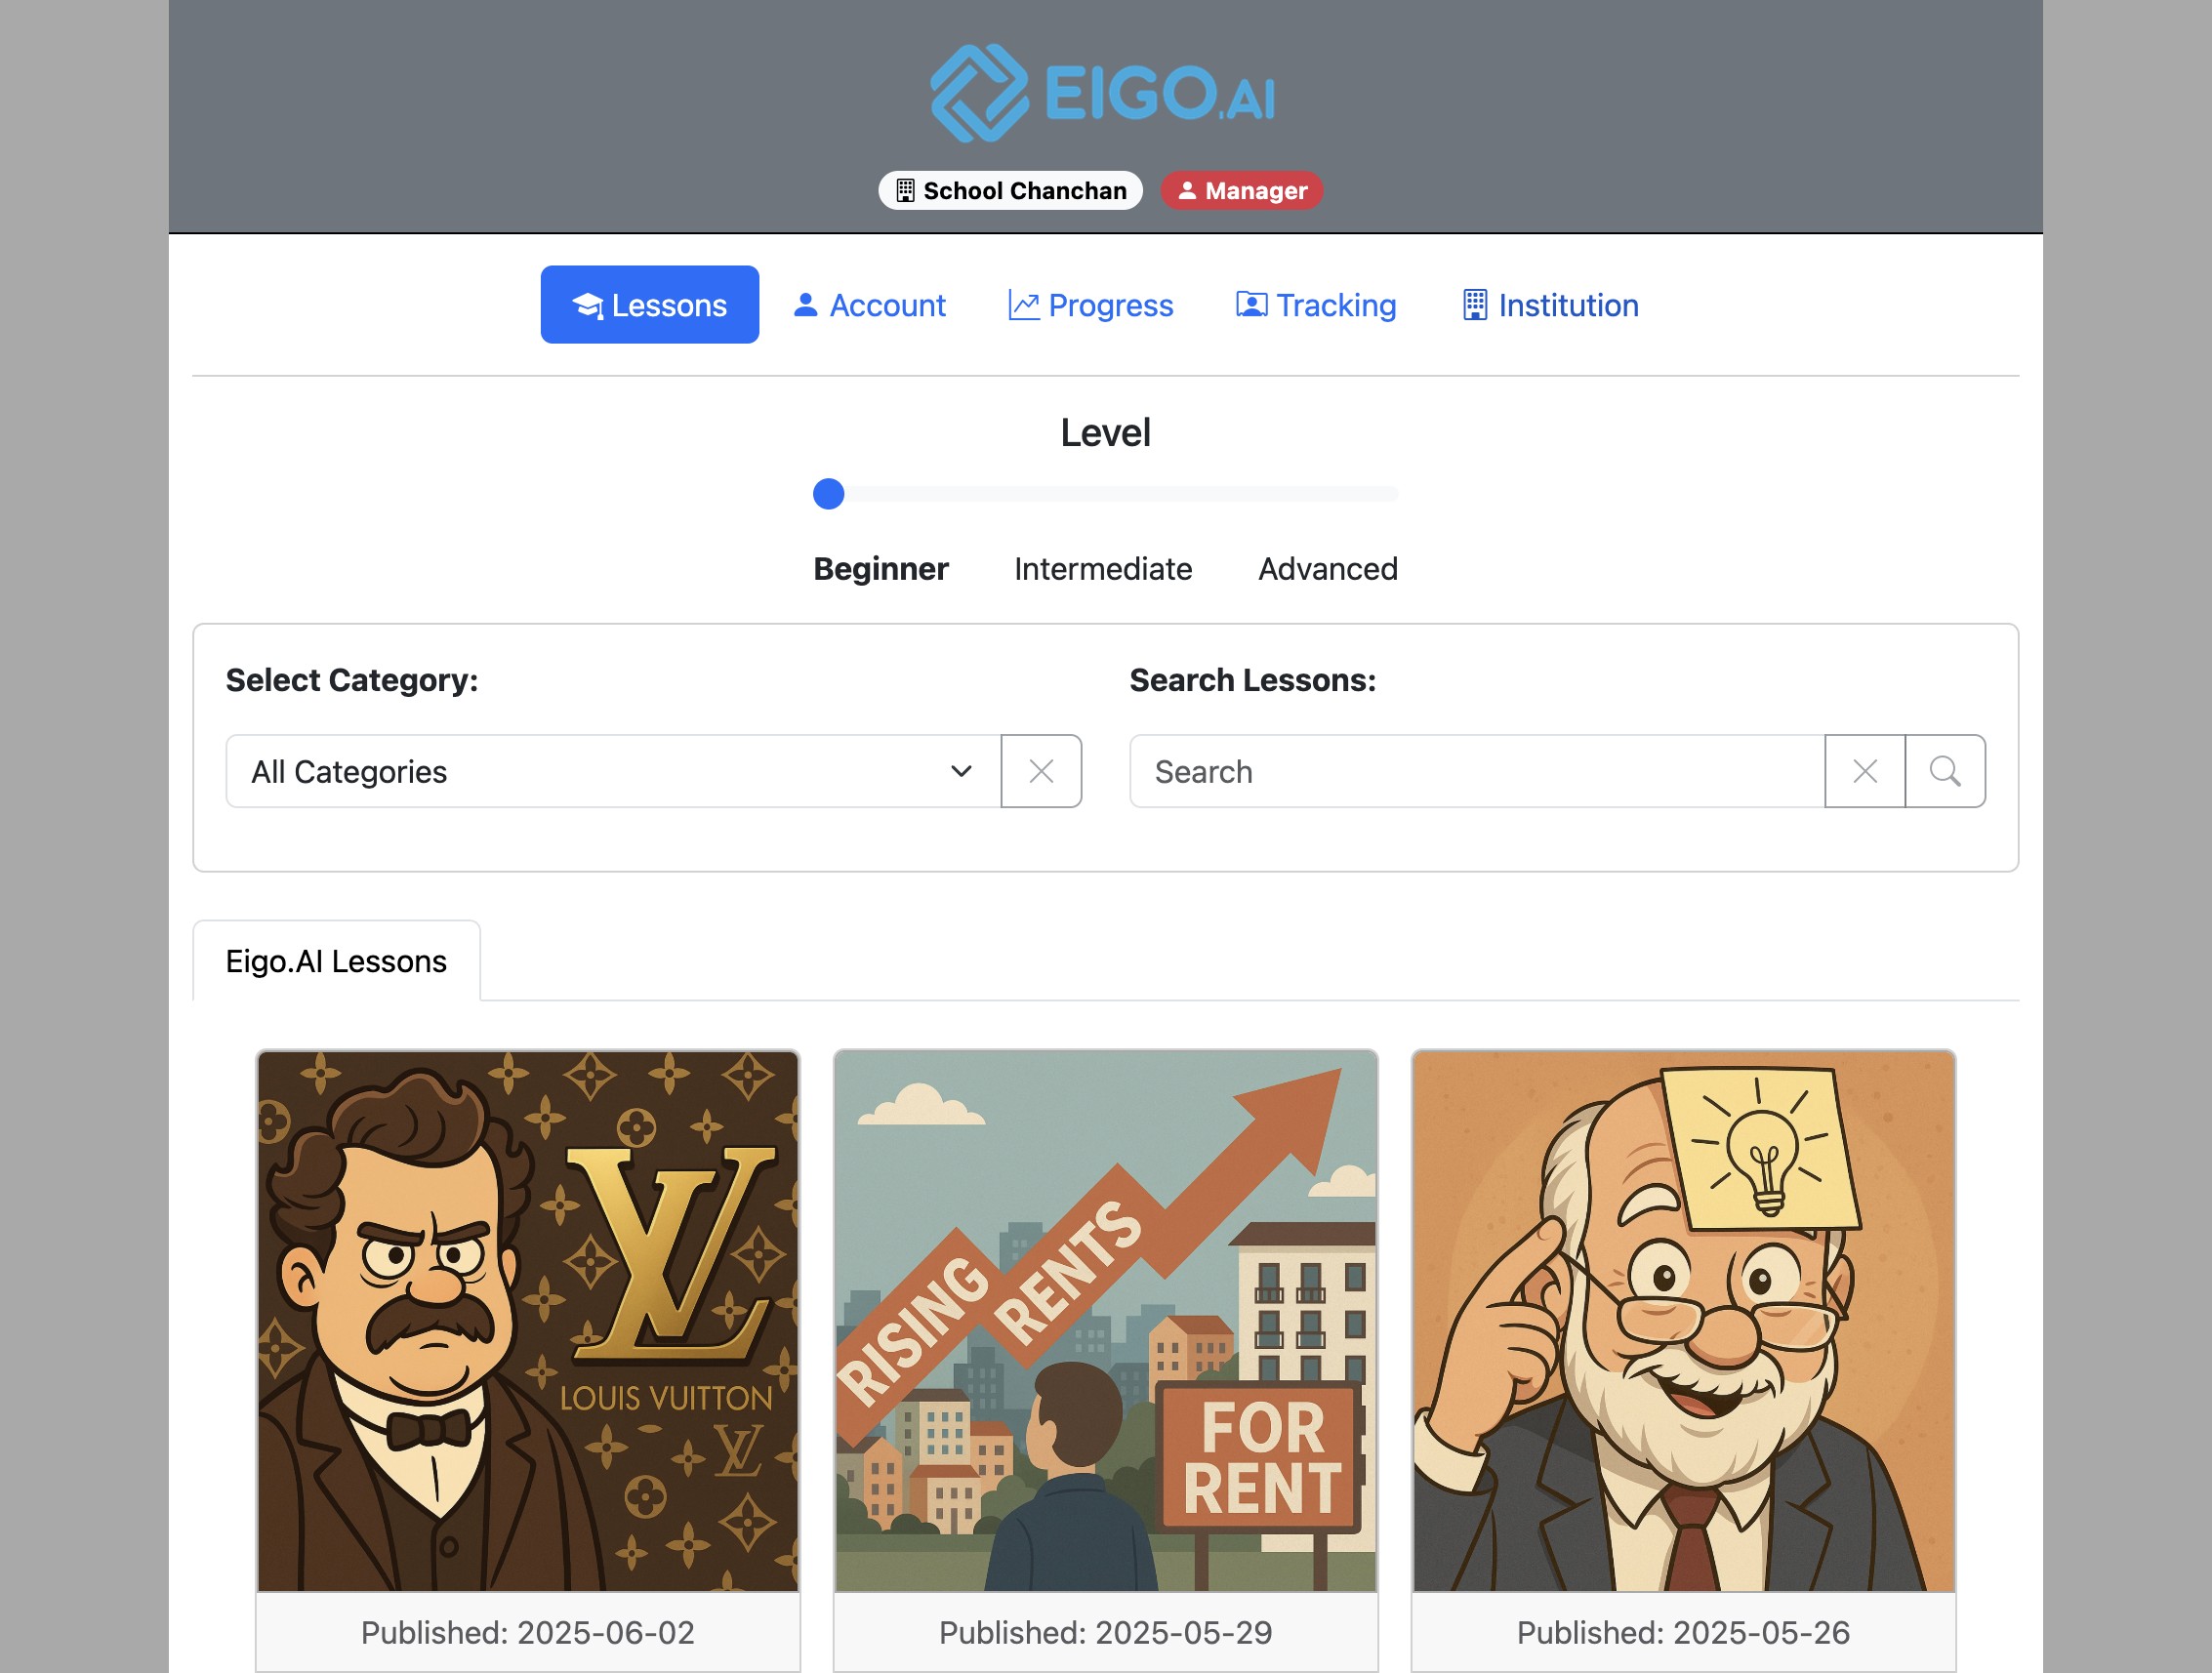
Navigate to https://eigo.ai/lessons/ and click "Institution".
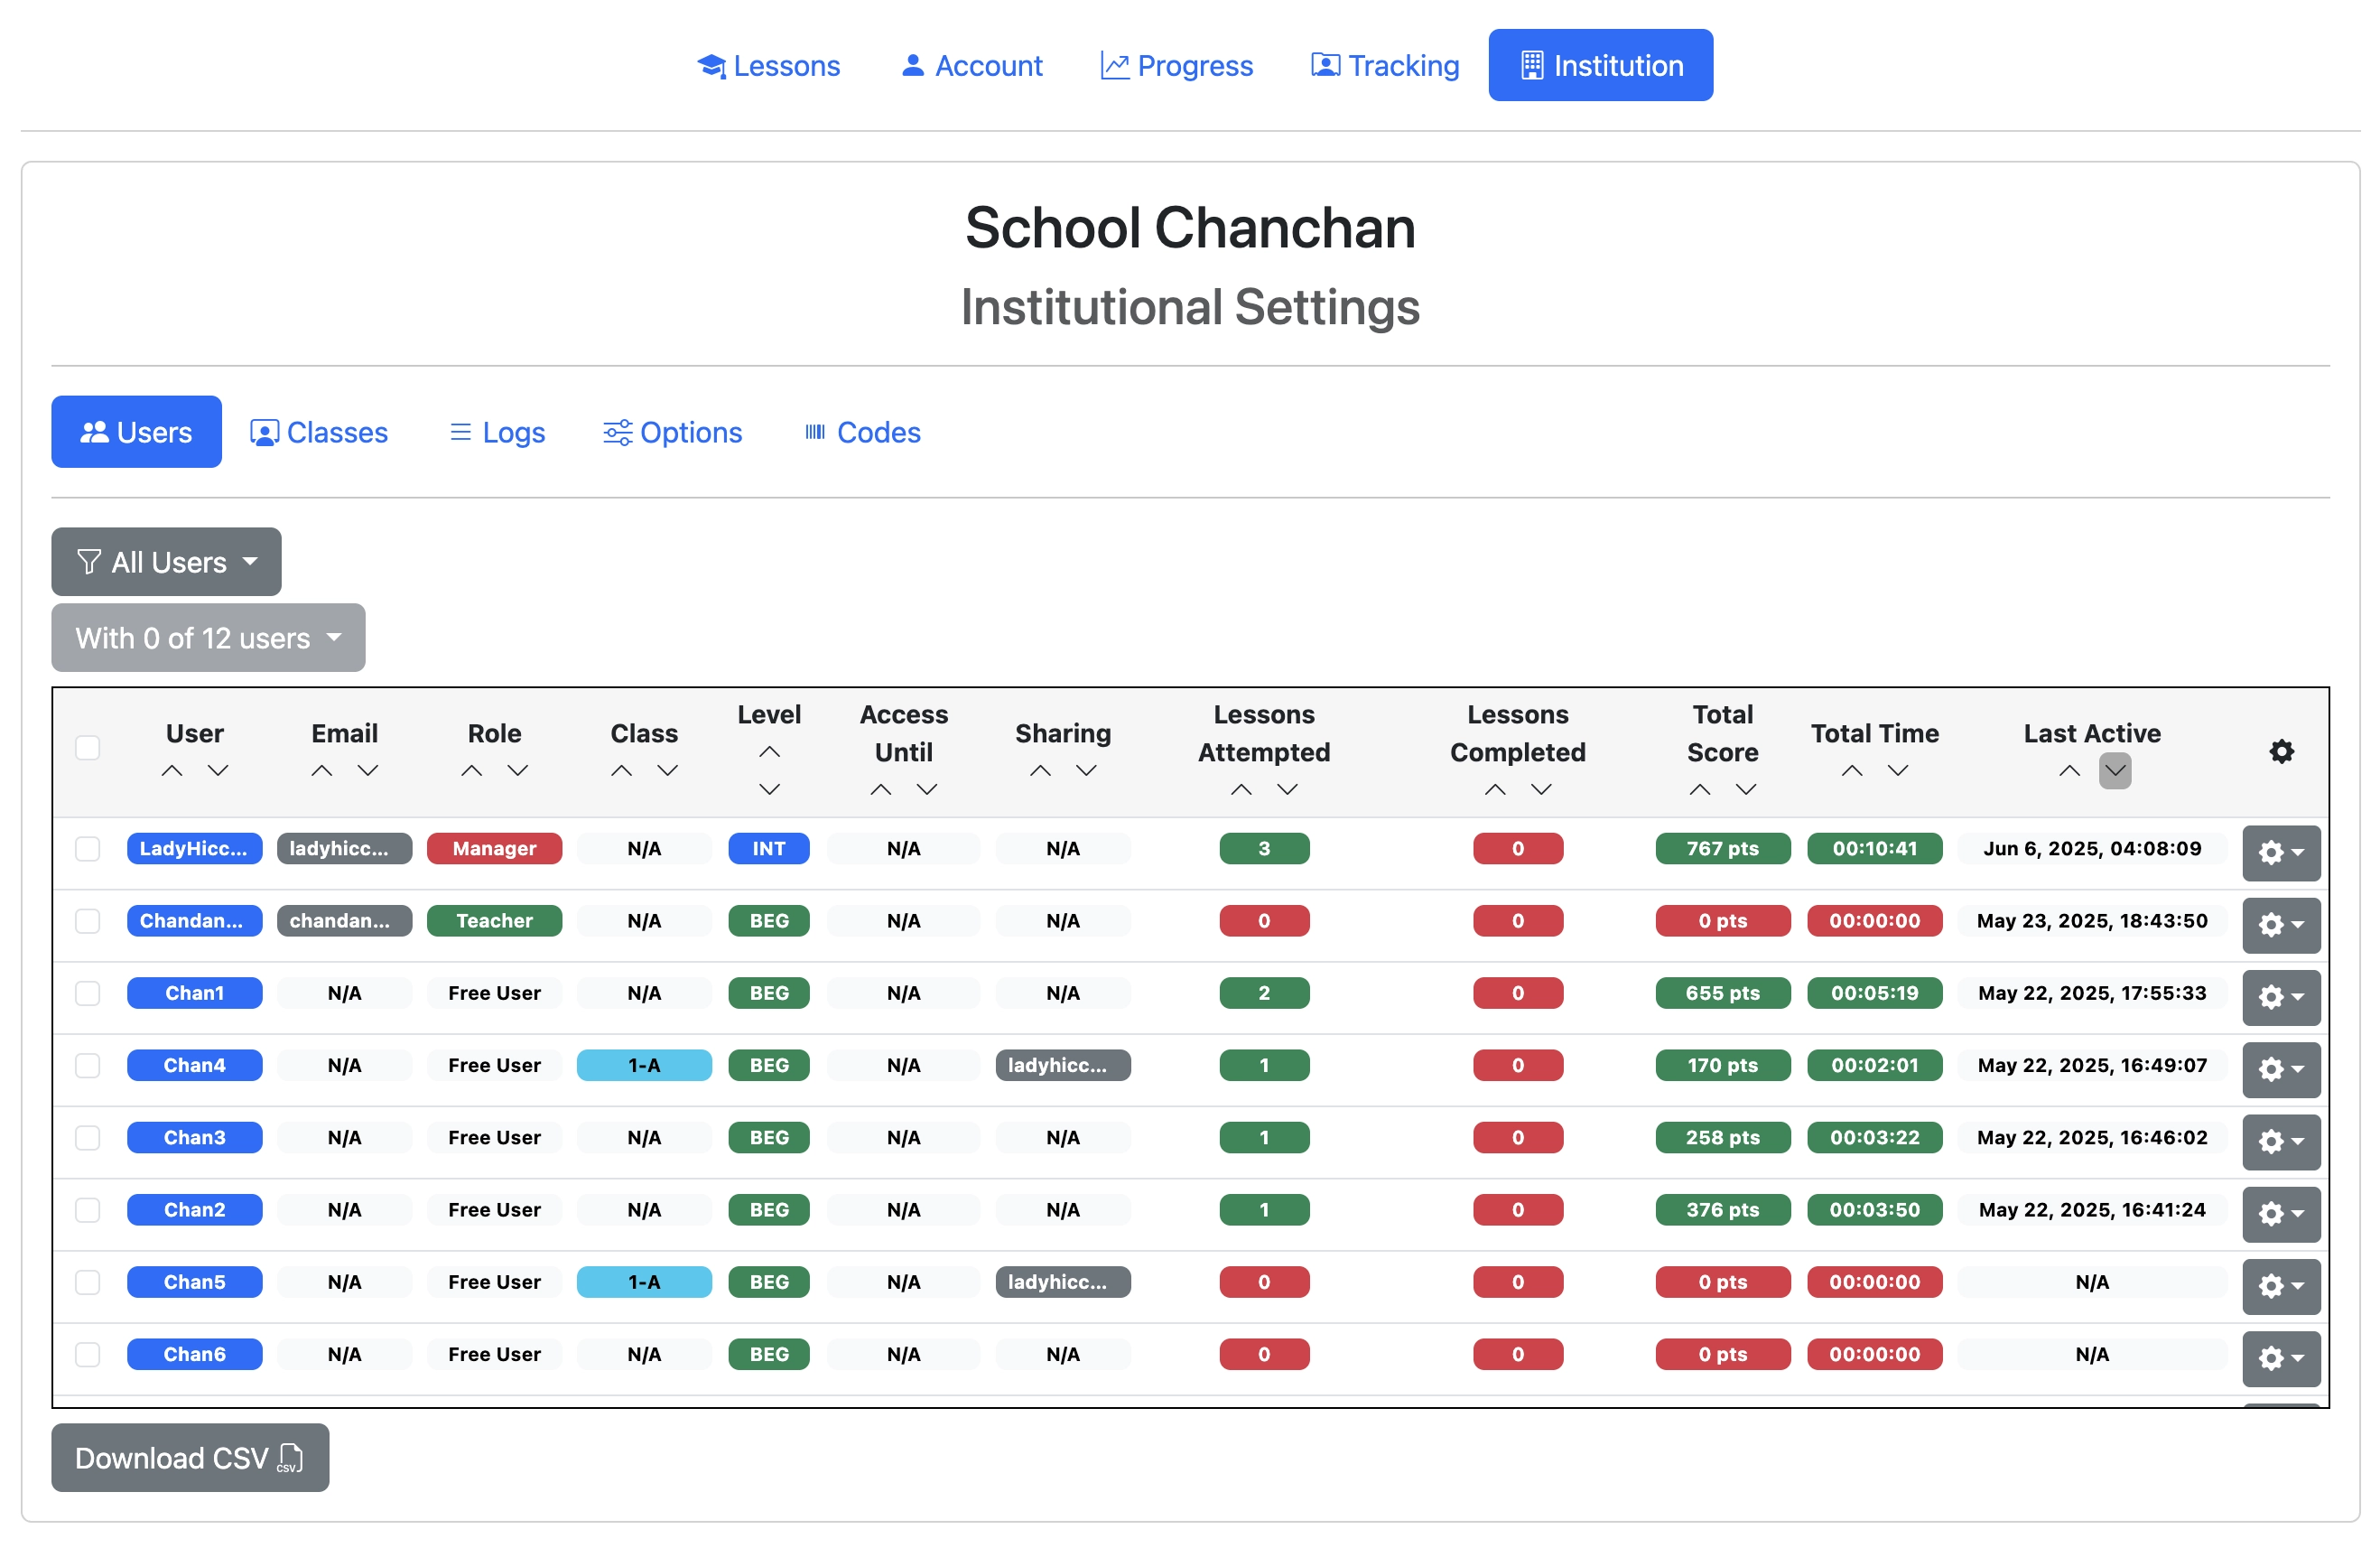
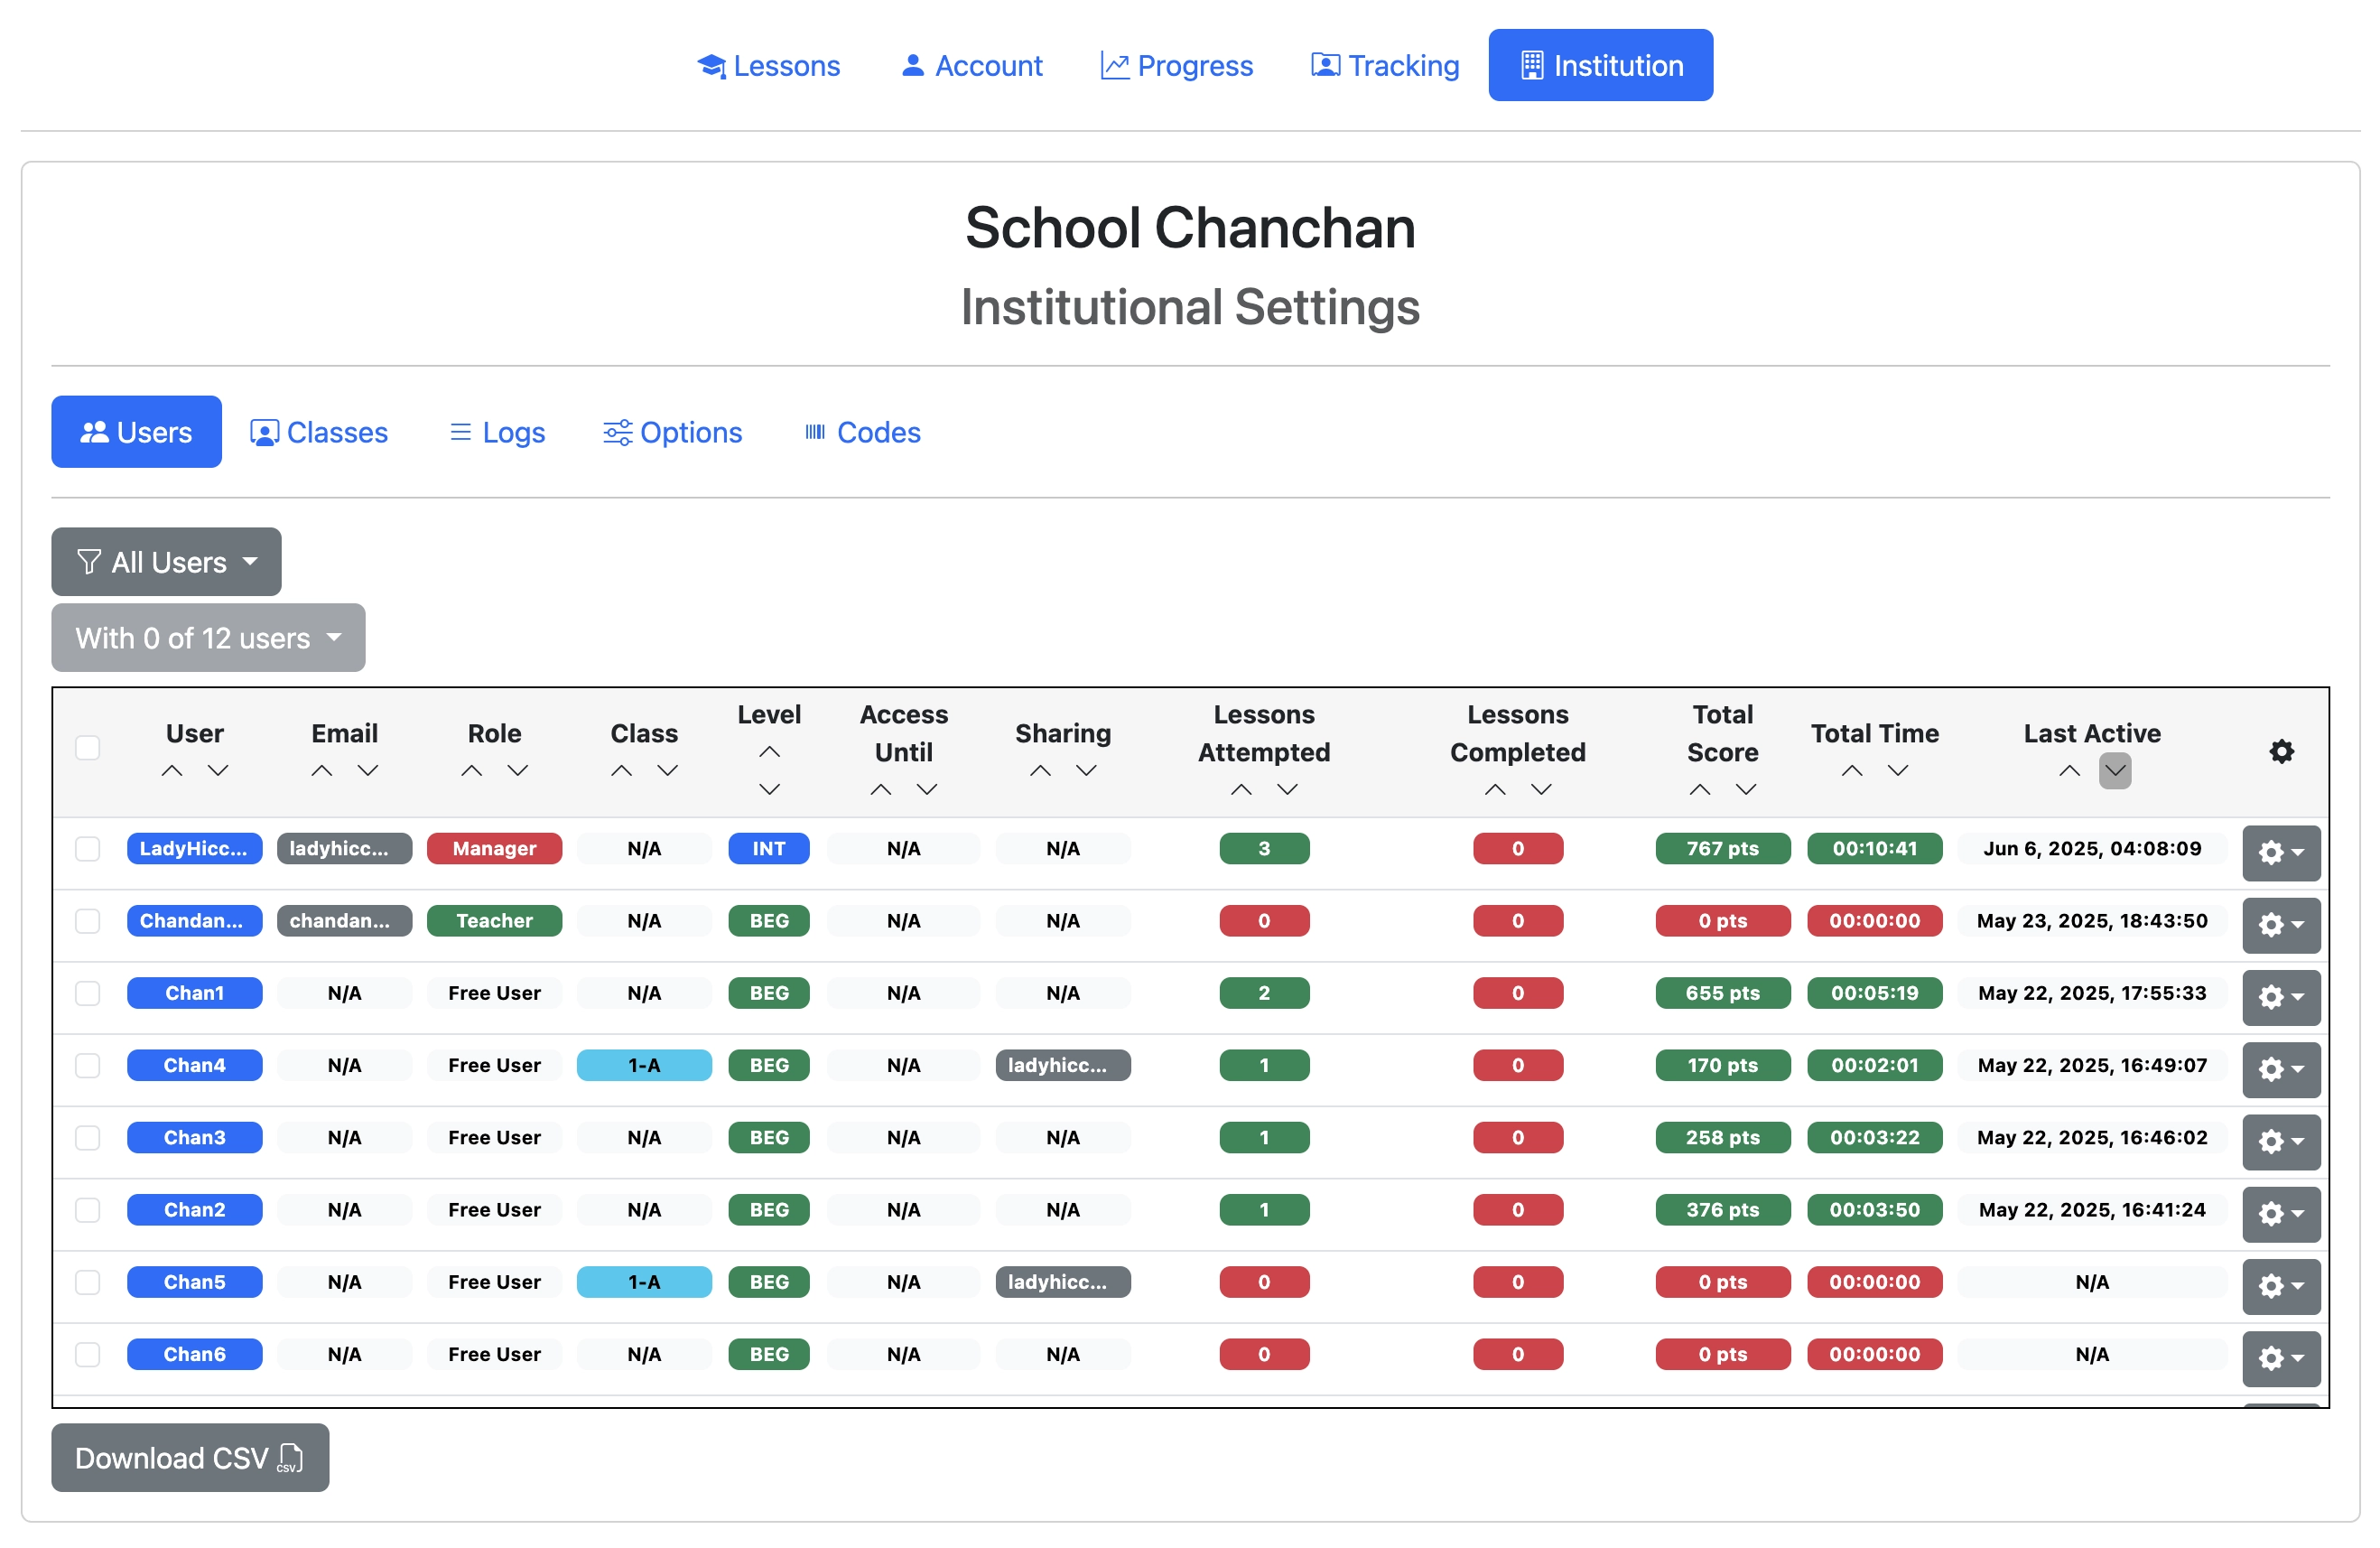
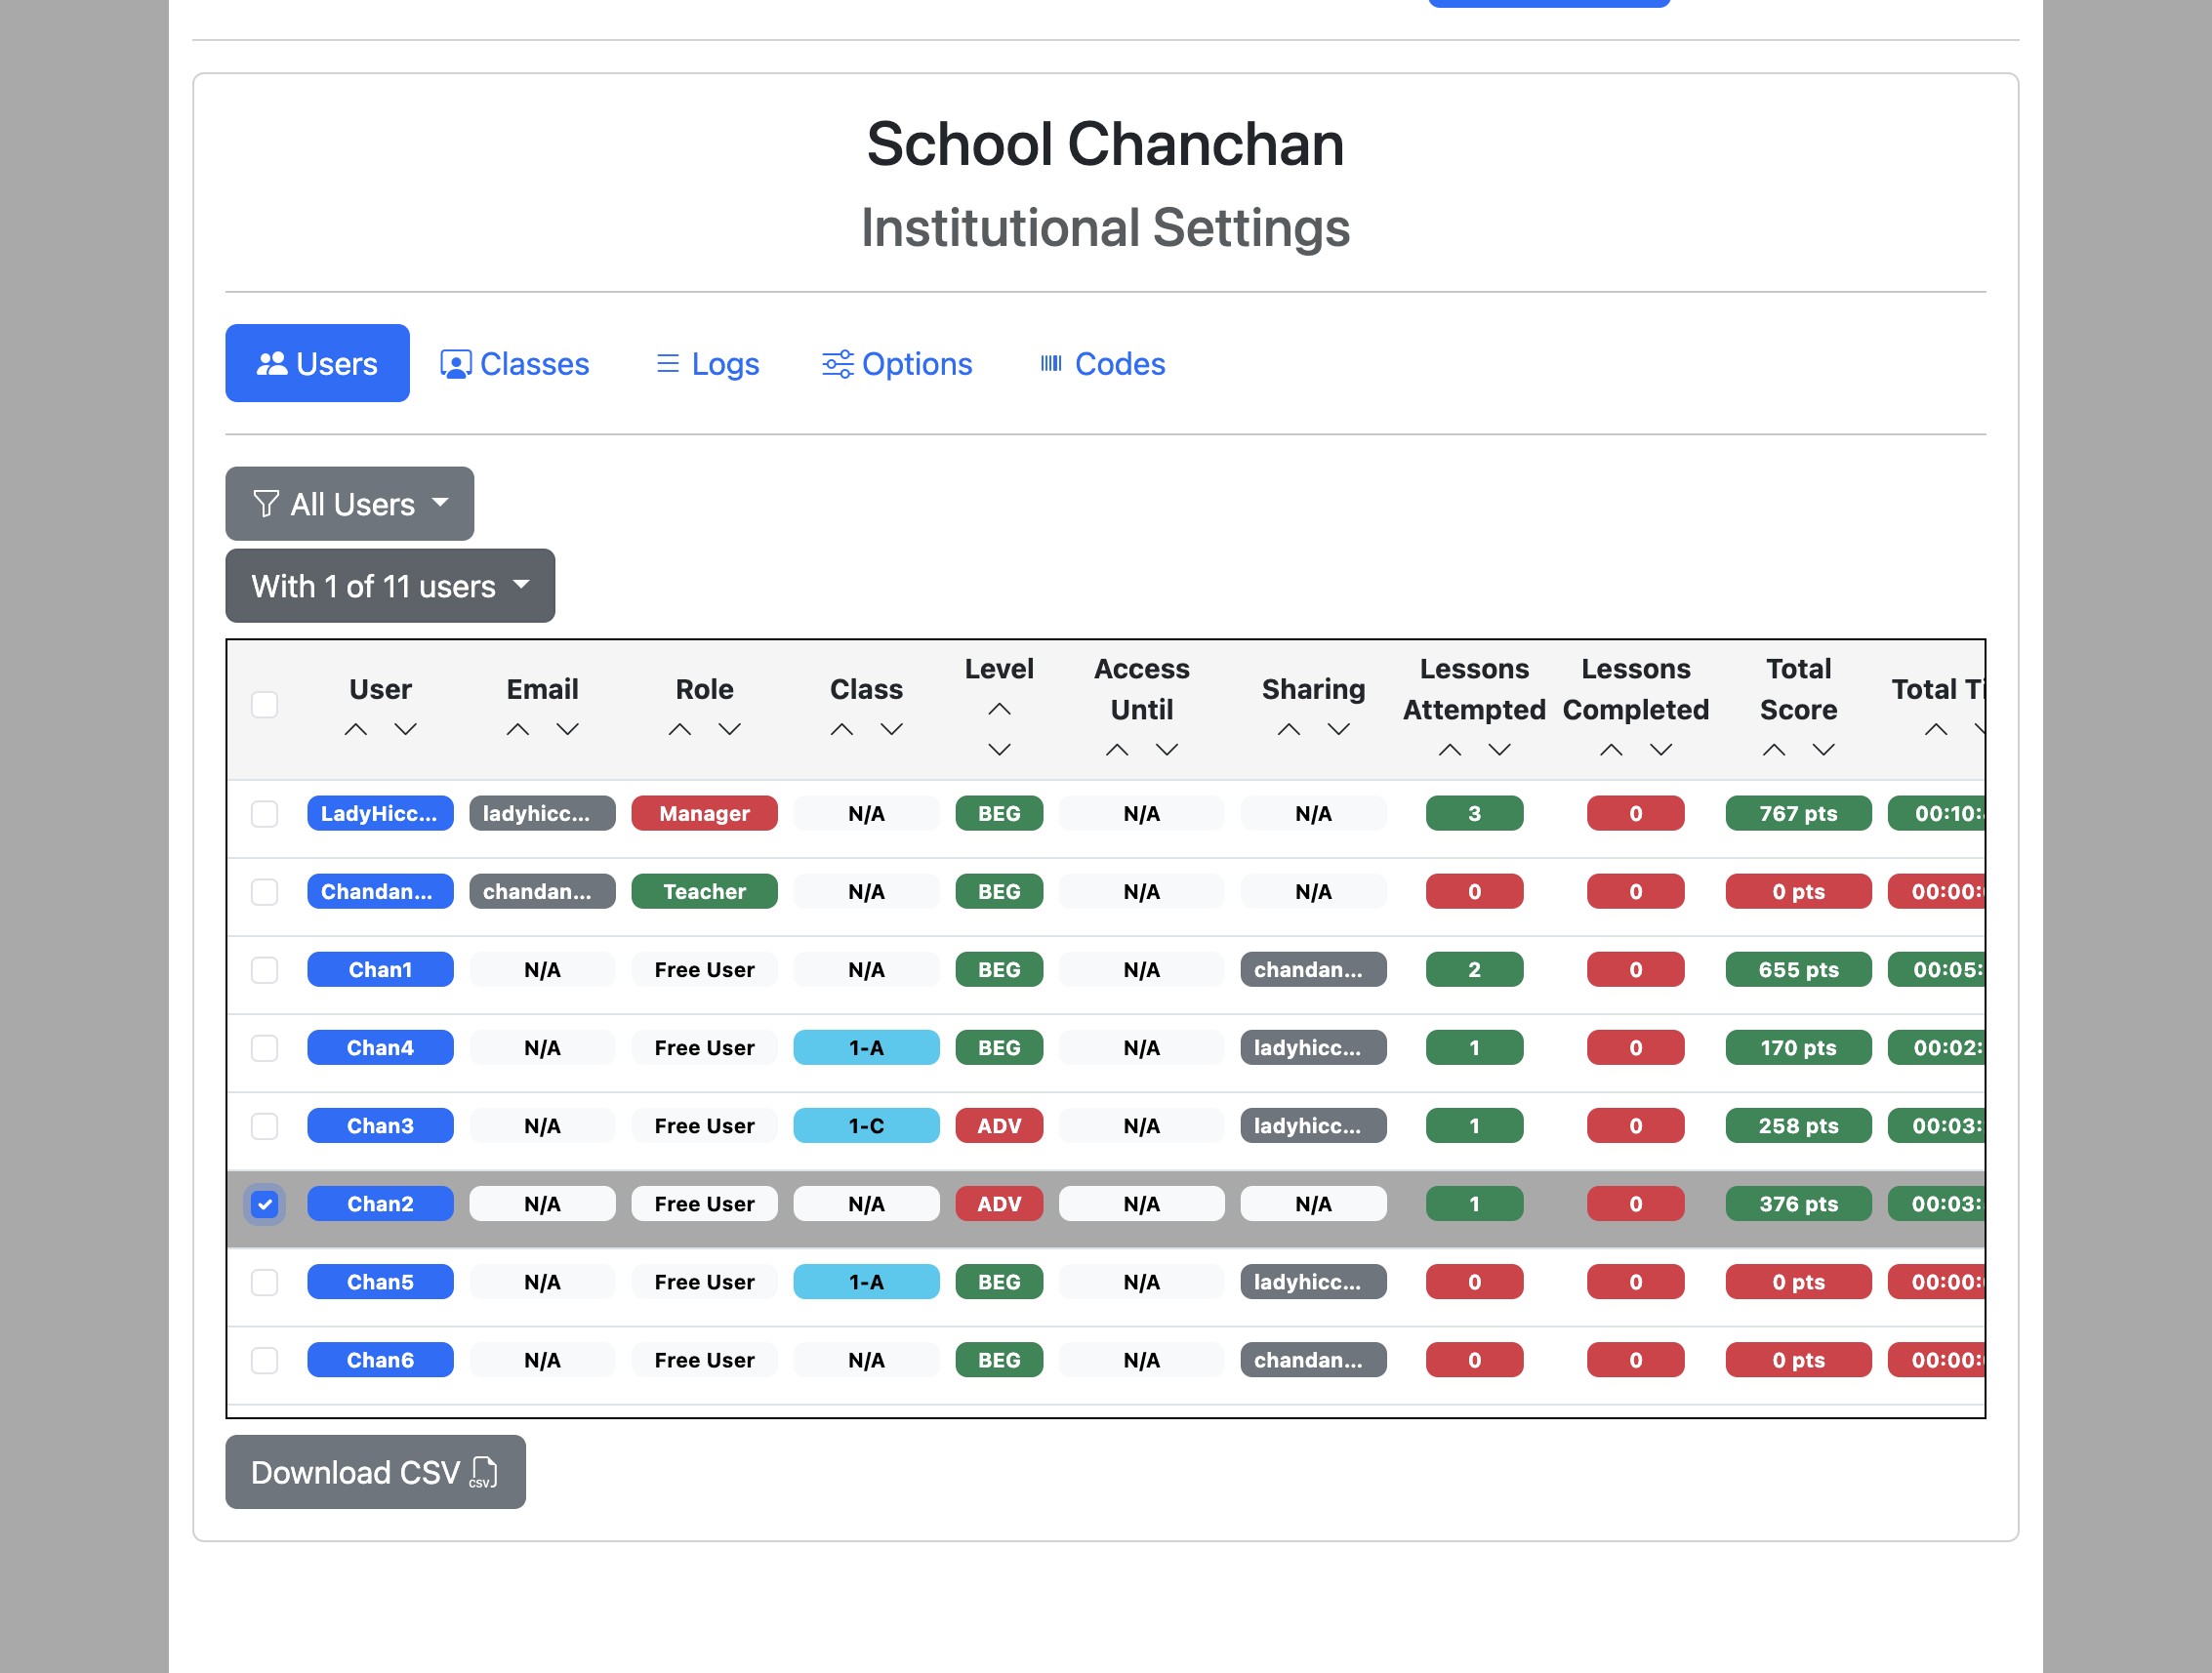
The table displays a summary of users in your institution, including both teachers and students.
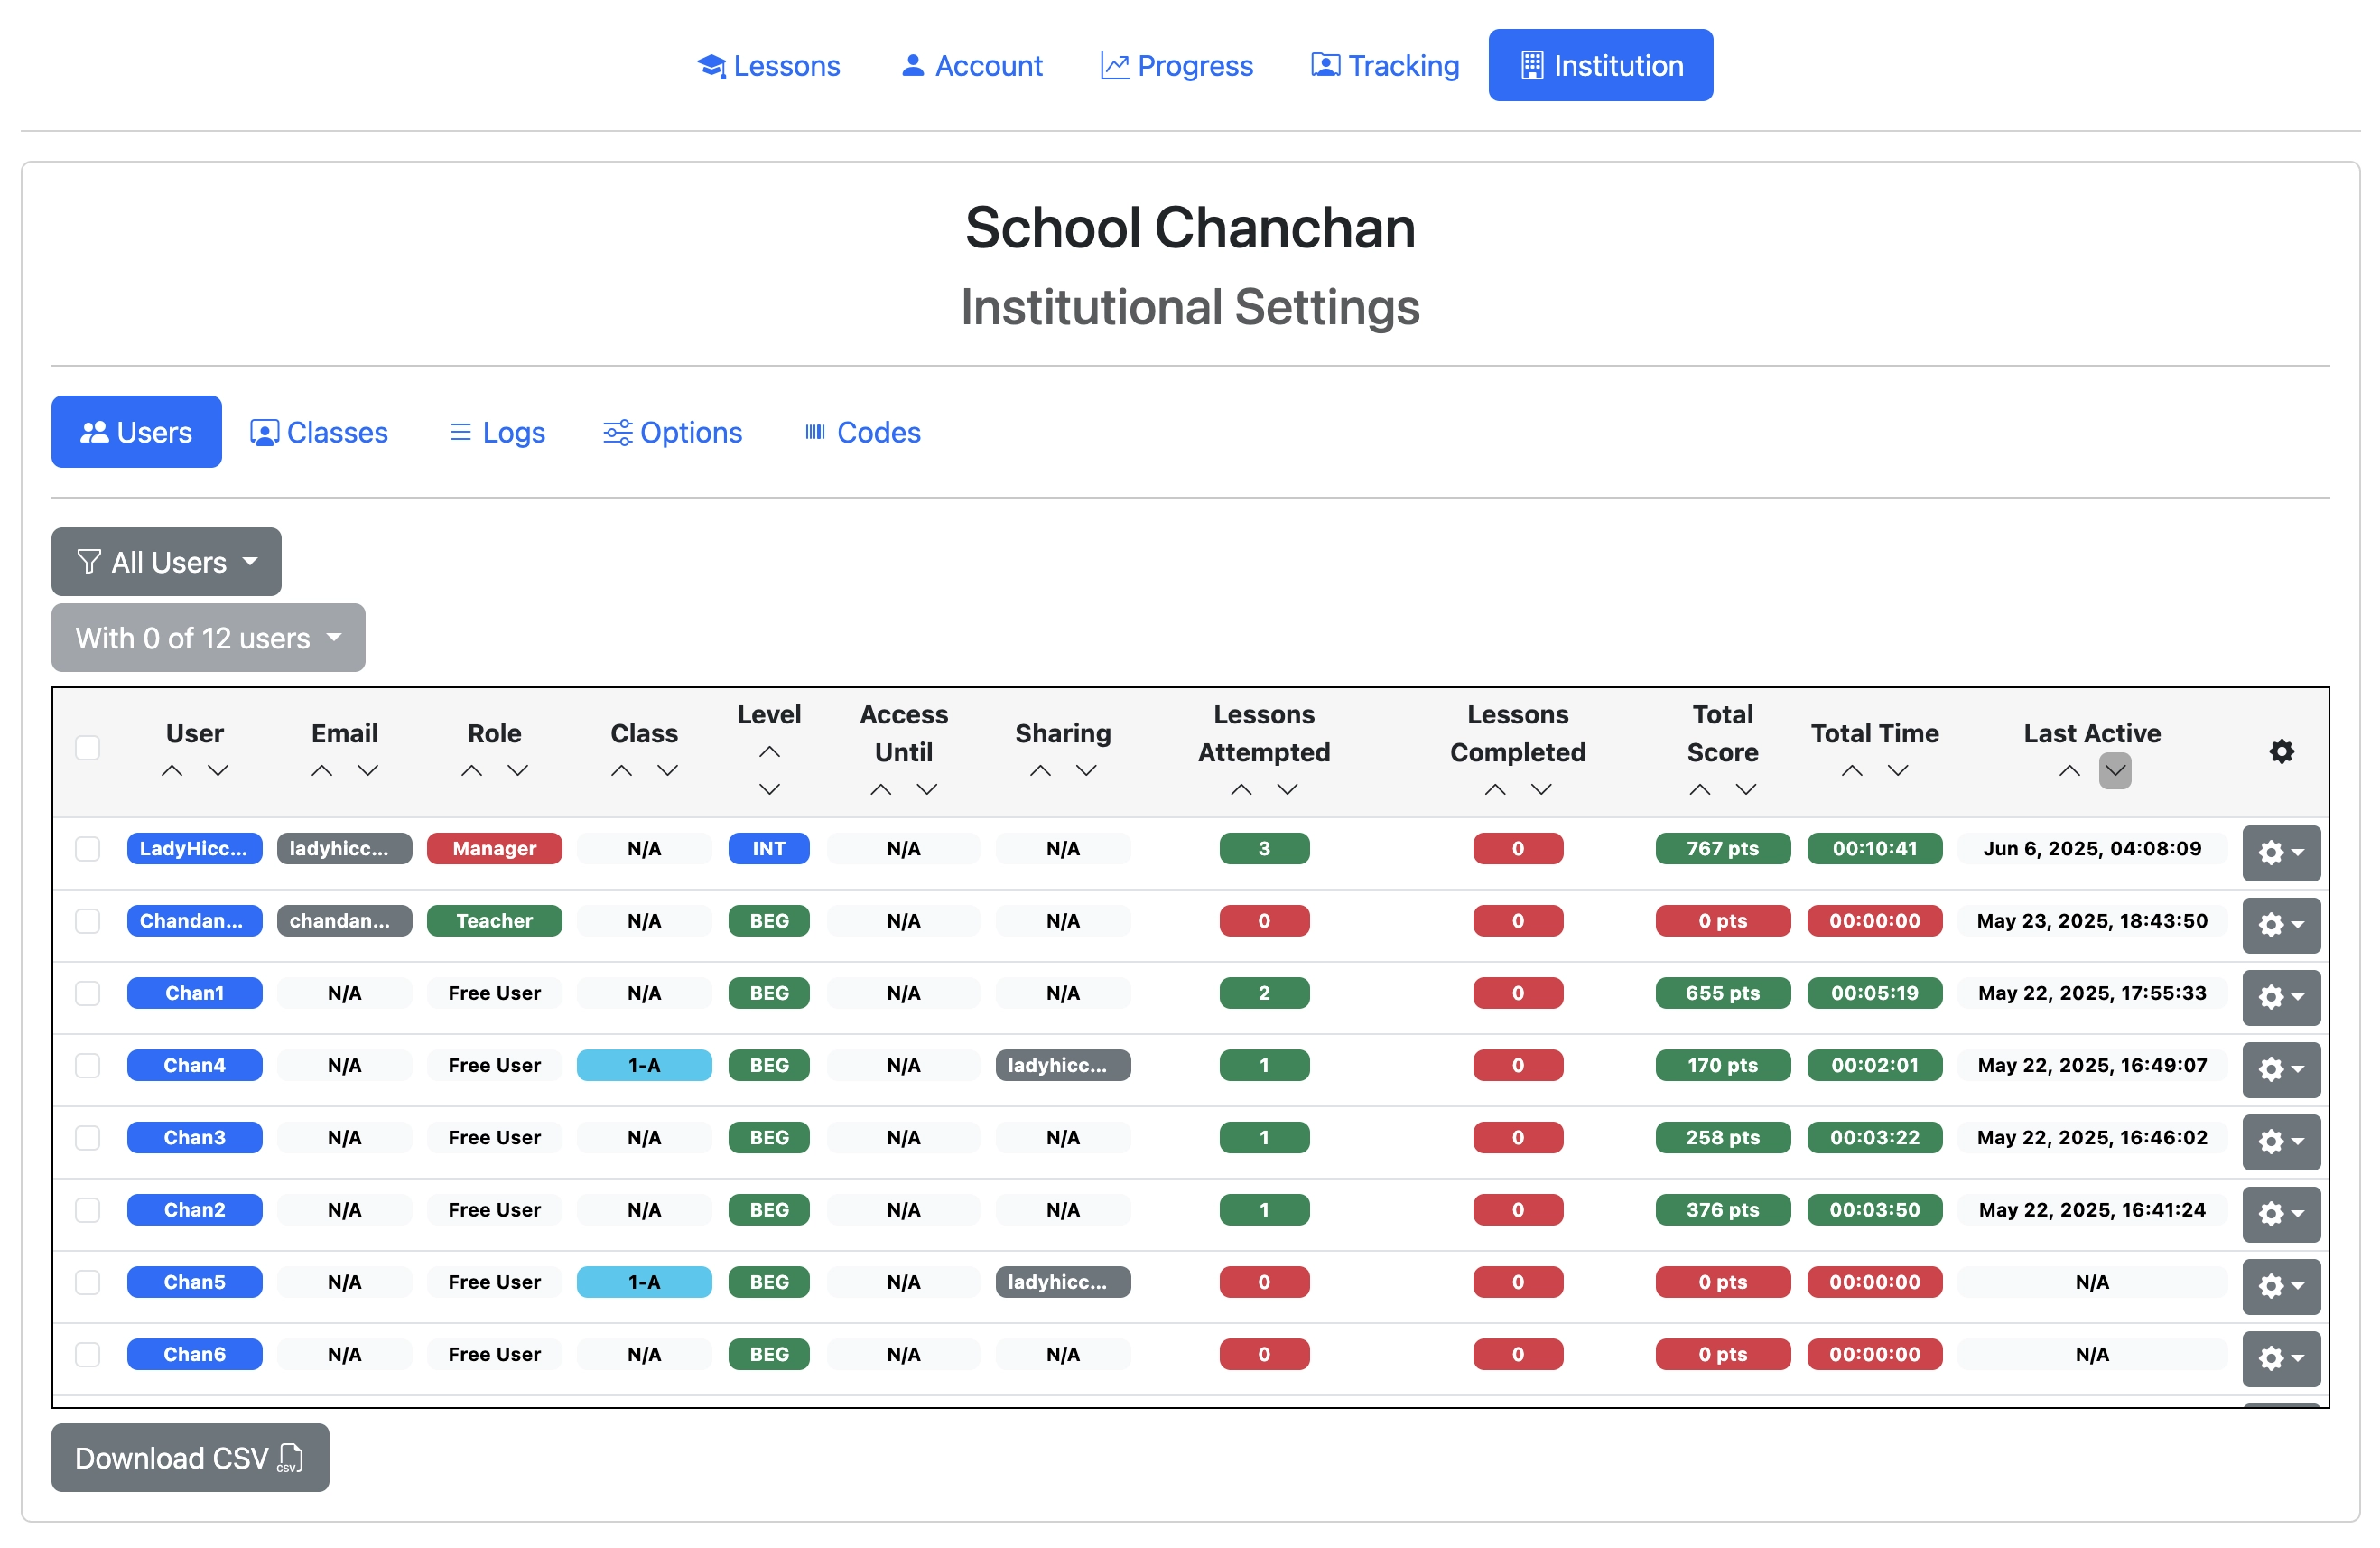
Here's how to read each column: - User & Email: Shows the username and associated email (if available). - Role: Indicates whether the user is a manager, teacher, or a student. - Class & Level: Displays the class and proficiency level assigned. - Access Until: Shows the access expiration date (if any). - Sharing: Indicates if a user is sharing their progress with a teacher under your institutional subscription. - Lessons Attempted / Completed: Tracks lesson activity status. - Total Score: Sum of all points earned. - Total Time: Time spent across all activities. - Last Active: Last login or activity timestamp.
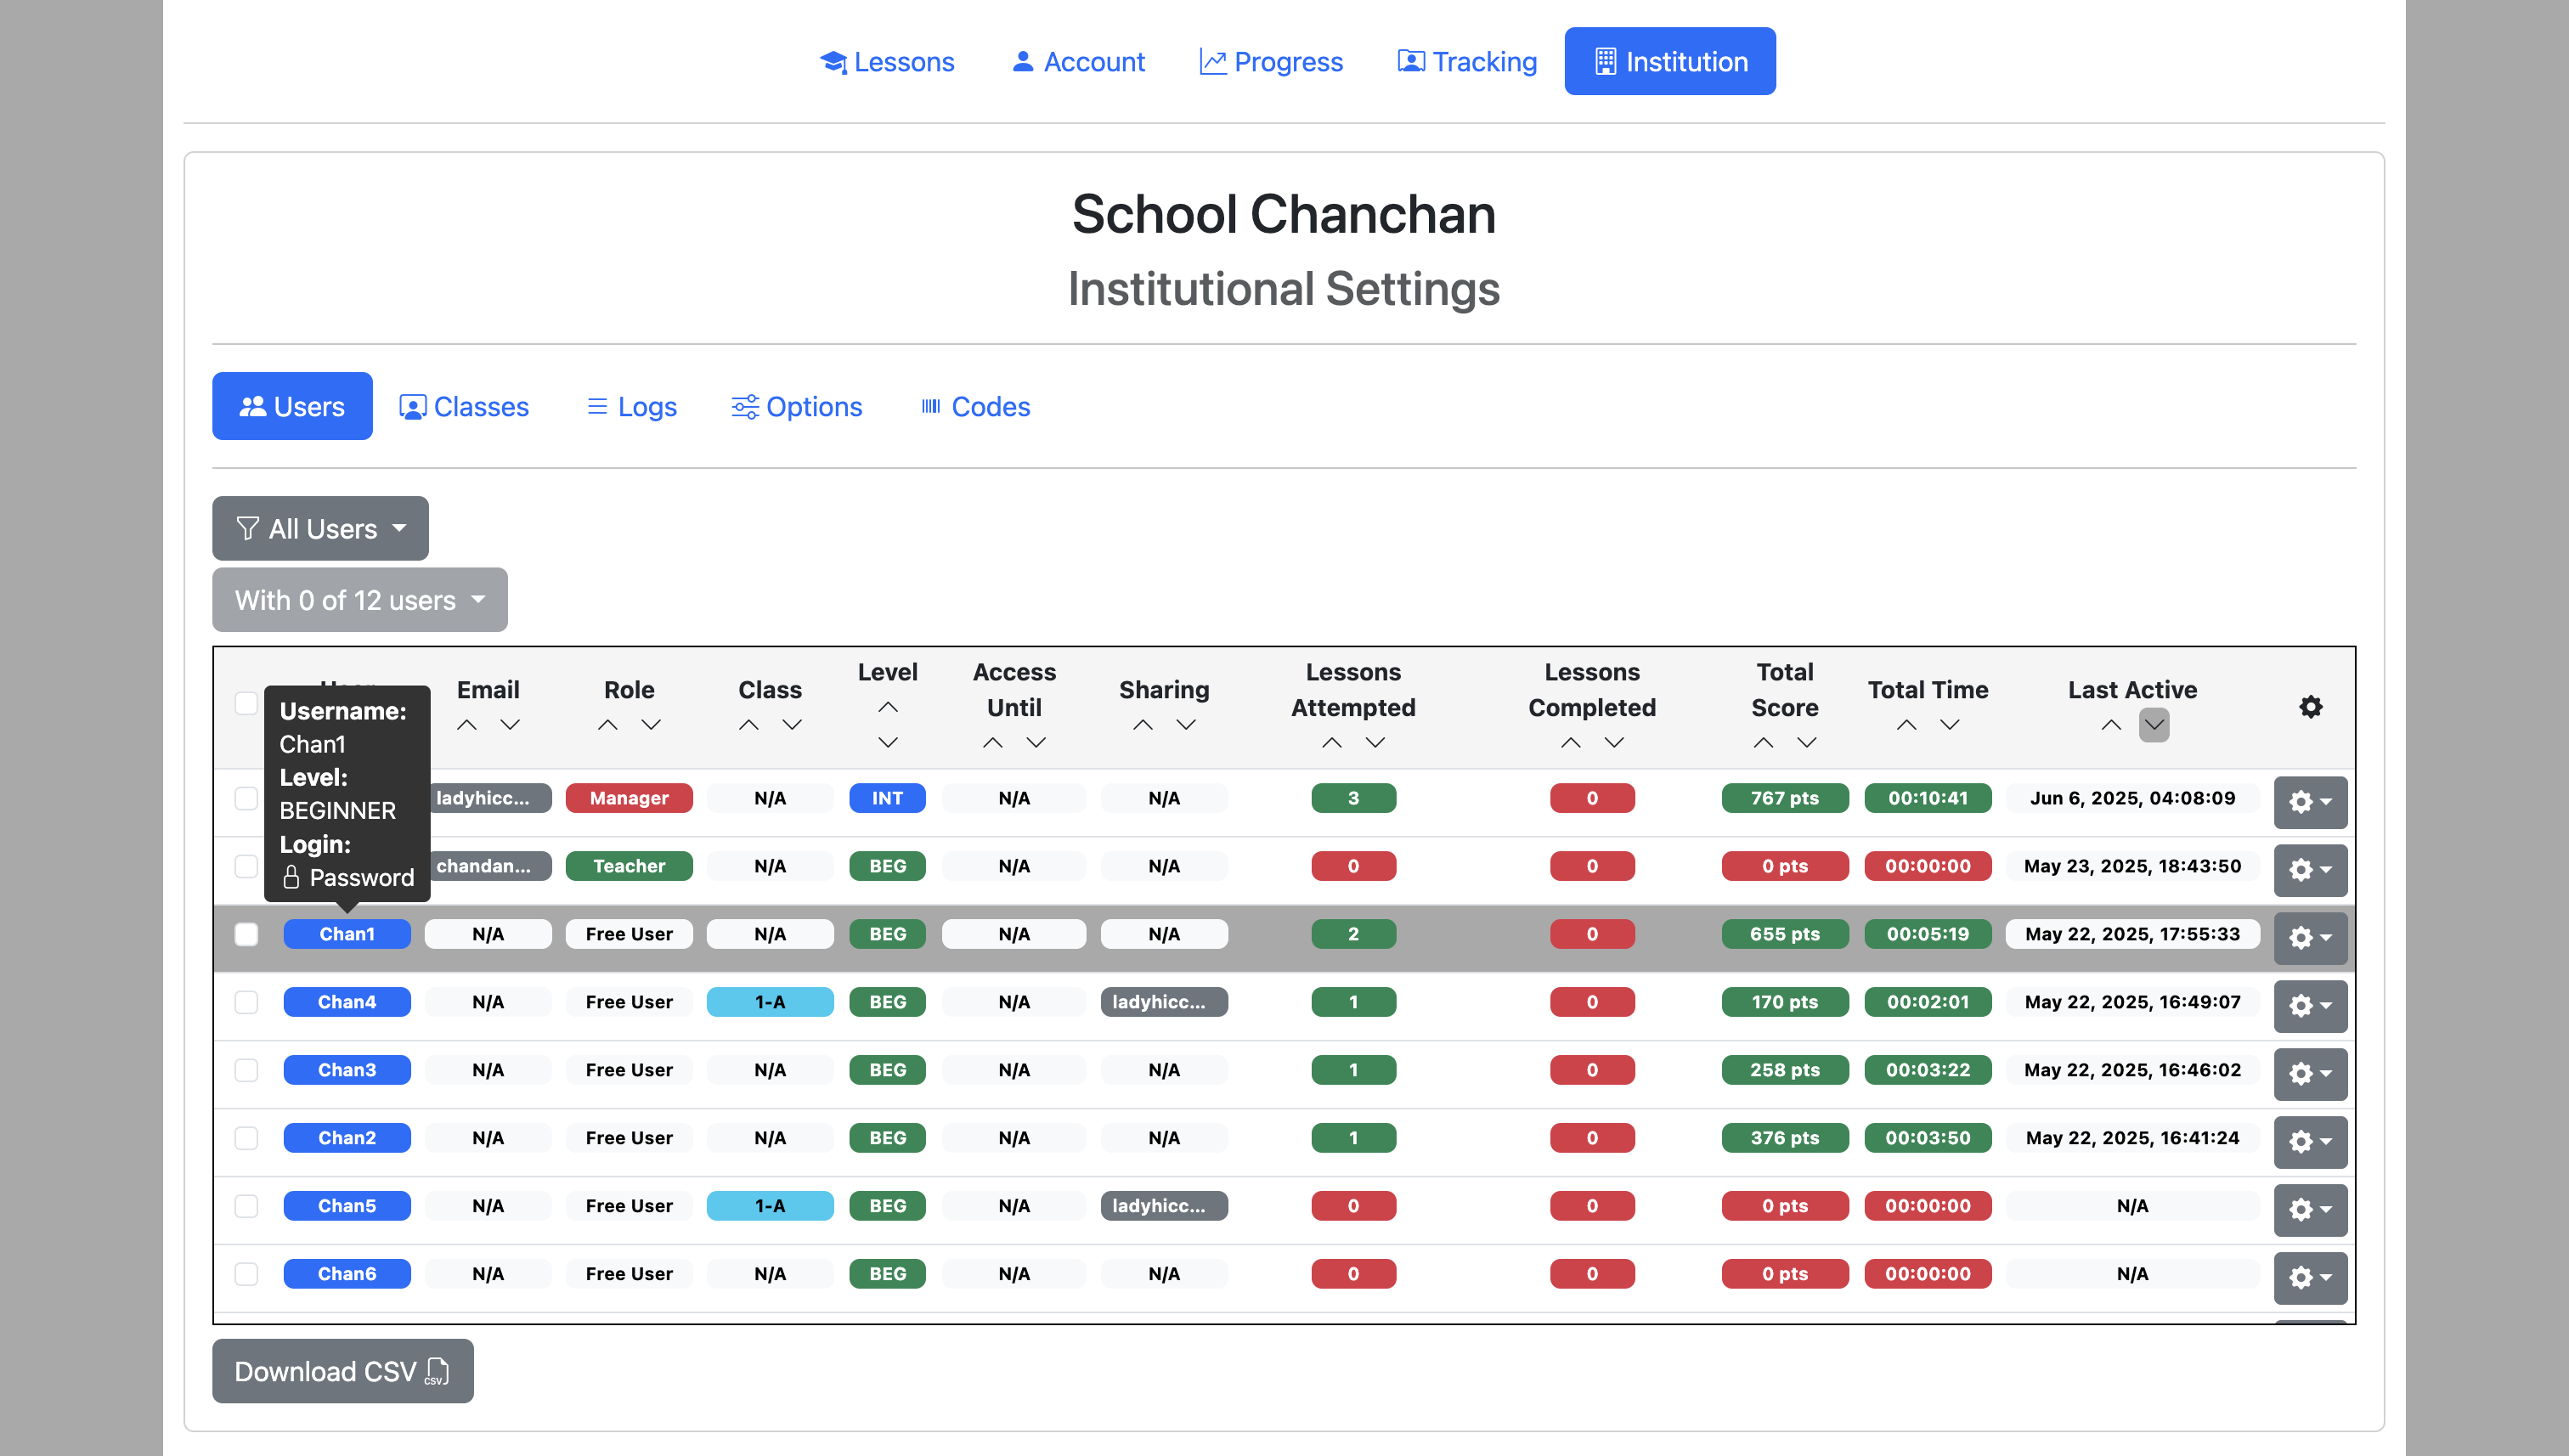
Hovering over the username shows the full username, level, and method of login.
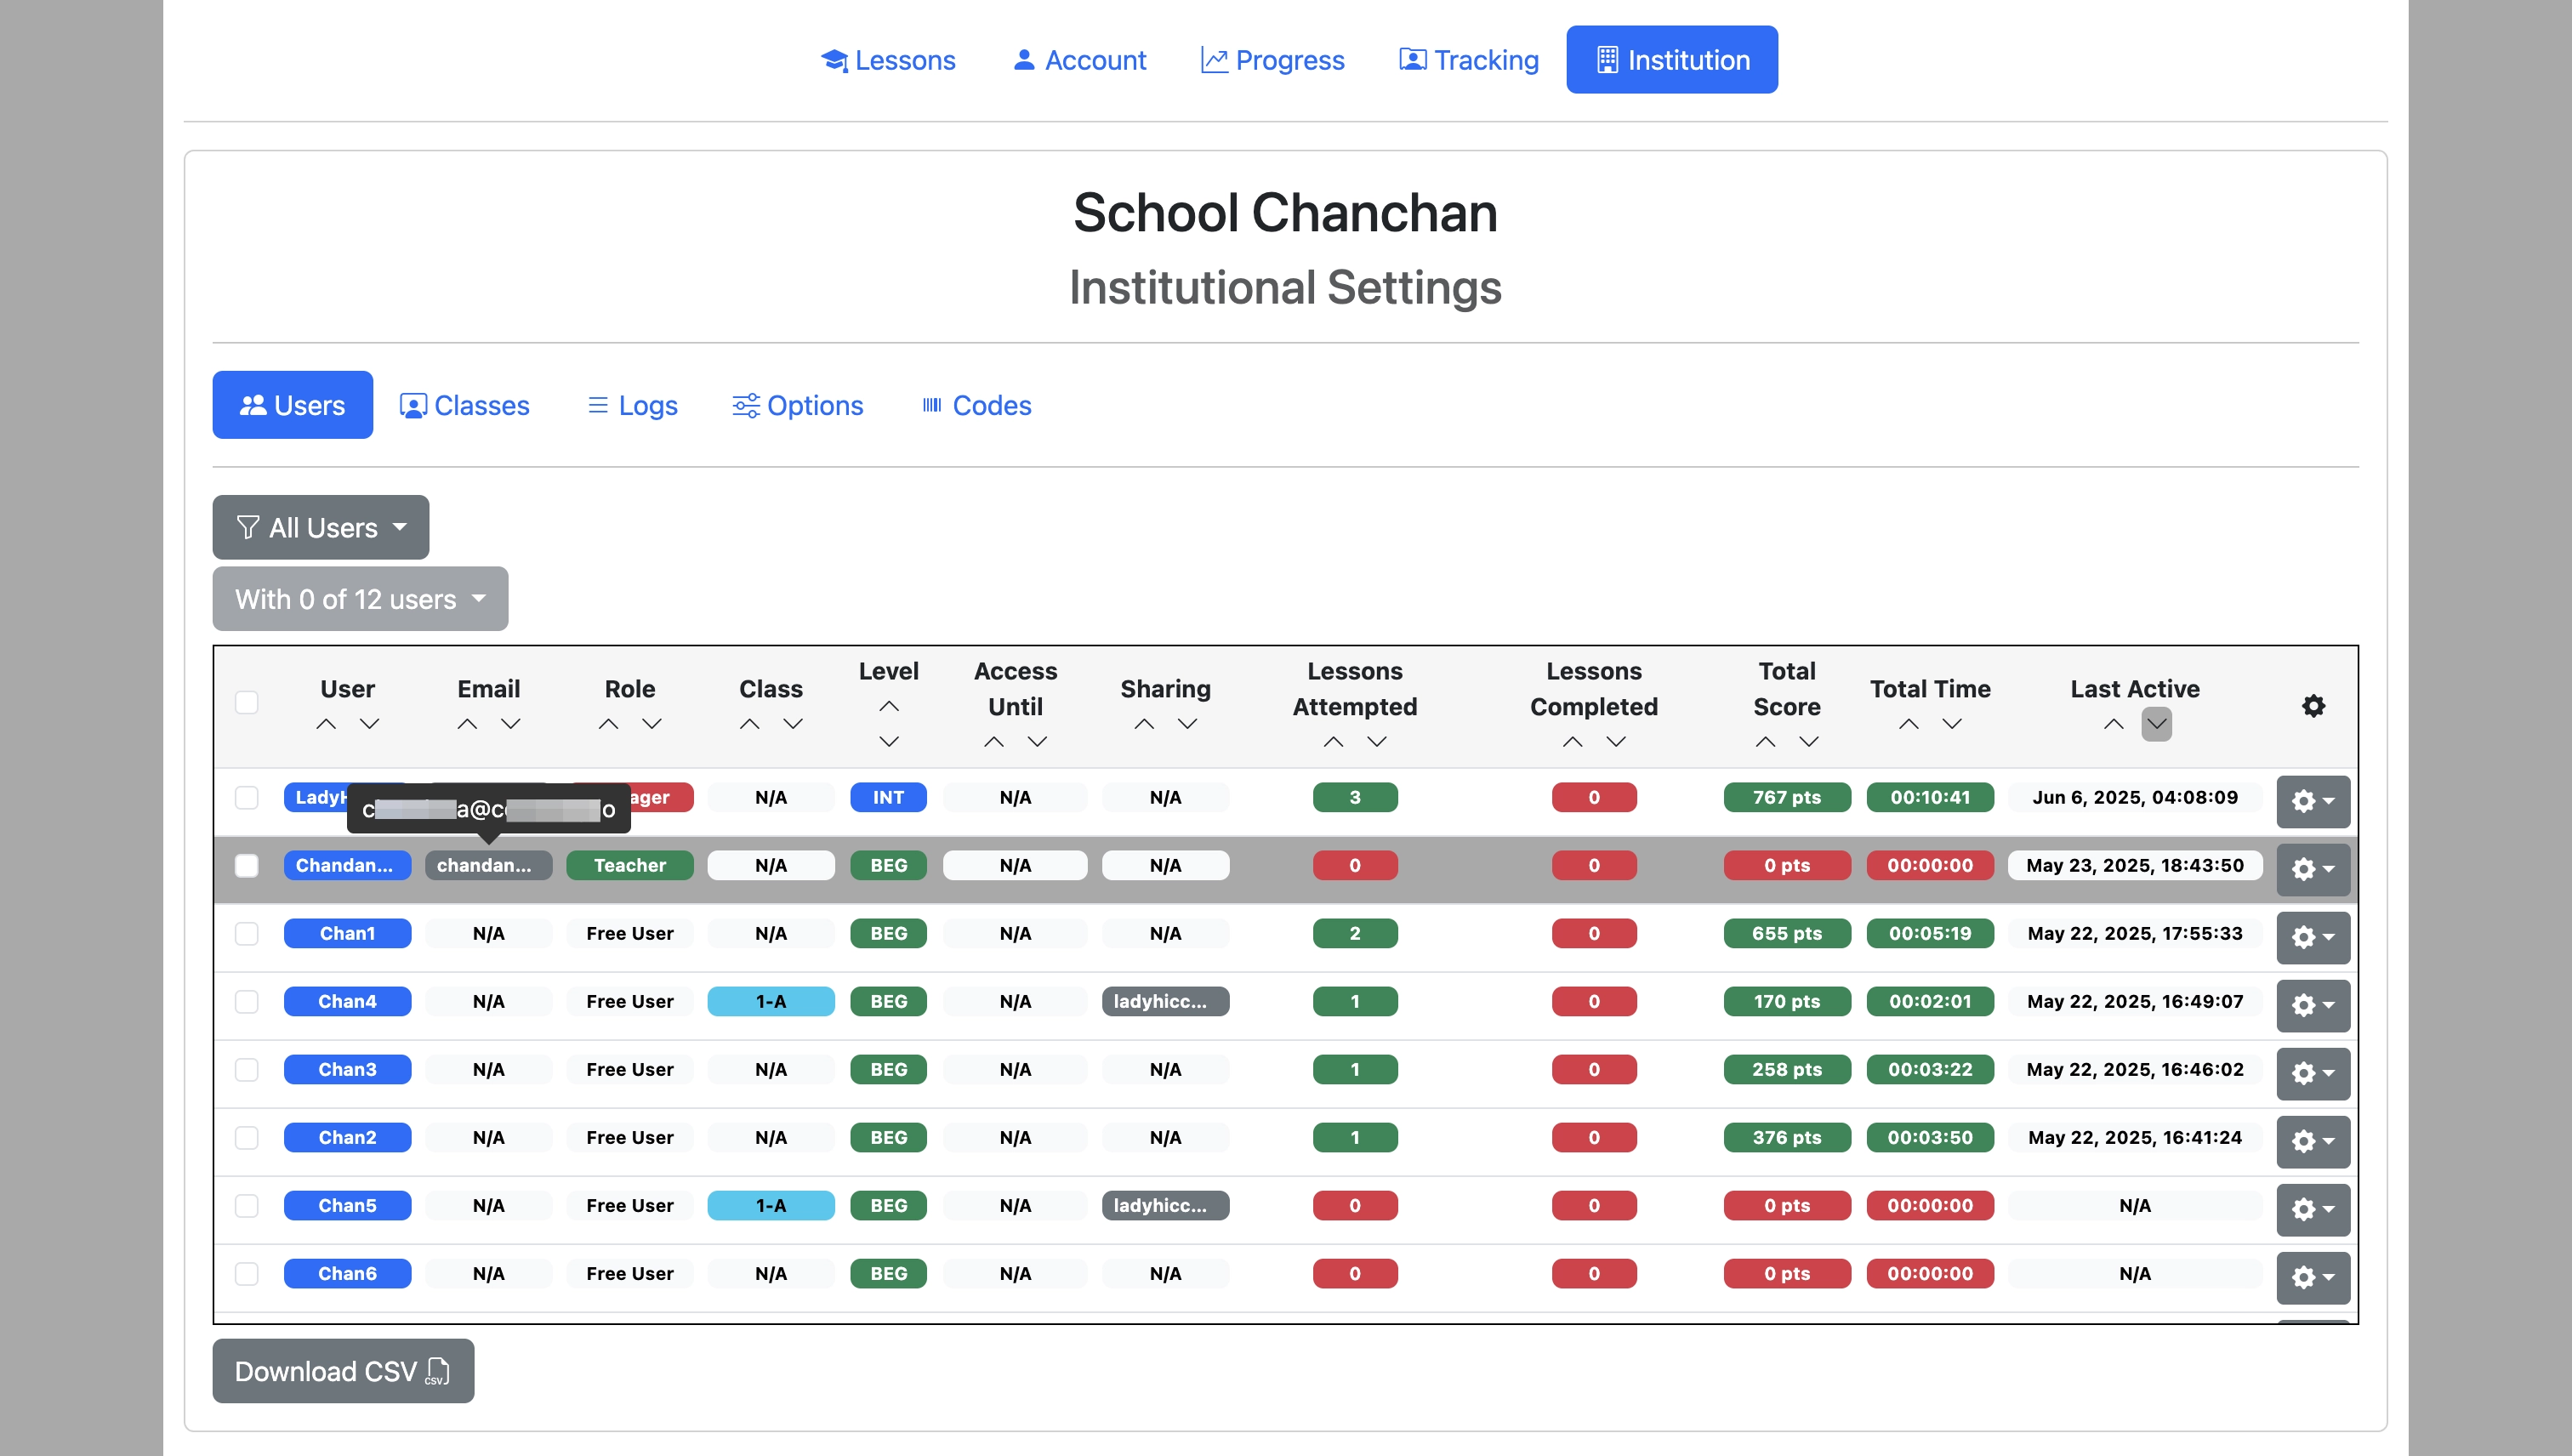
Hovering over the user's email will display the user's full email address, if available.
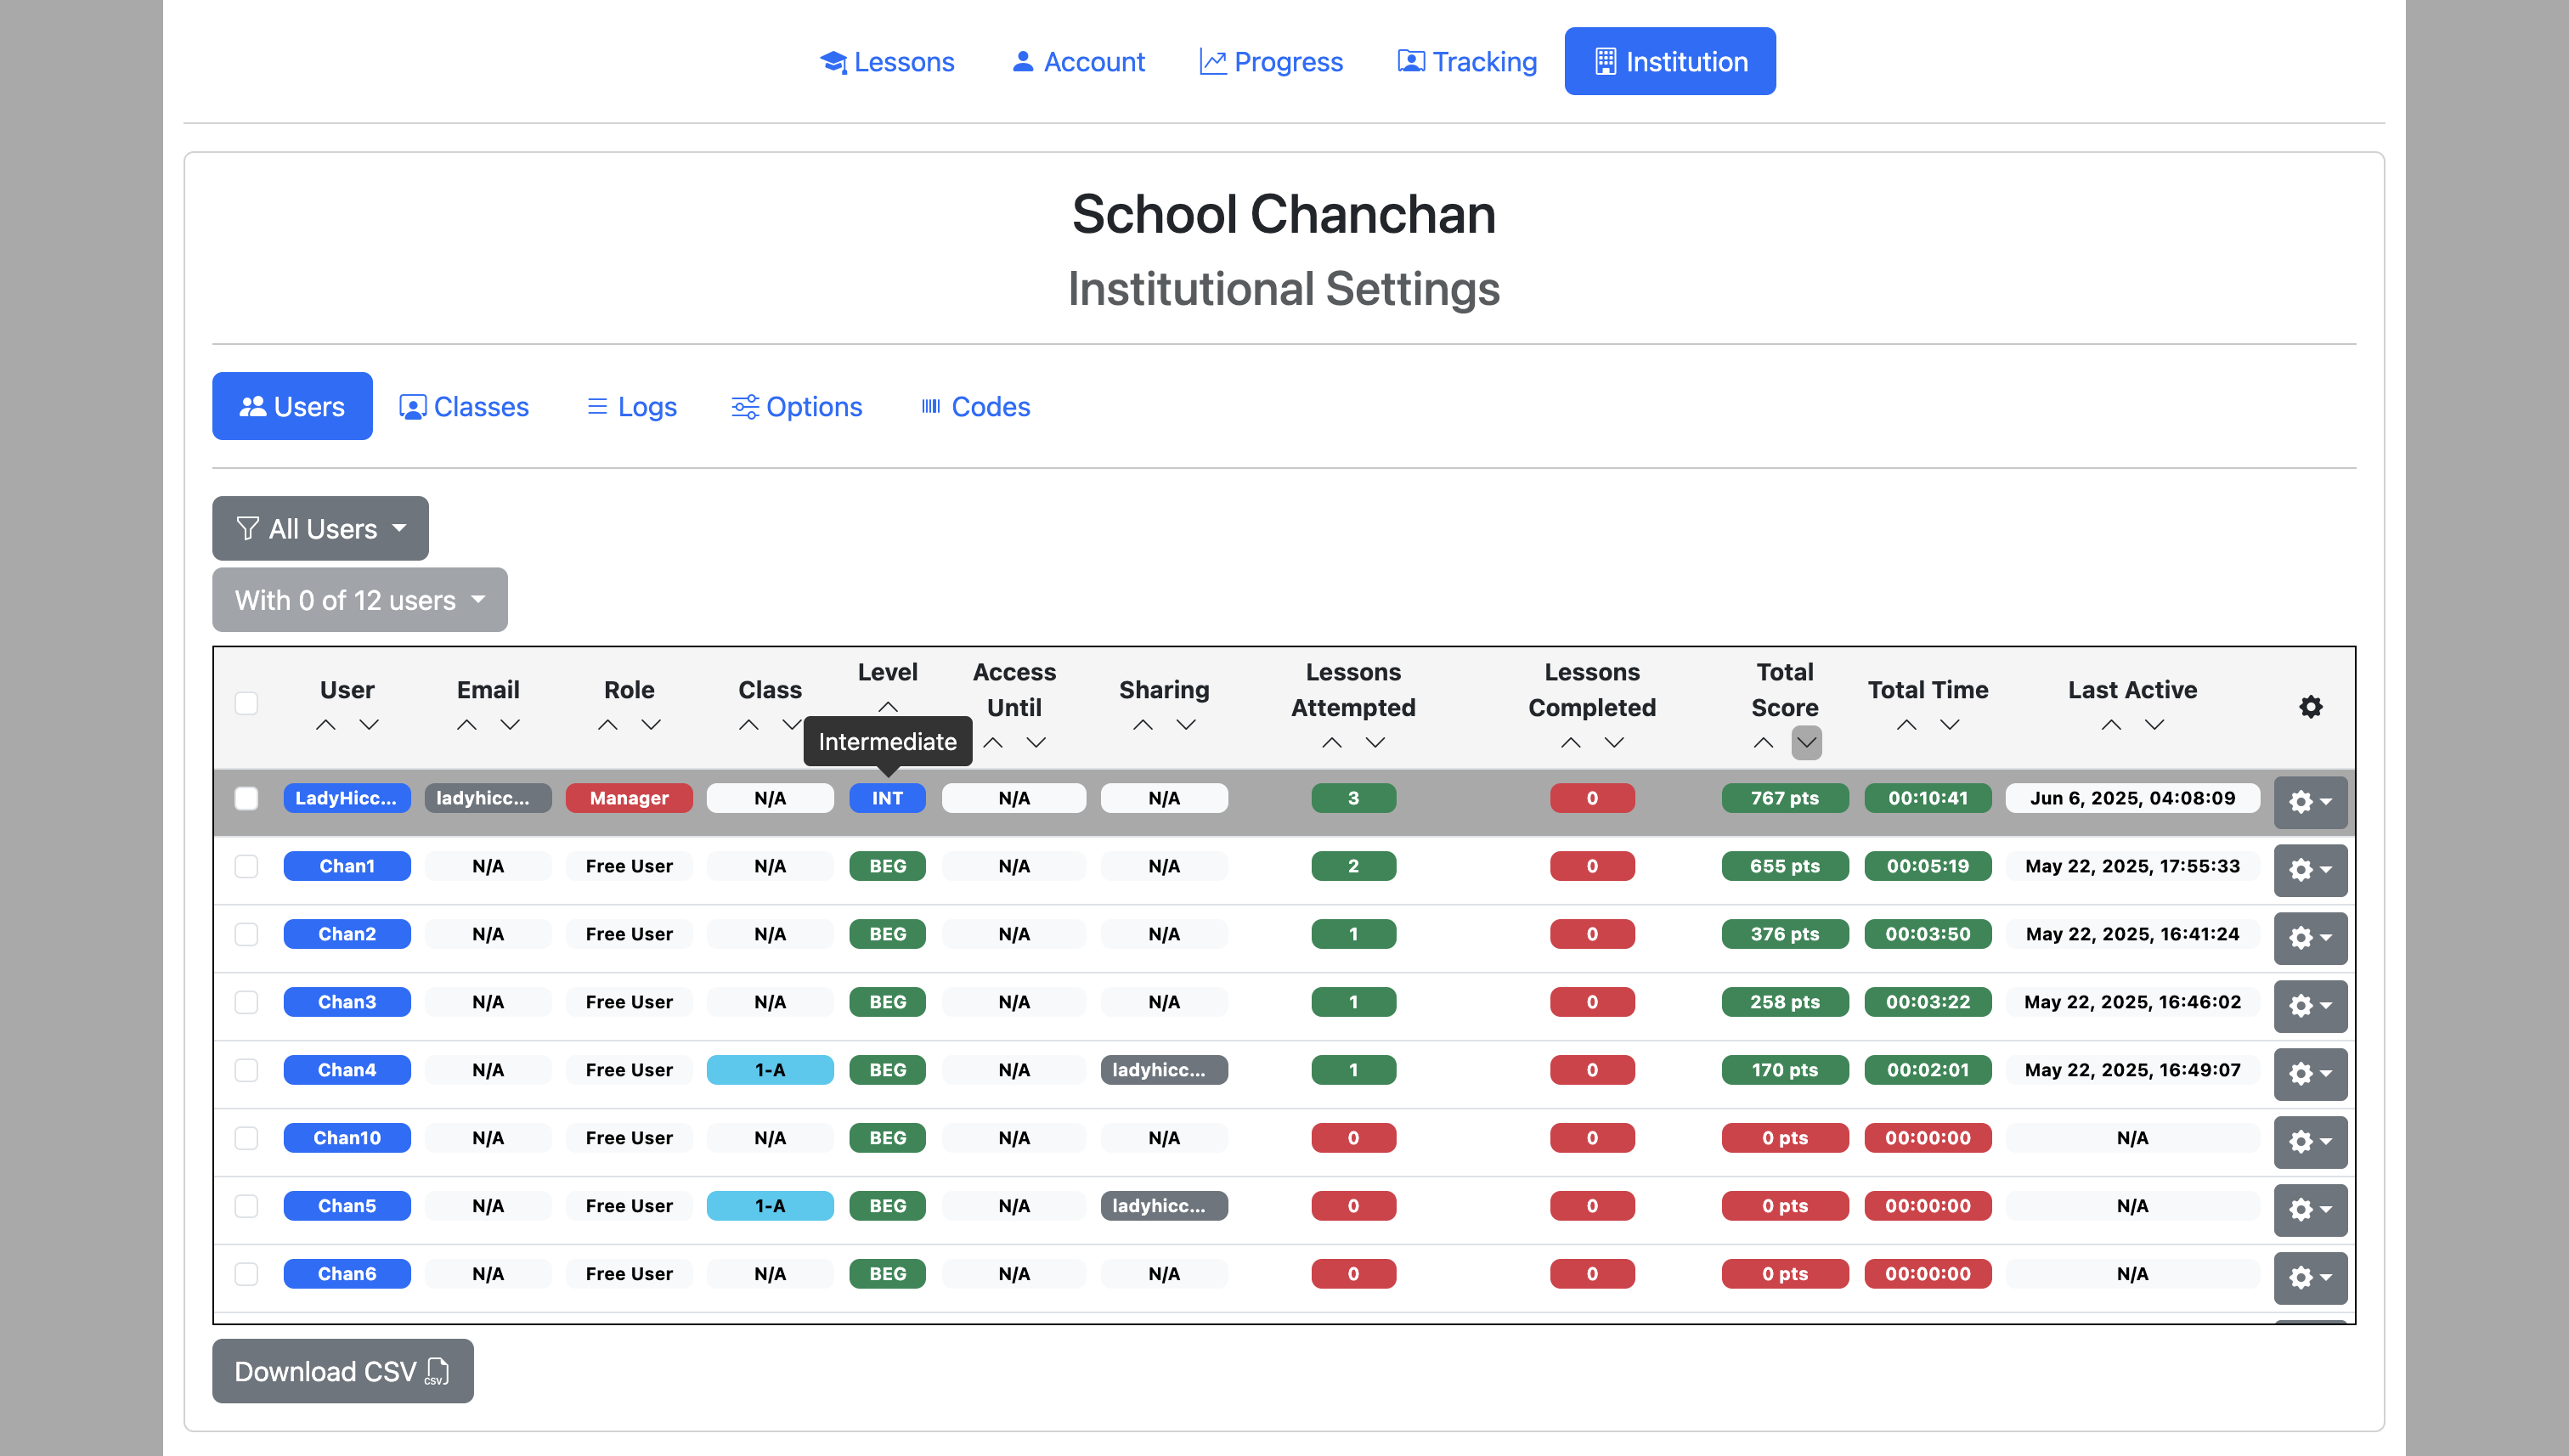
Hovering over the user's level shows the full user level: Beginner, Intermediate, or Advanced.
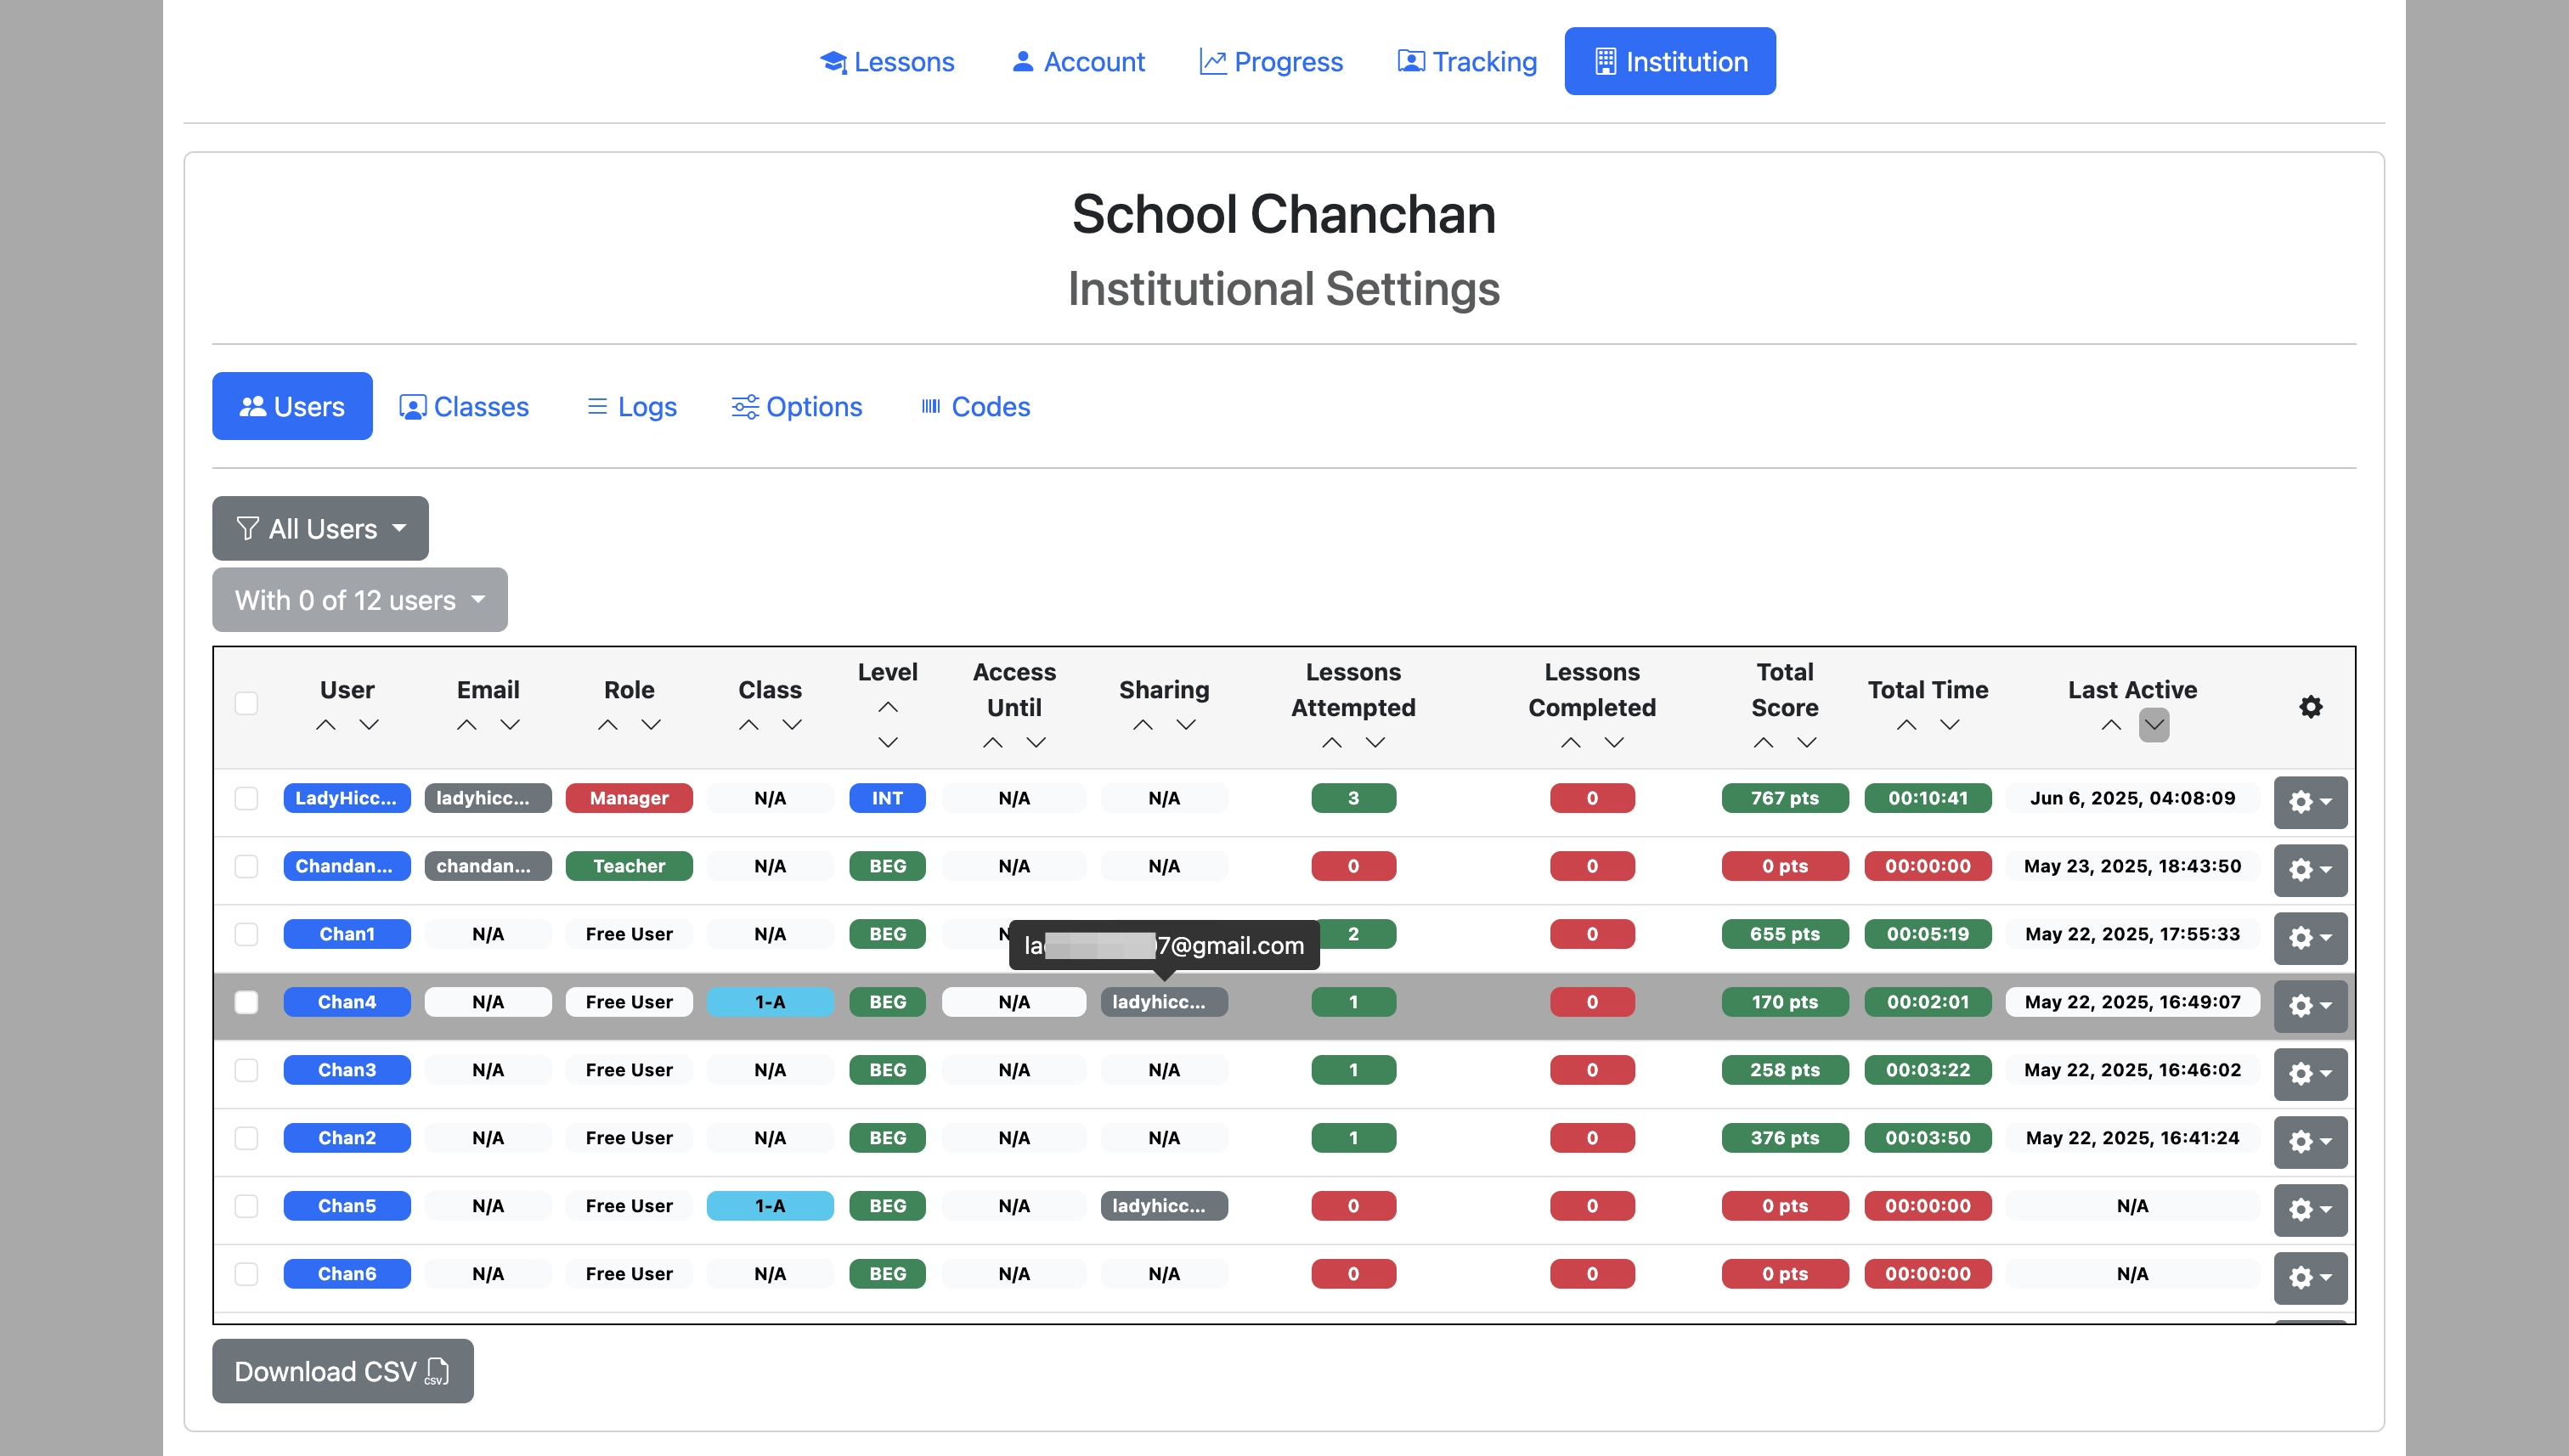
Hovering over the email address displayed under 'Sharing' column displays the full email of the teacher that the user is sharing their progress with, if applicable.
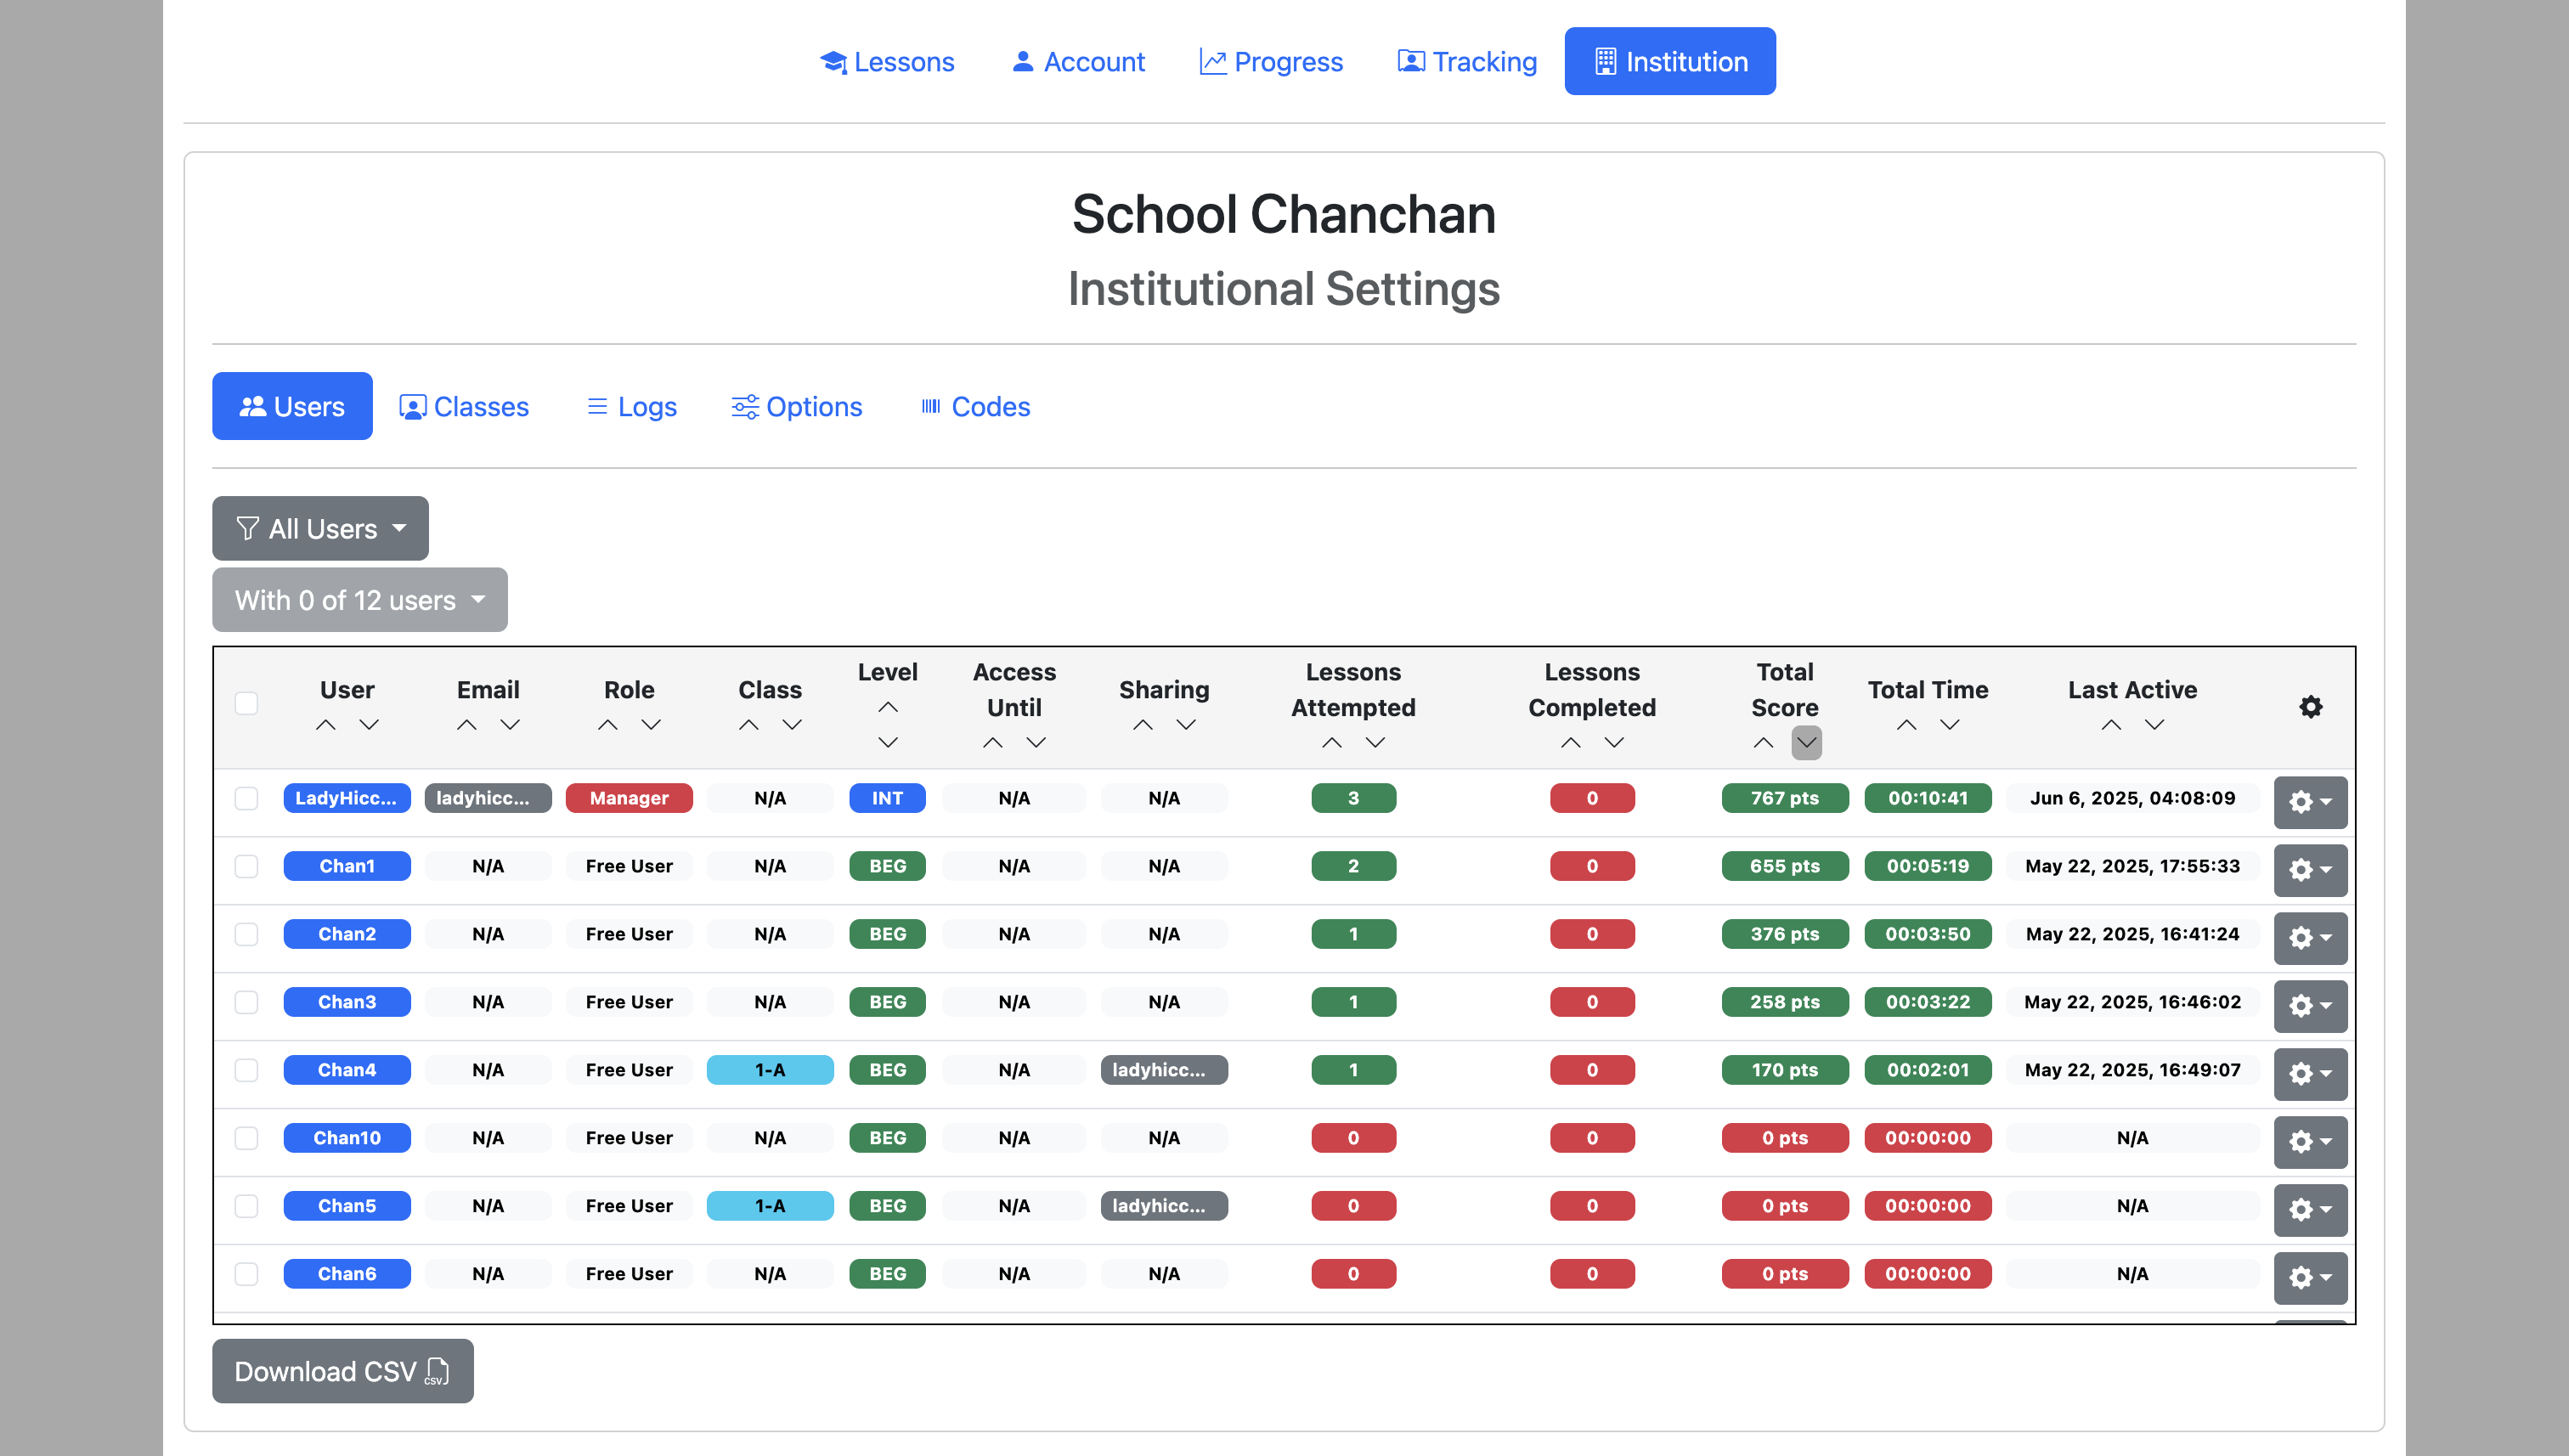
Use the arrows under each column header to sort the columns.
Use the gear icon on the right to manage individual users.
Filter users by class
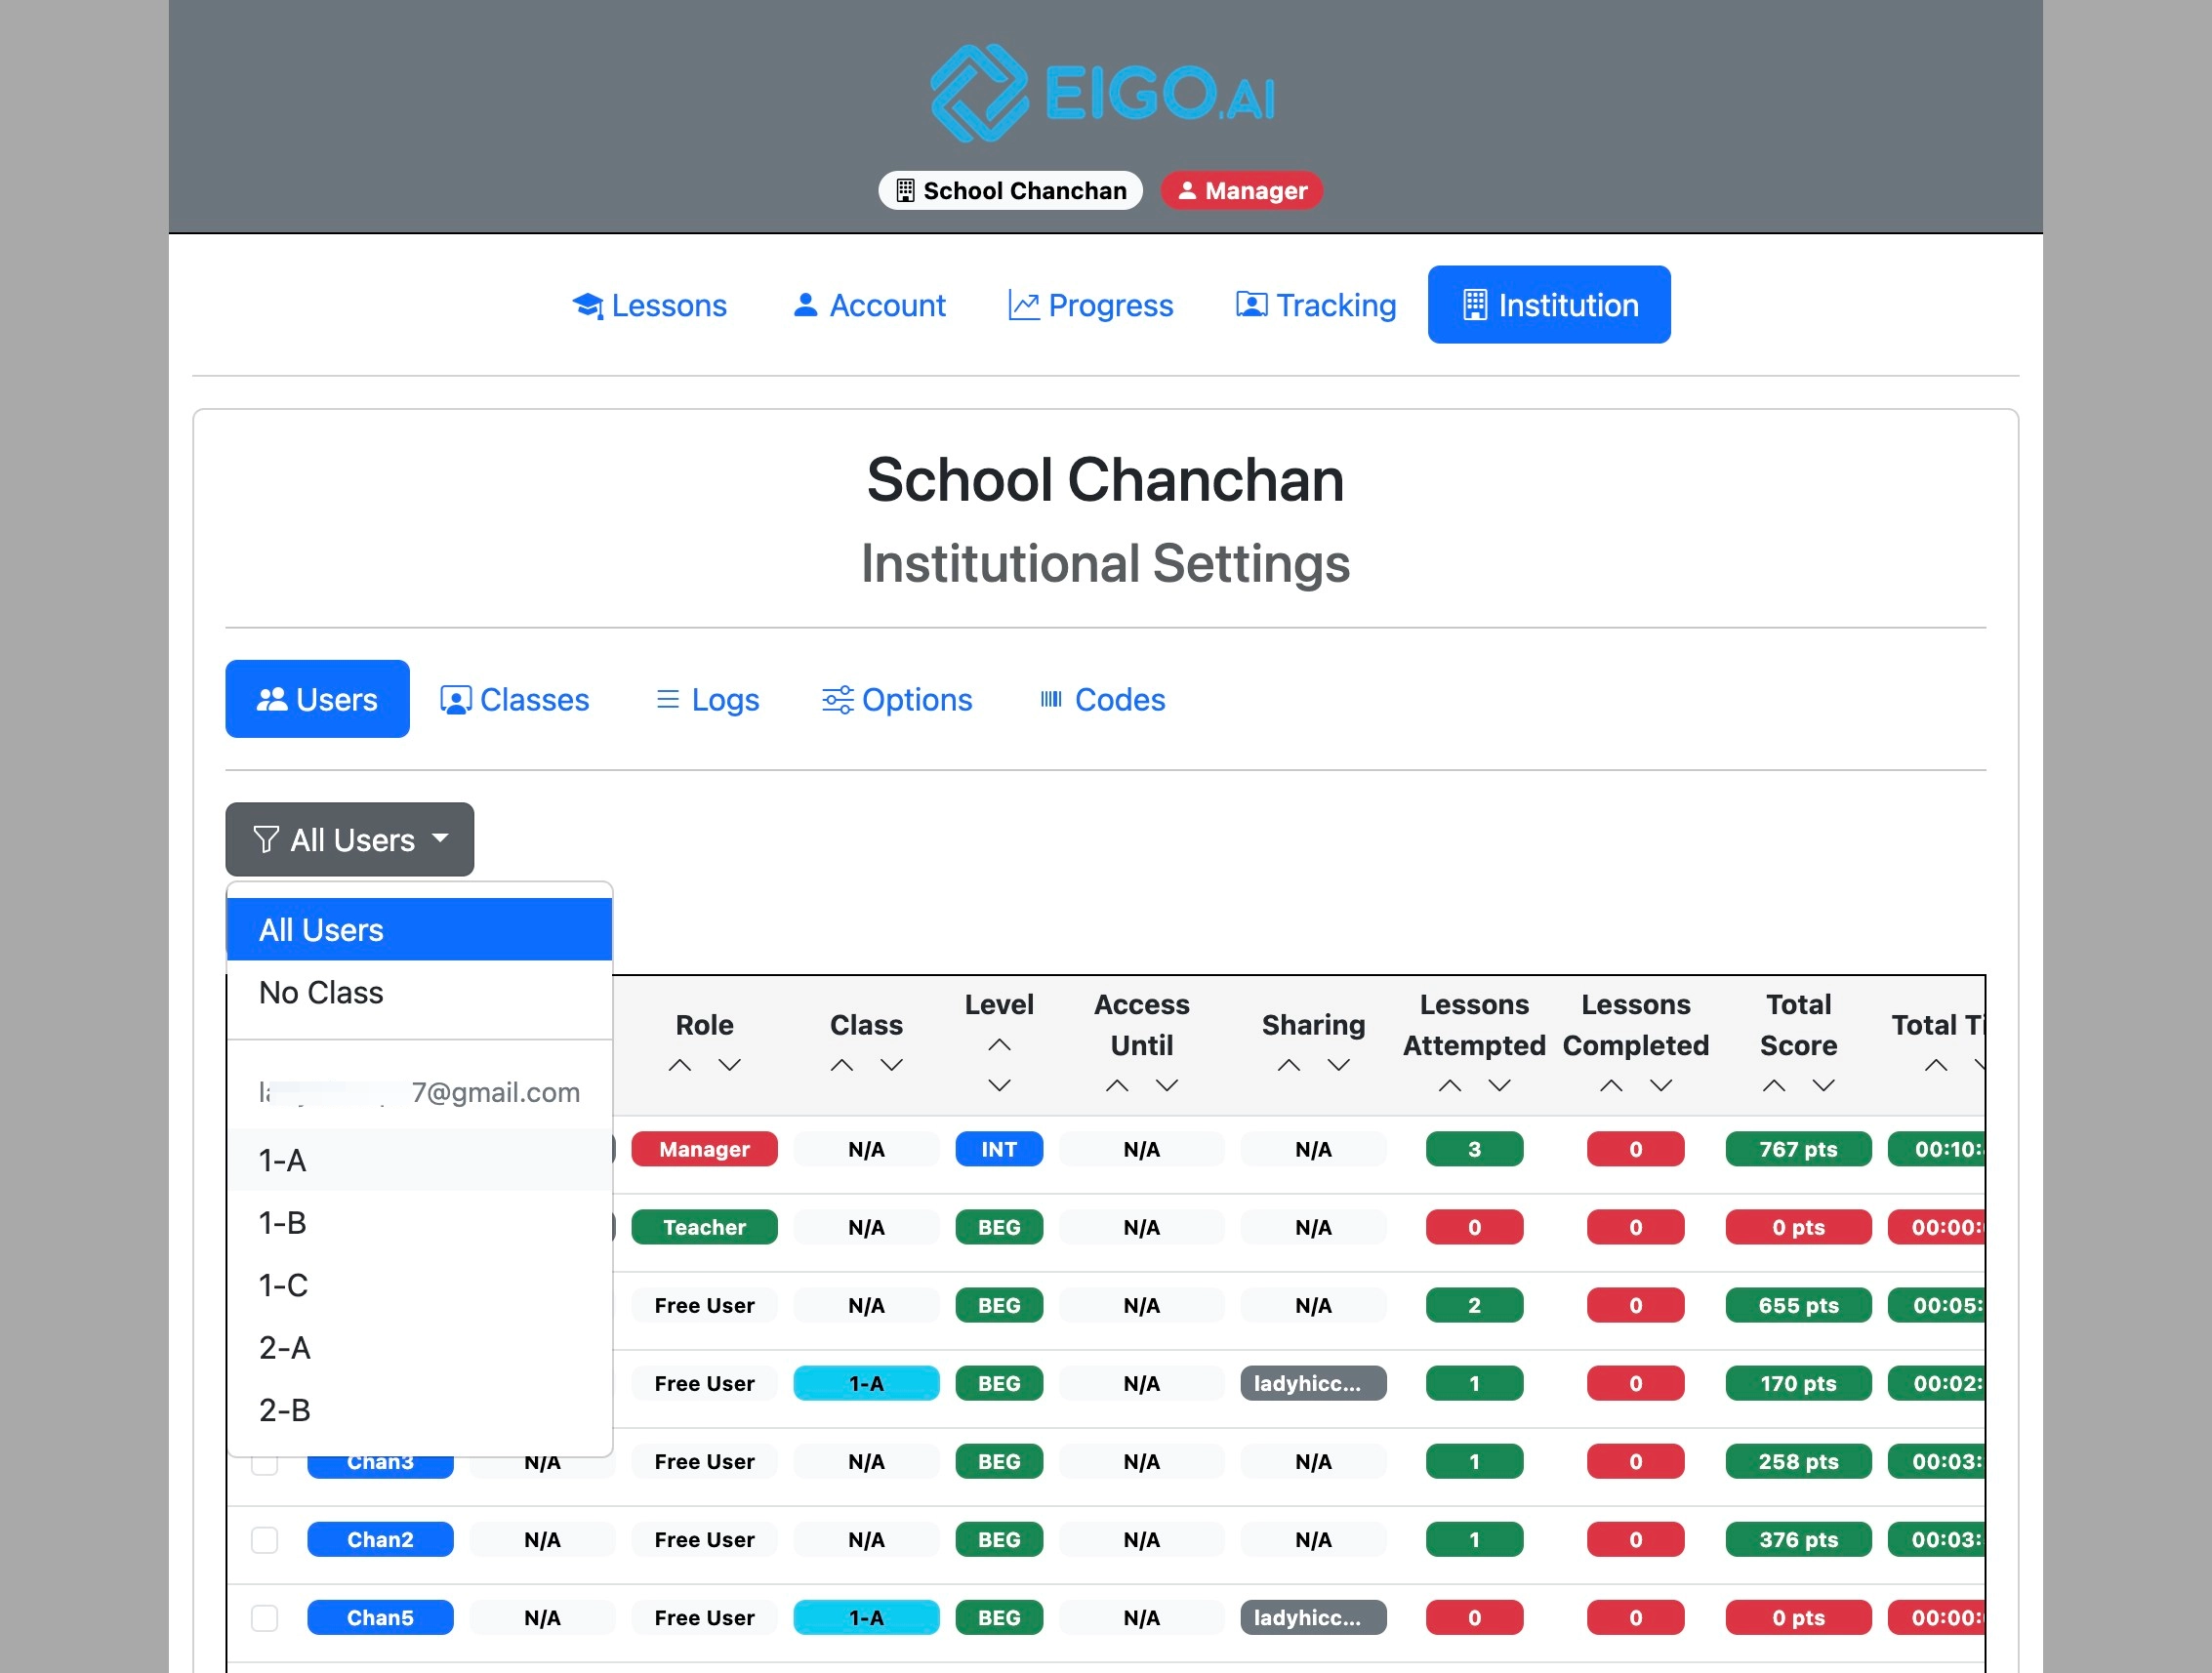
Click "All Users" to filter the users by class.
Select the class name from the dropdown or select "No Class" to show users who are not yet assigned to a class.
Add users to or remove them from a class
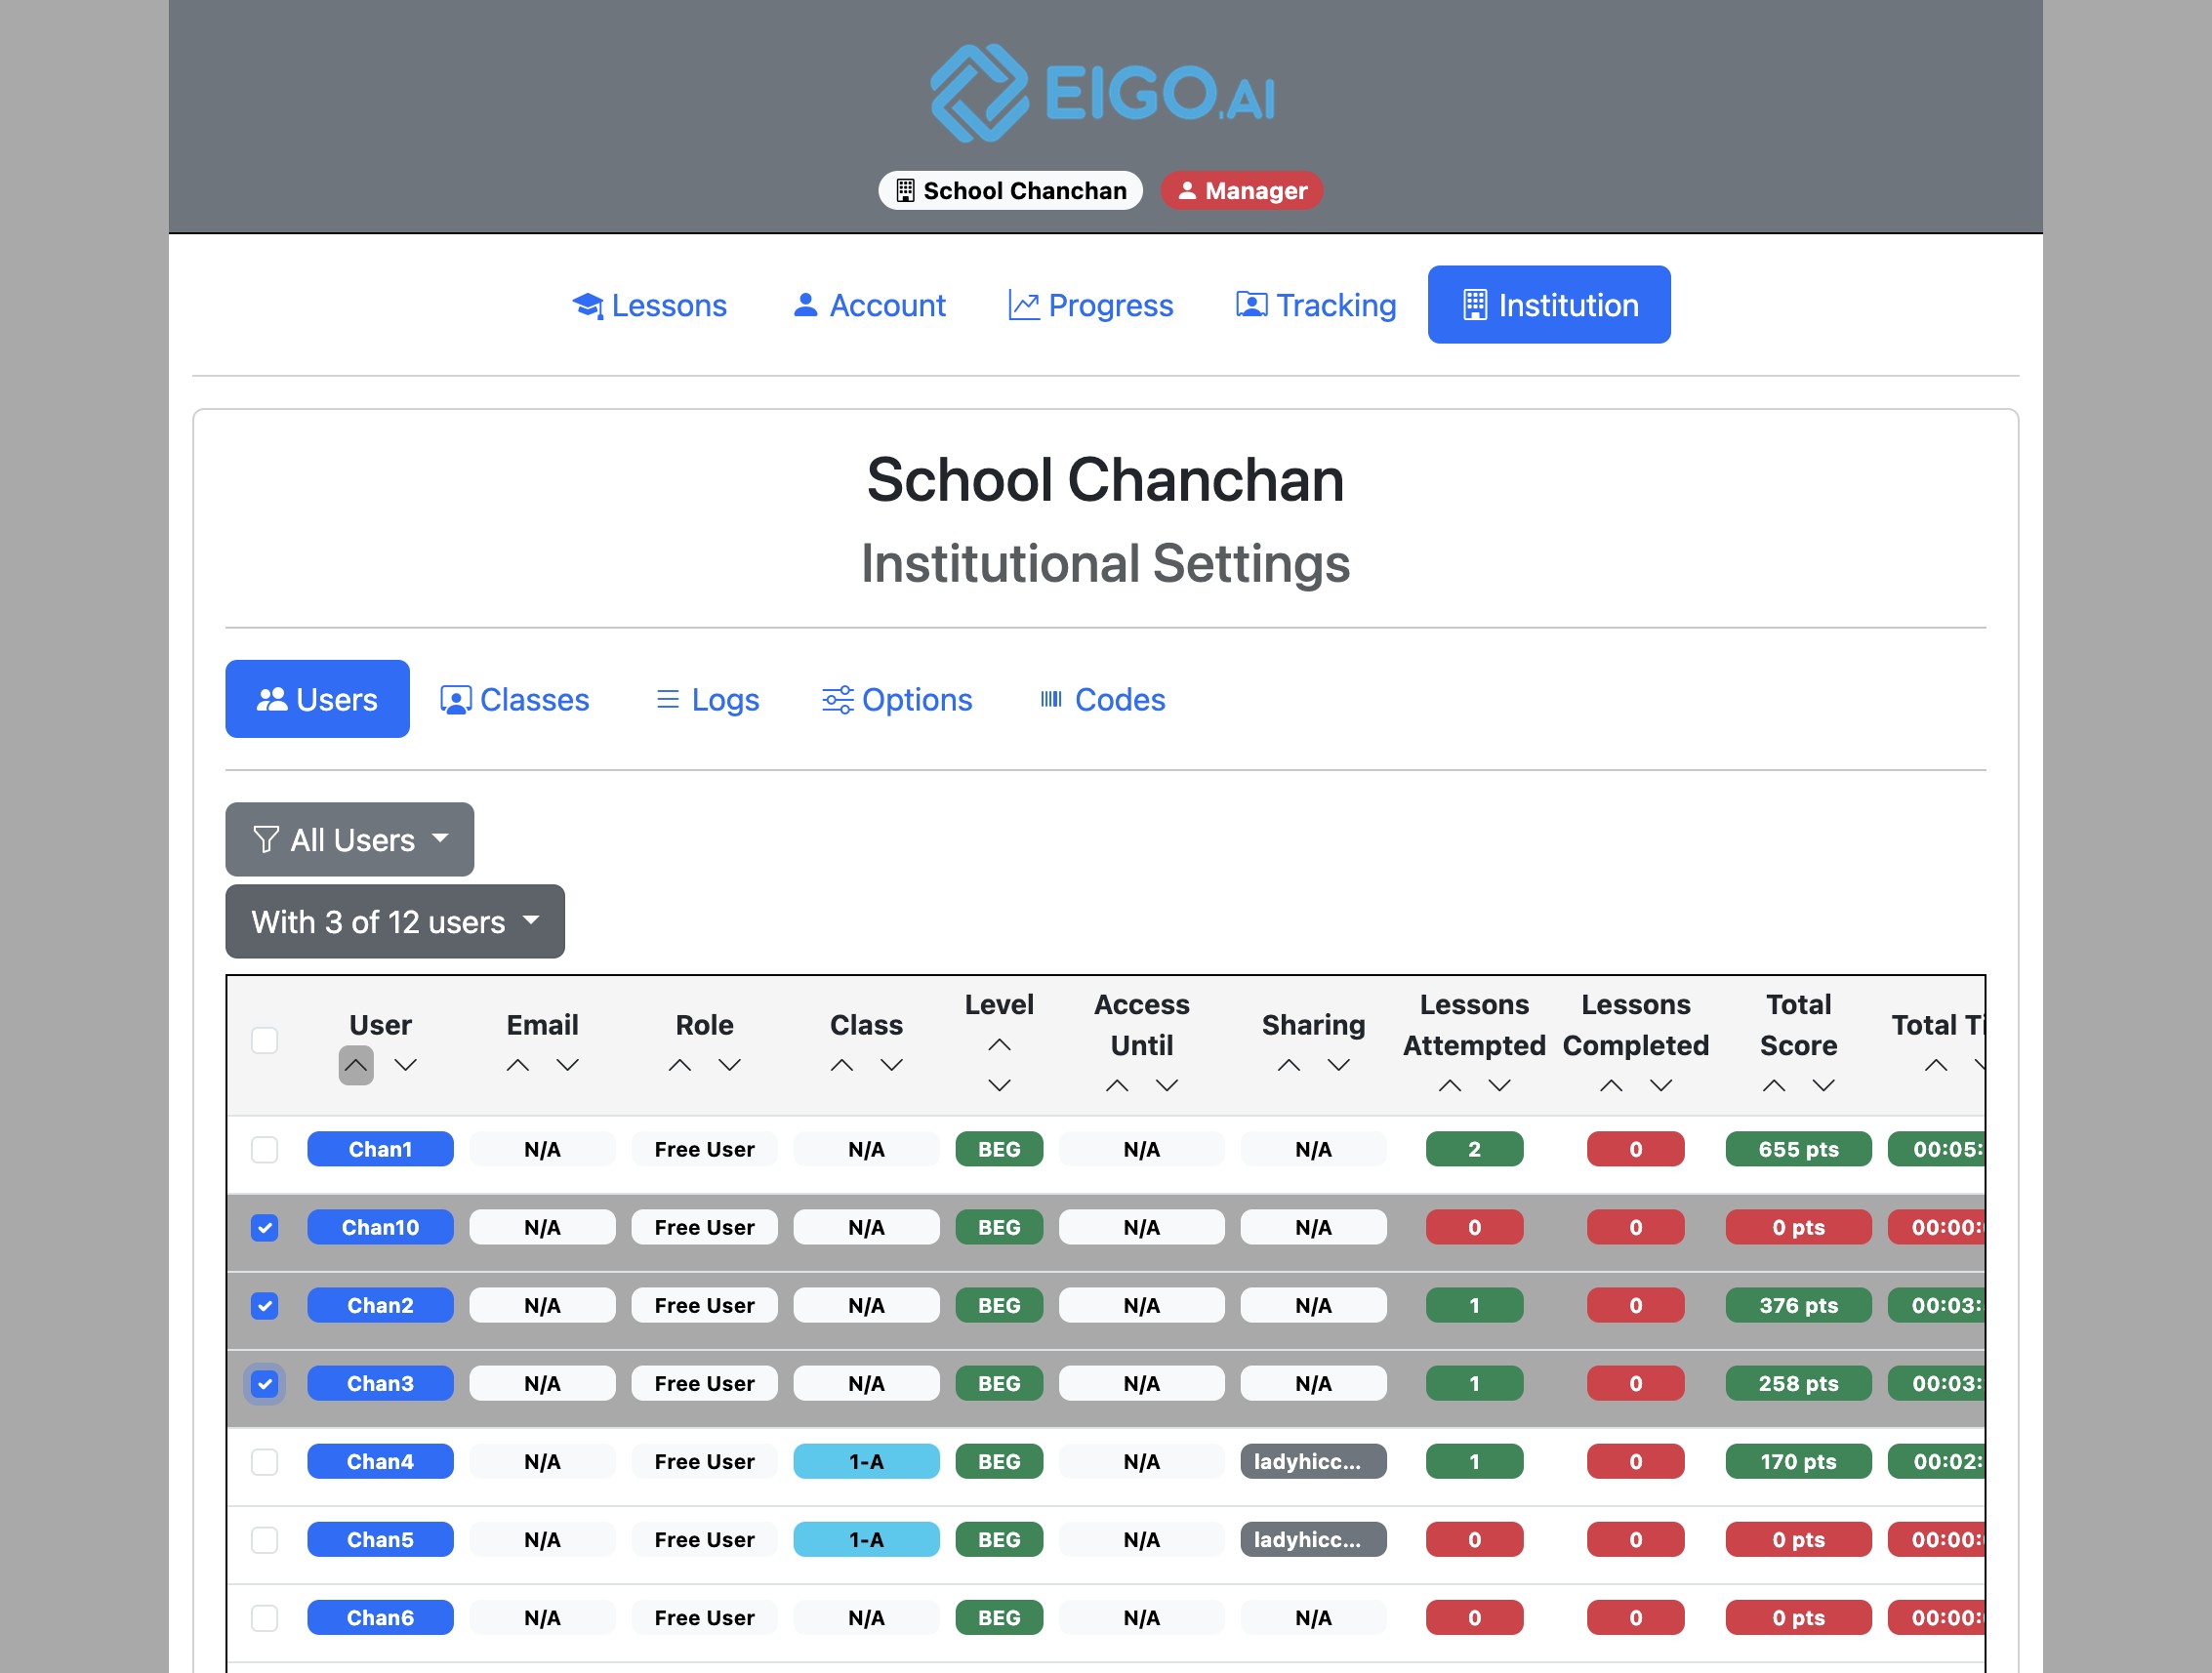
Select the users with the checkboxes on the left and click the "With x of n users" dropdown button.
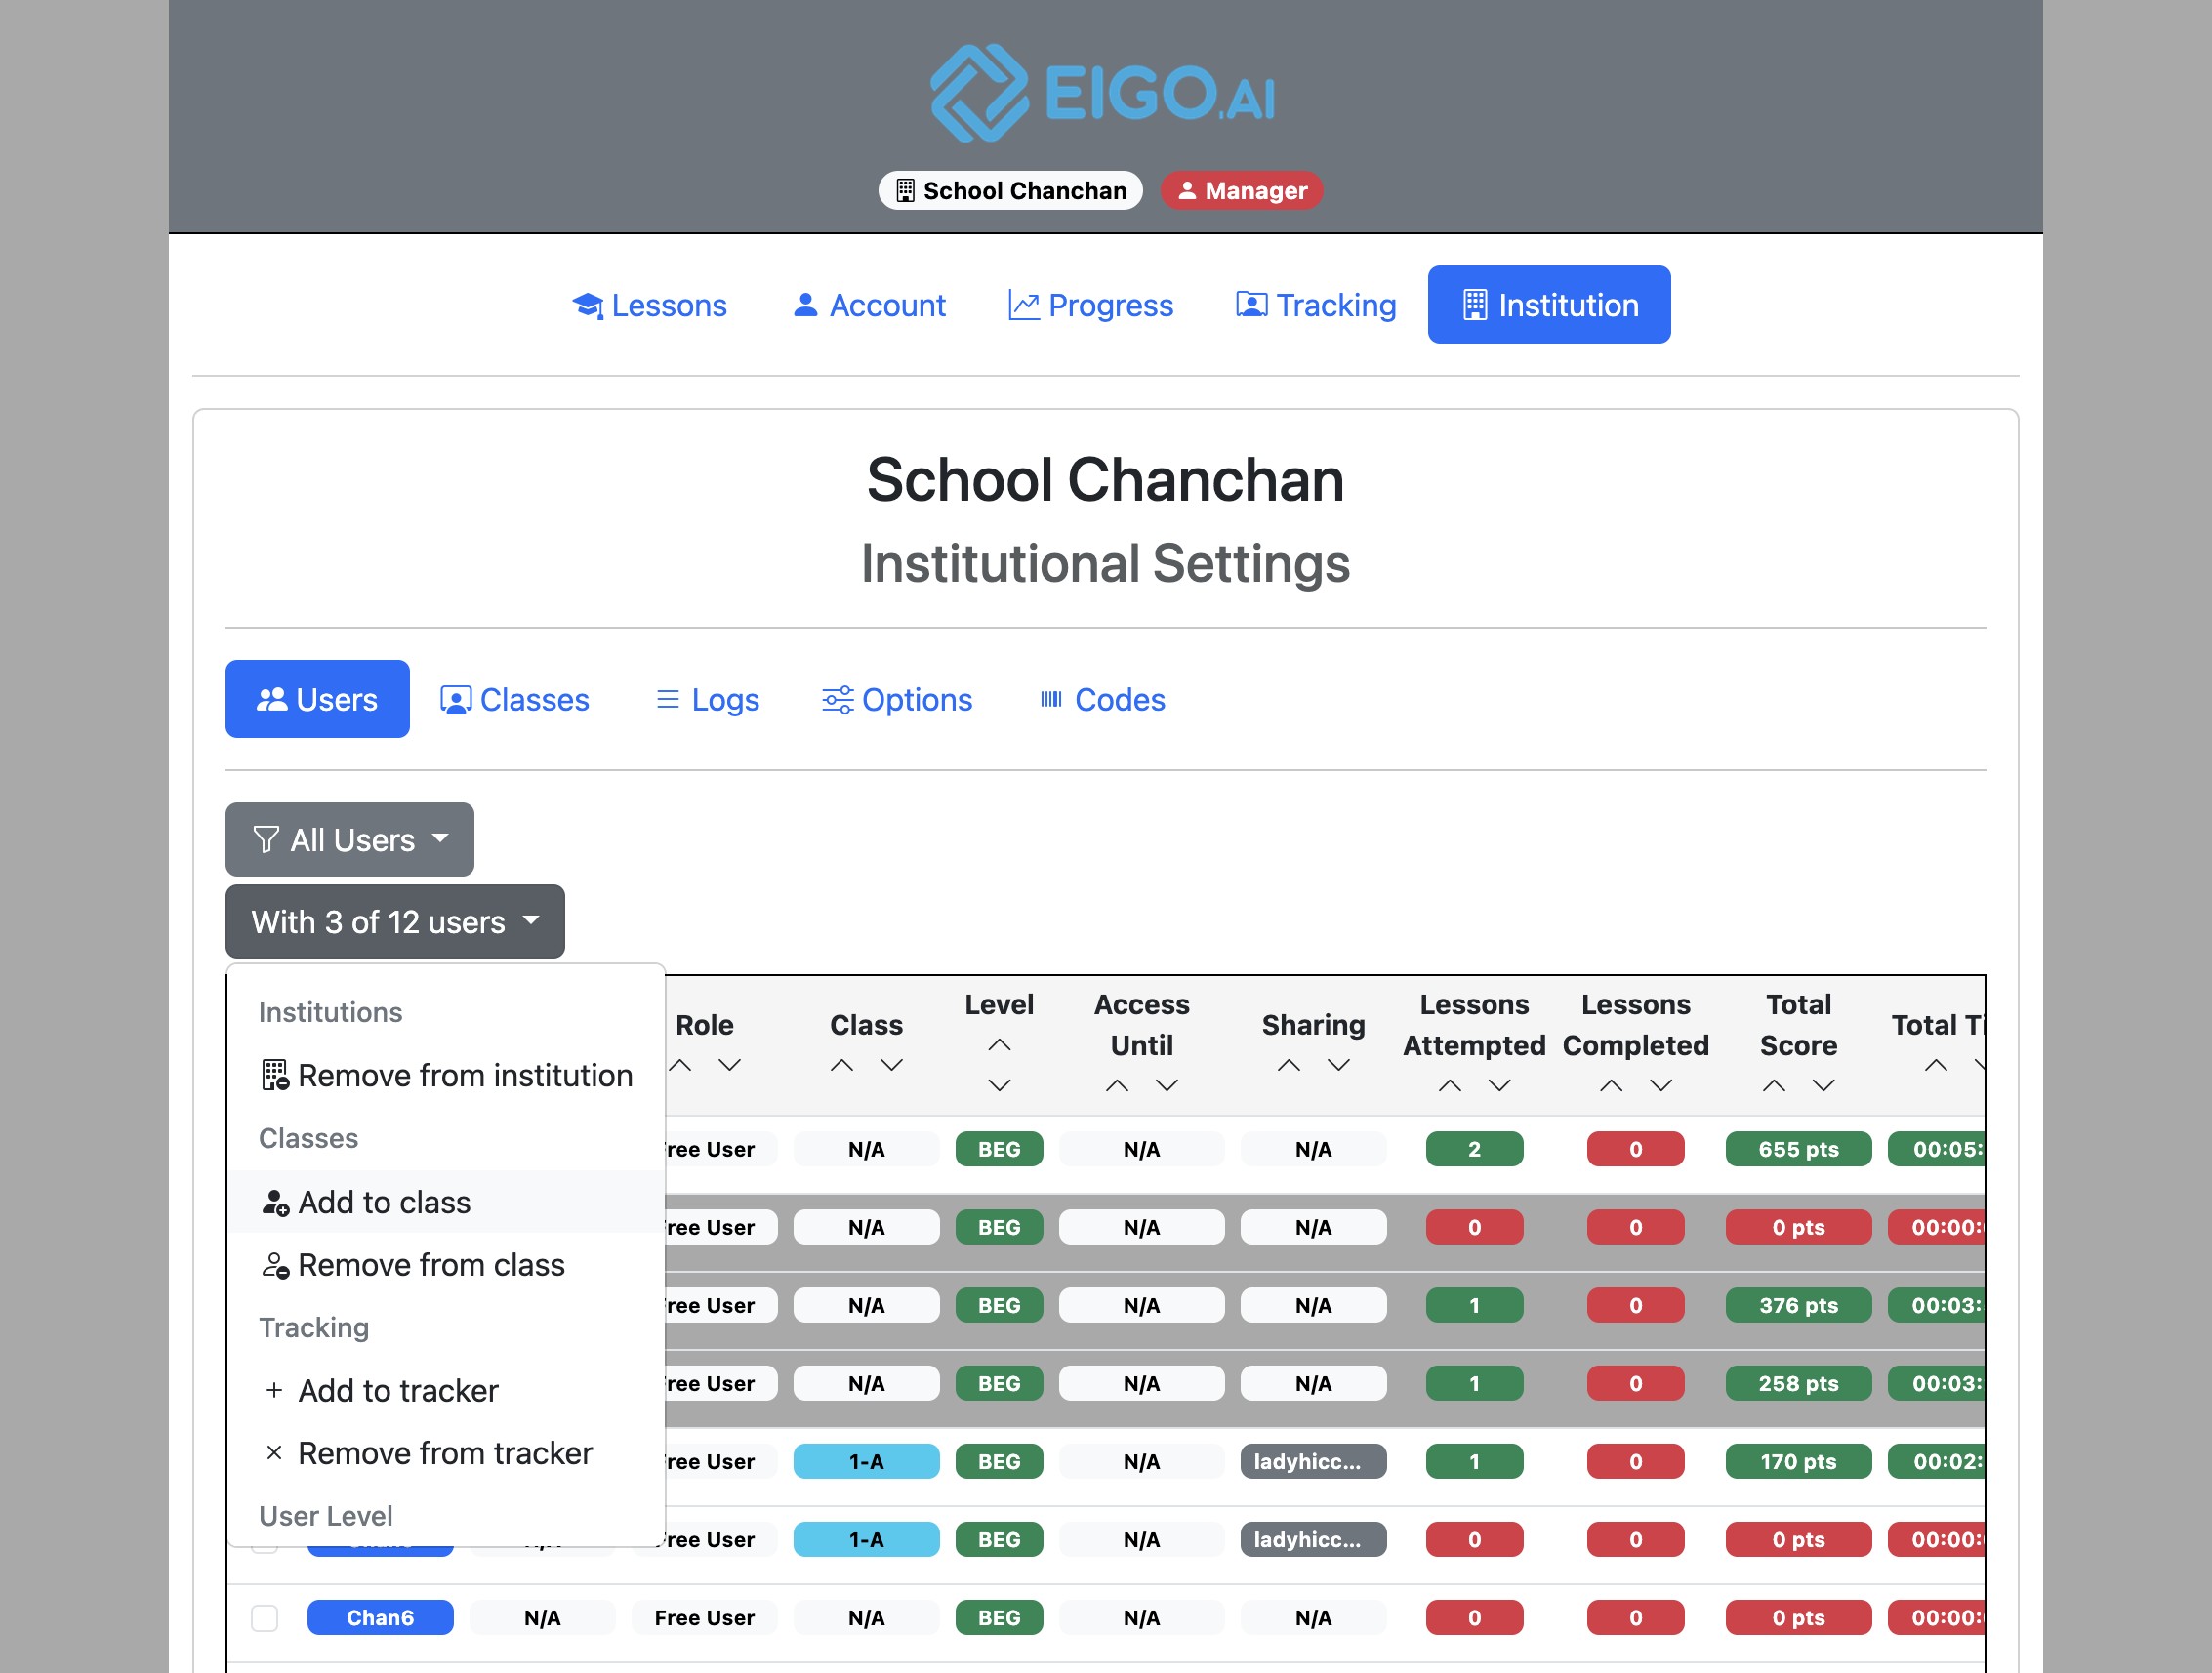
To add users to a class, click "Add to class".
Select the teacher who is the owner of the desired class.
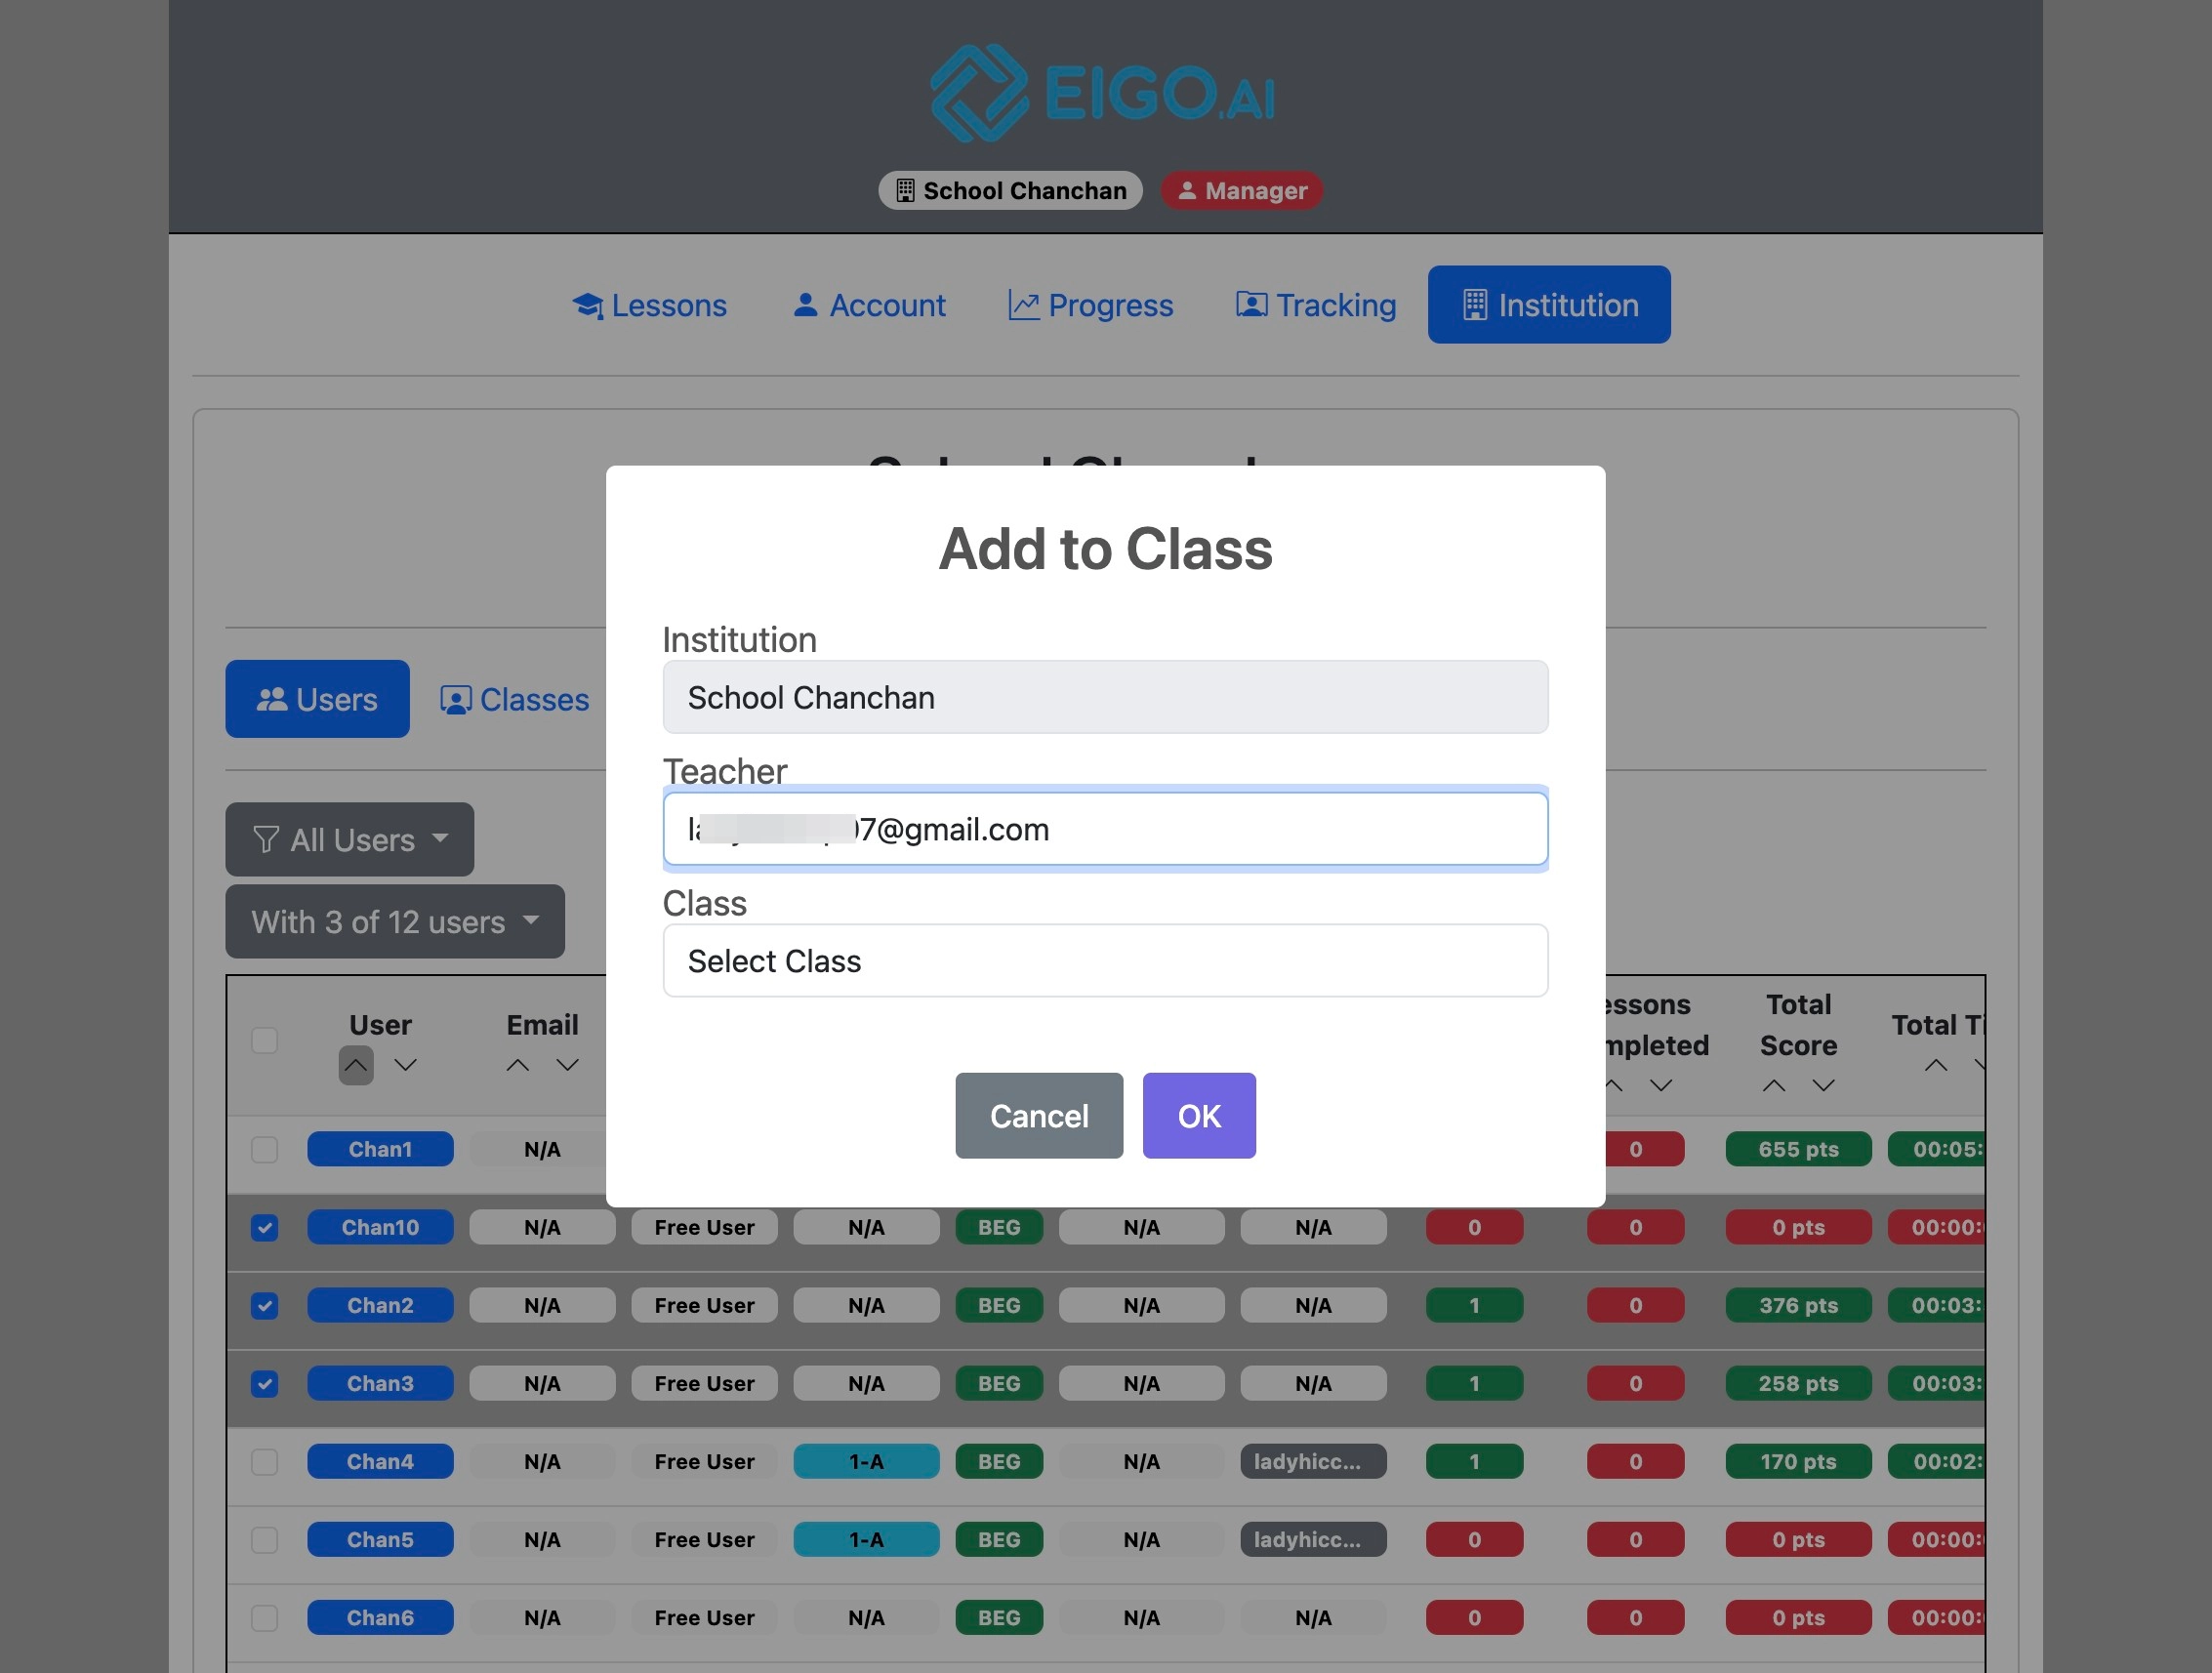
Select the desired class.
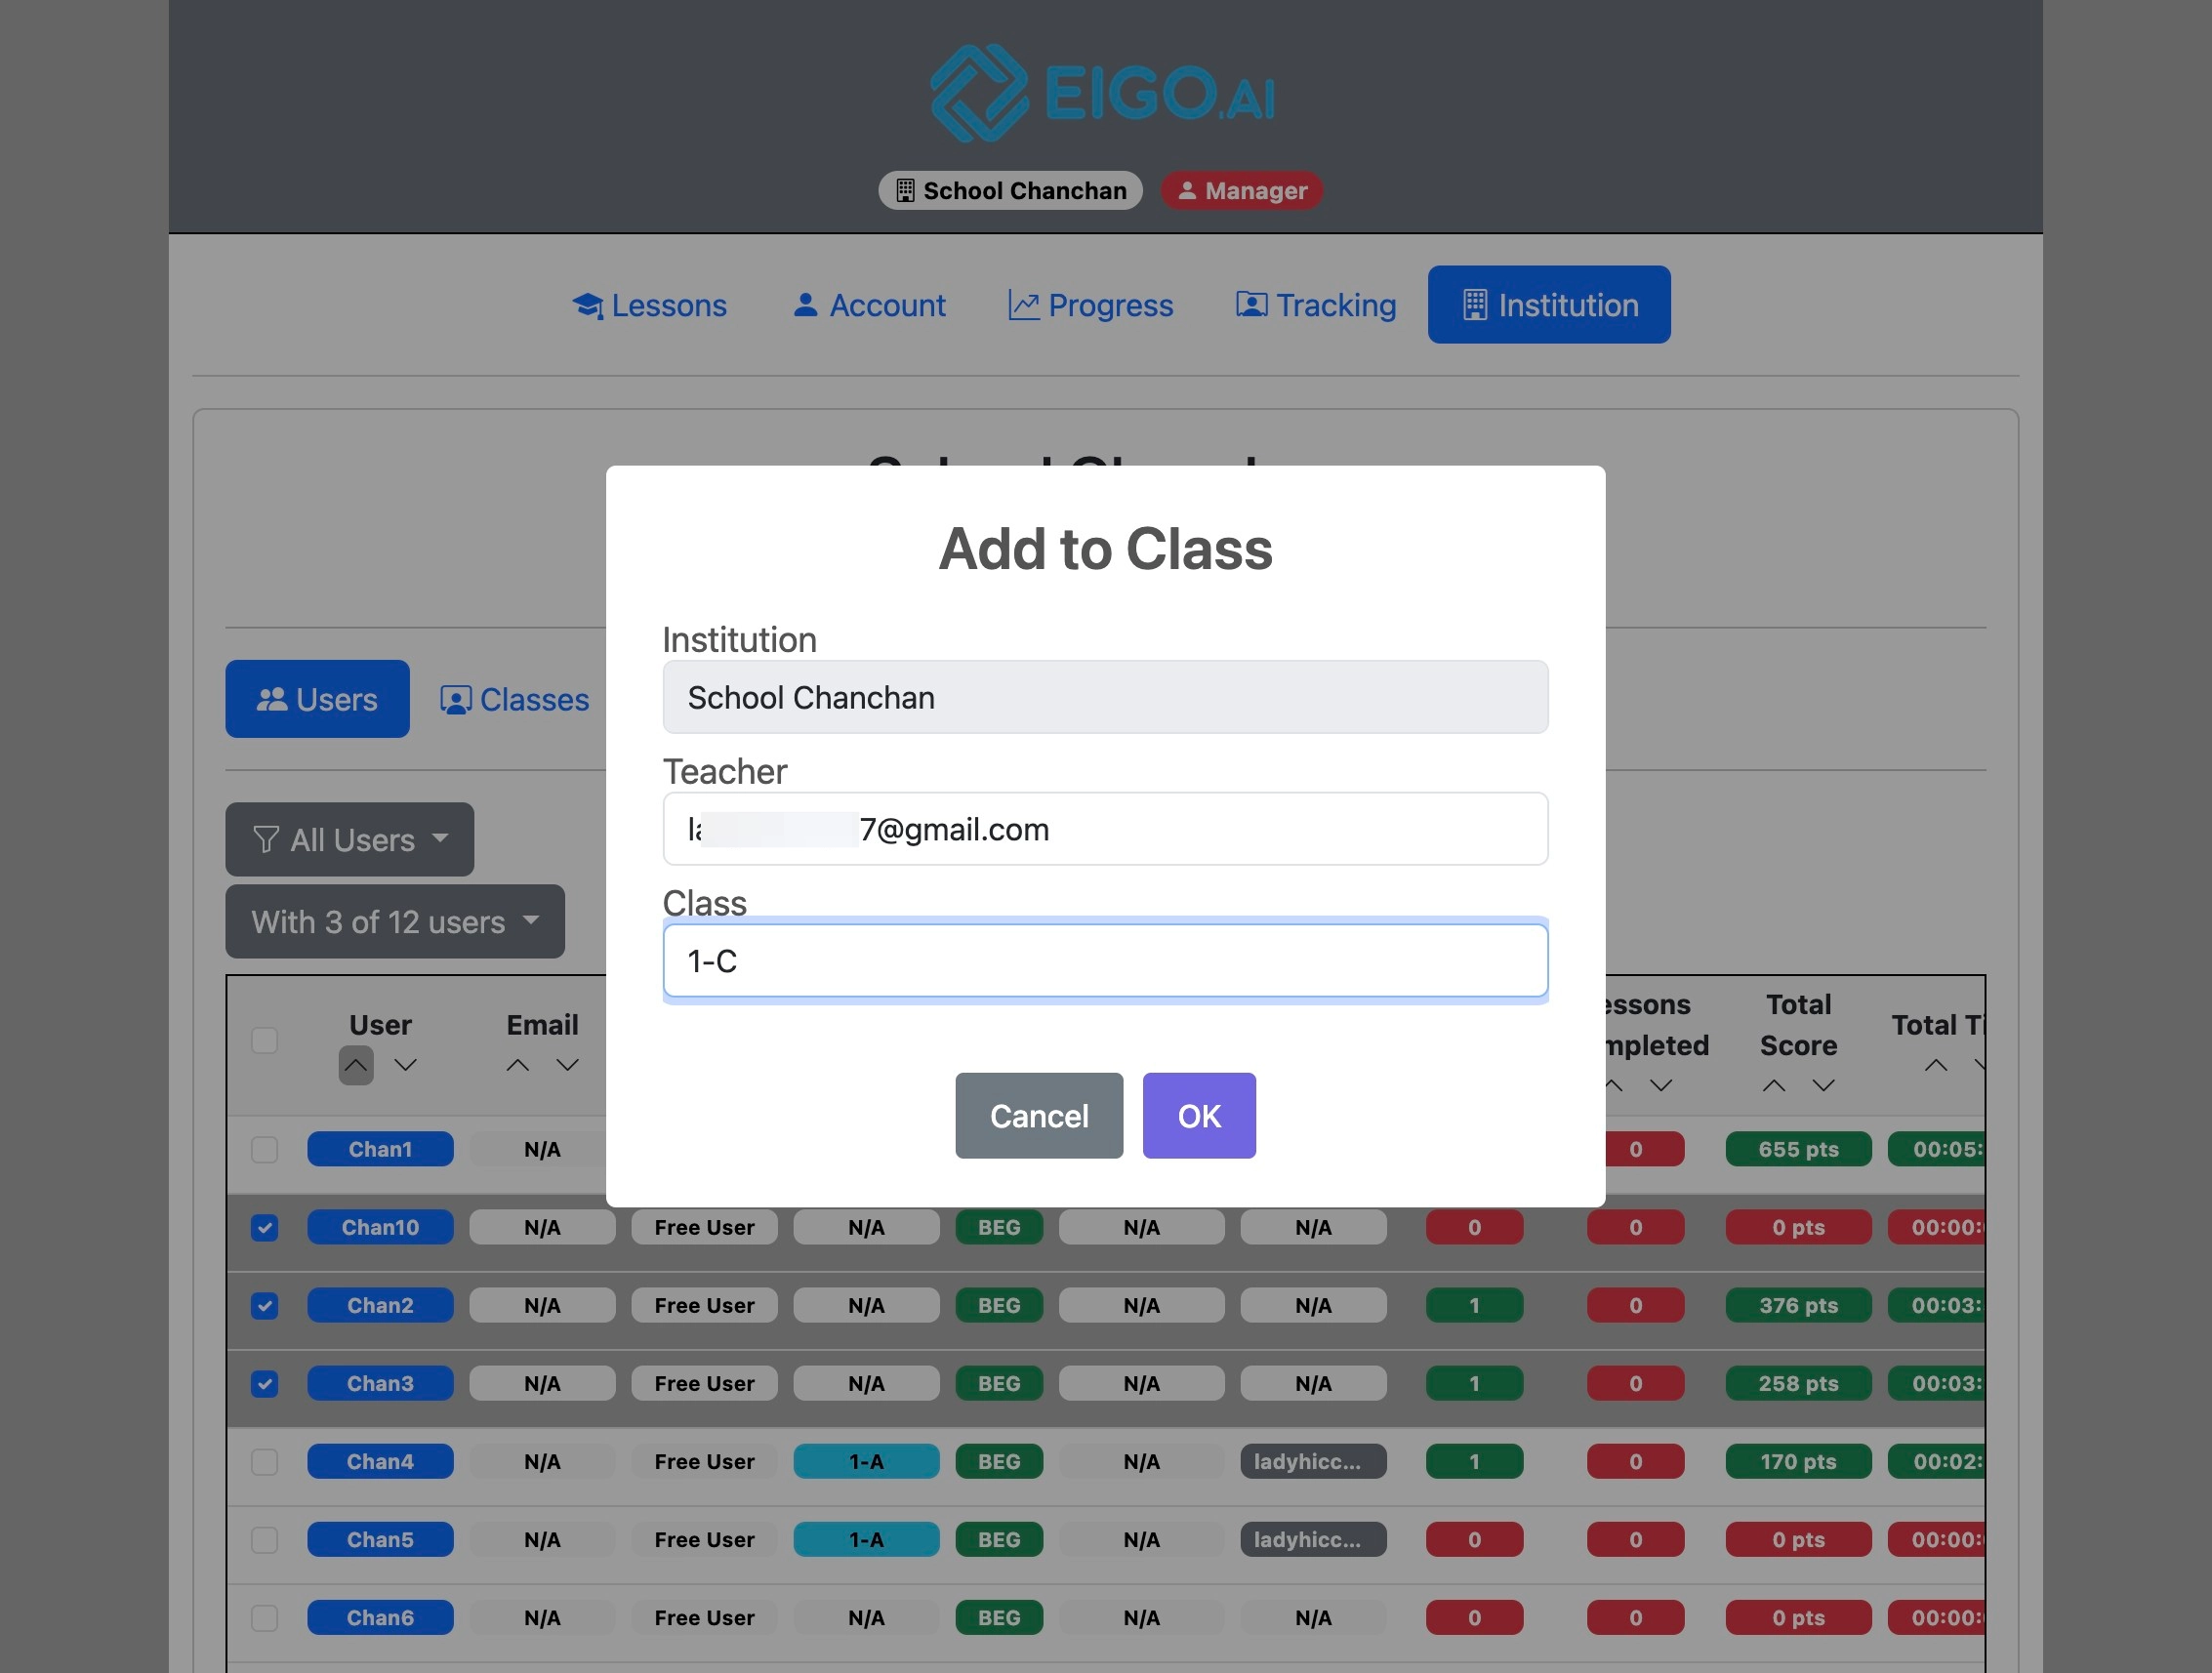
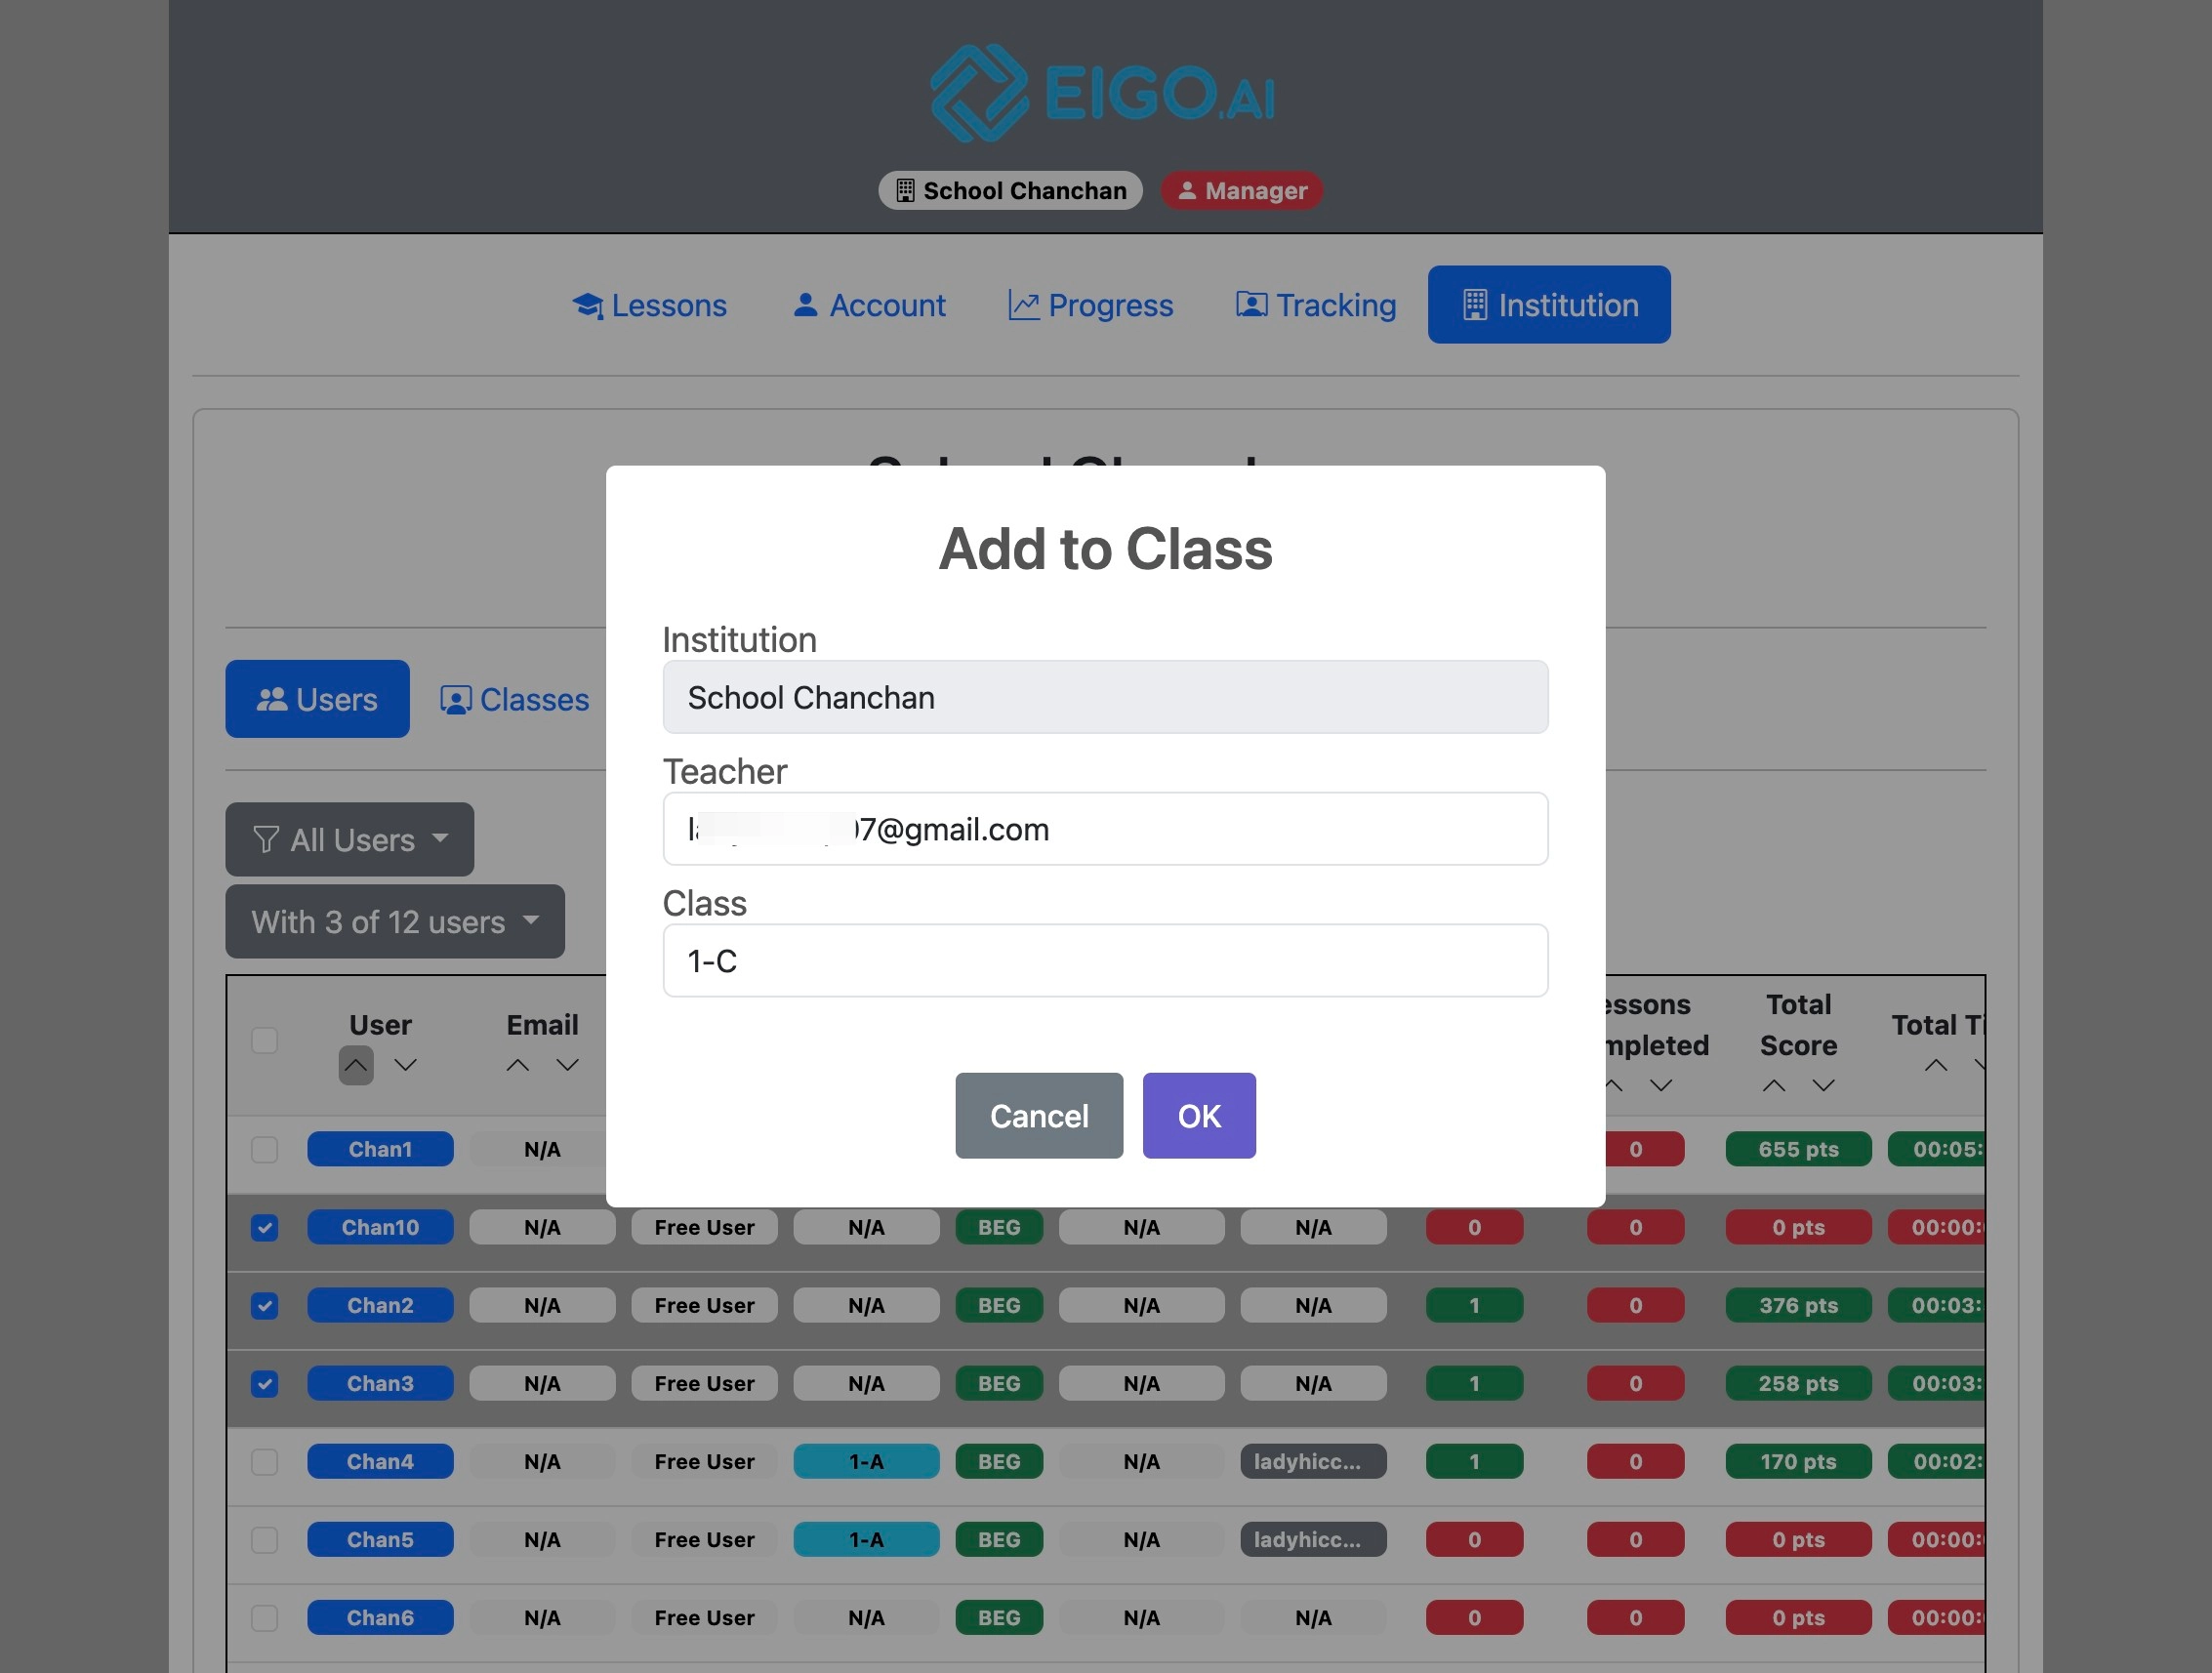
Click "OK" to confirm.
To remove users from the class they are currently assigned to, click "Remove from class".
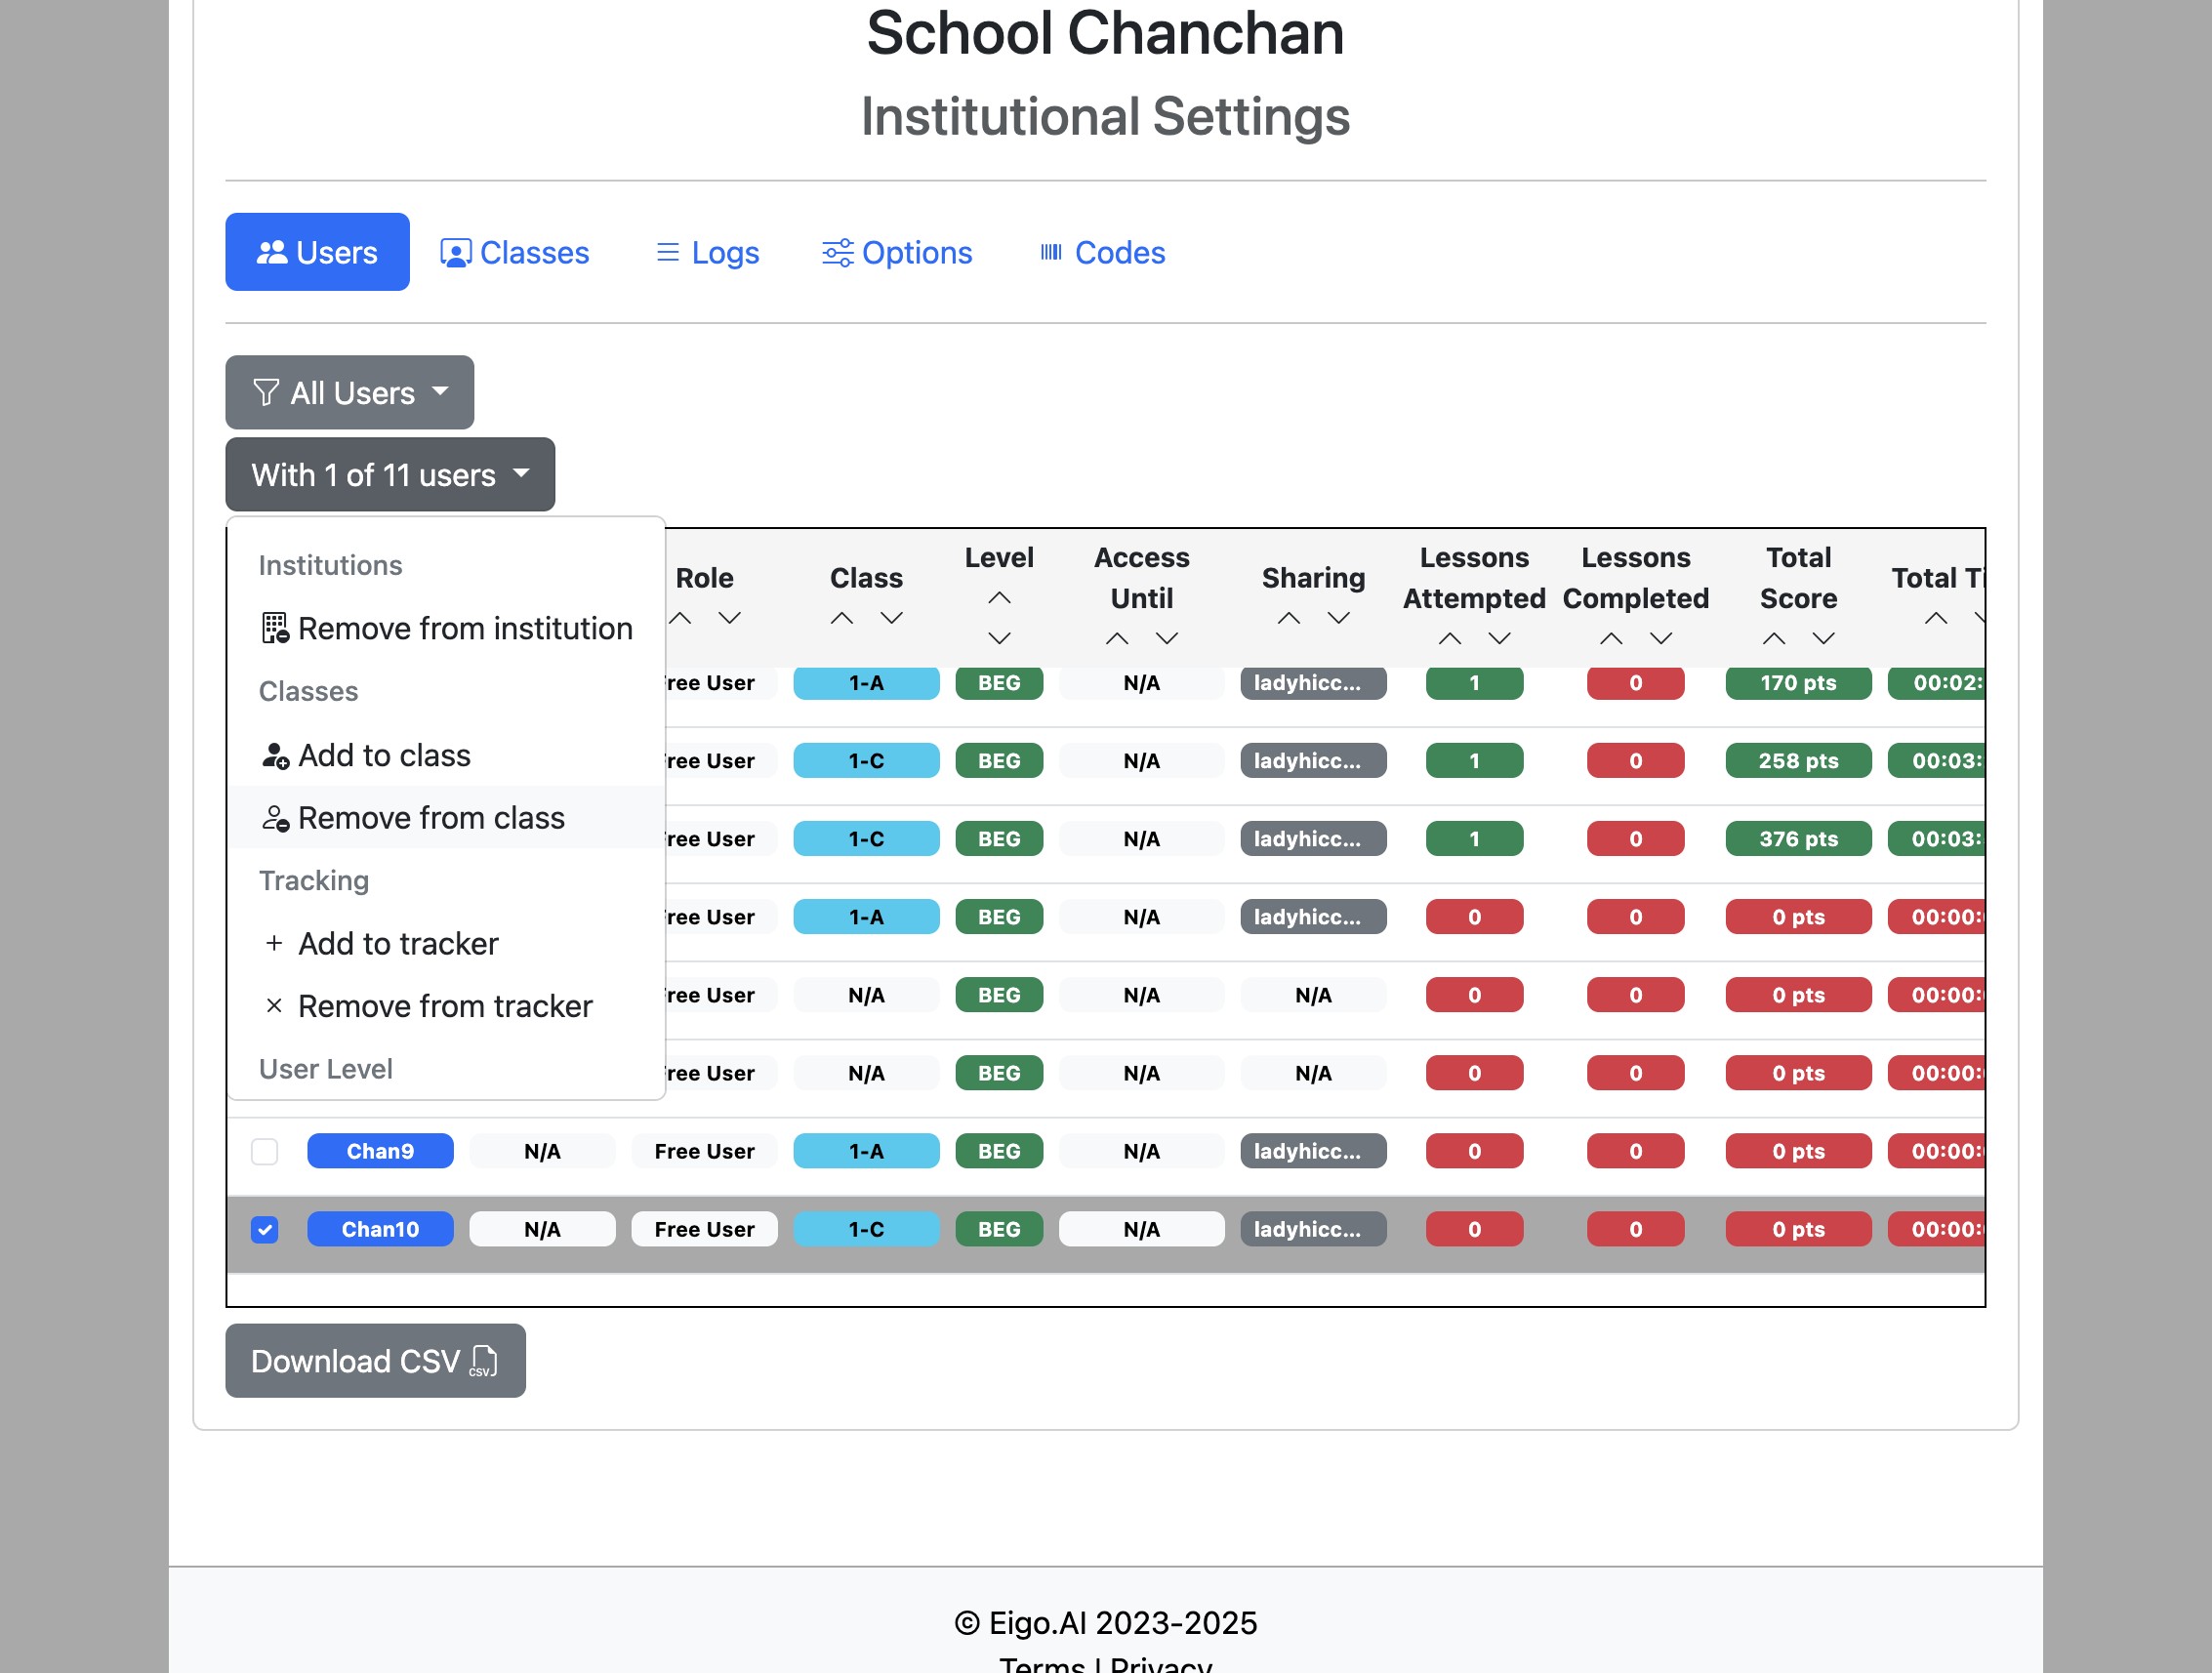
Click "OK" to confirm.
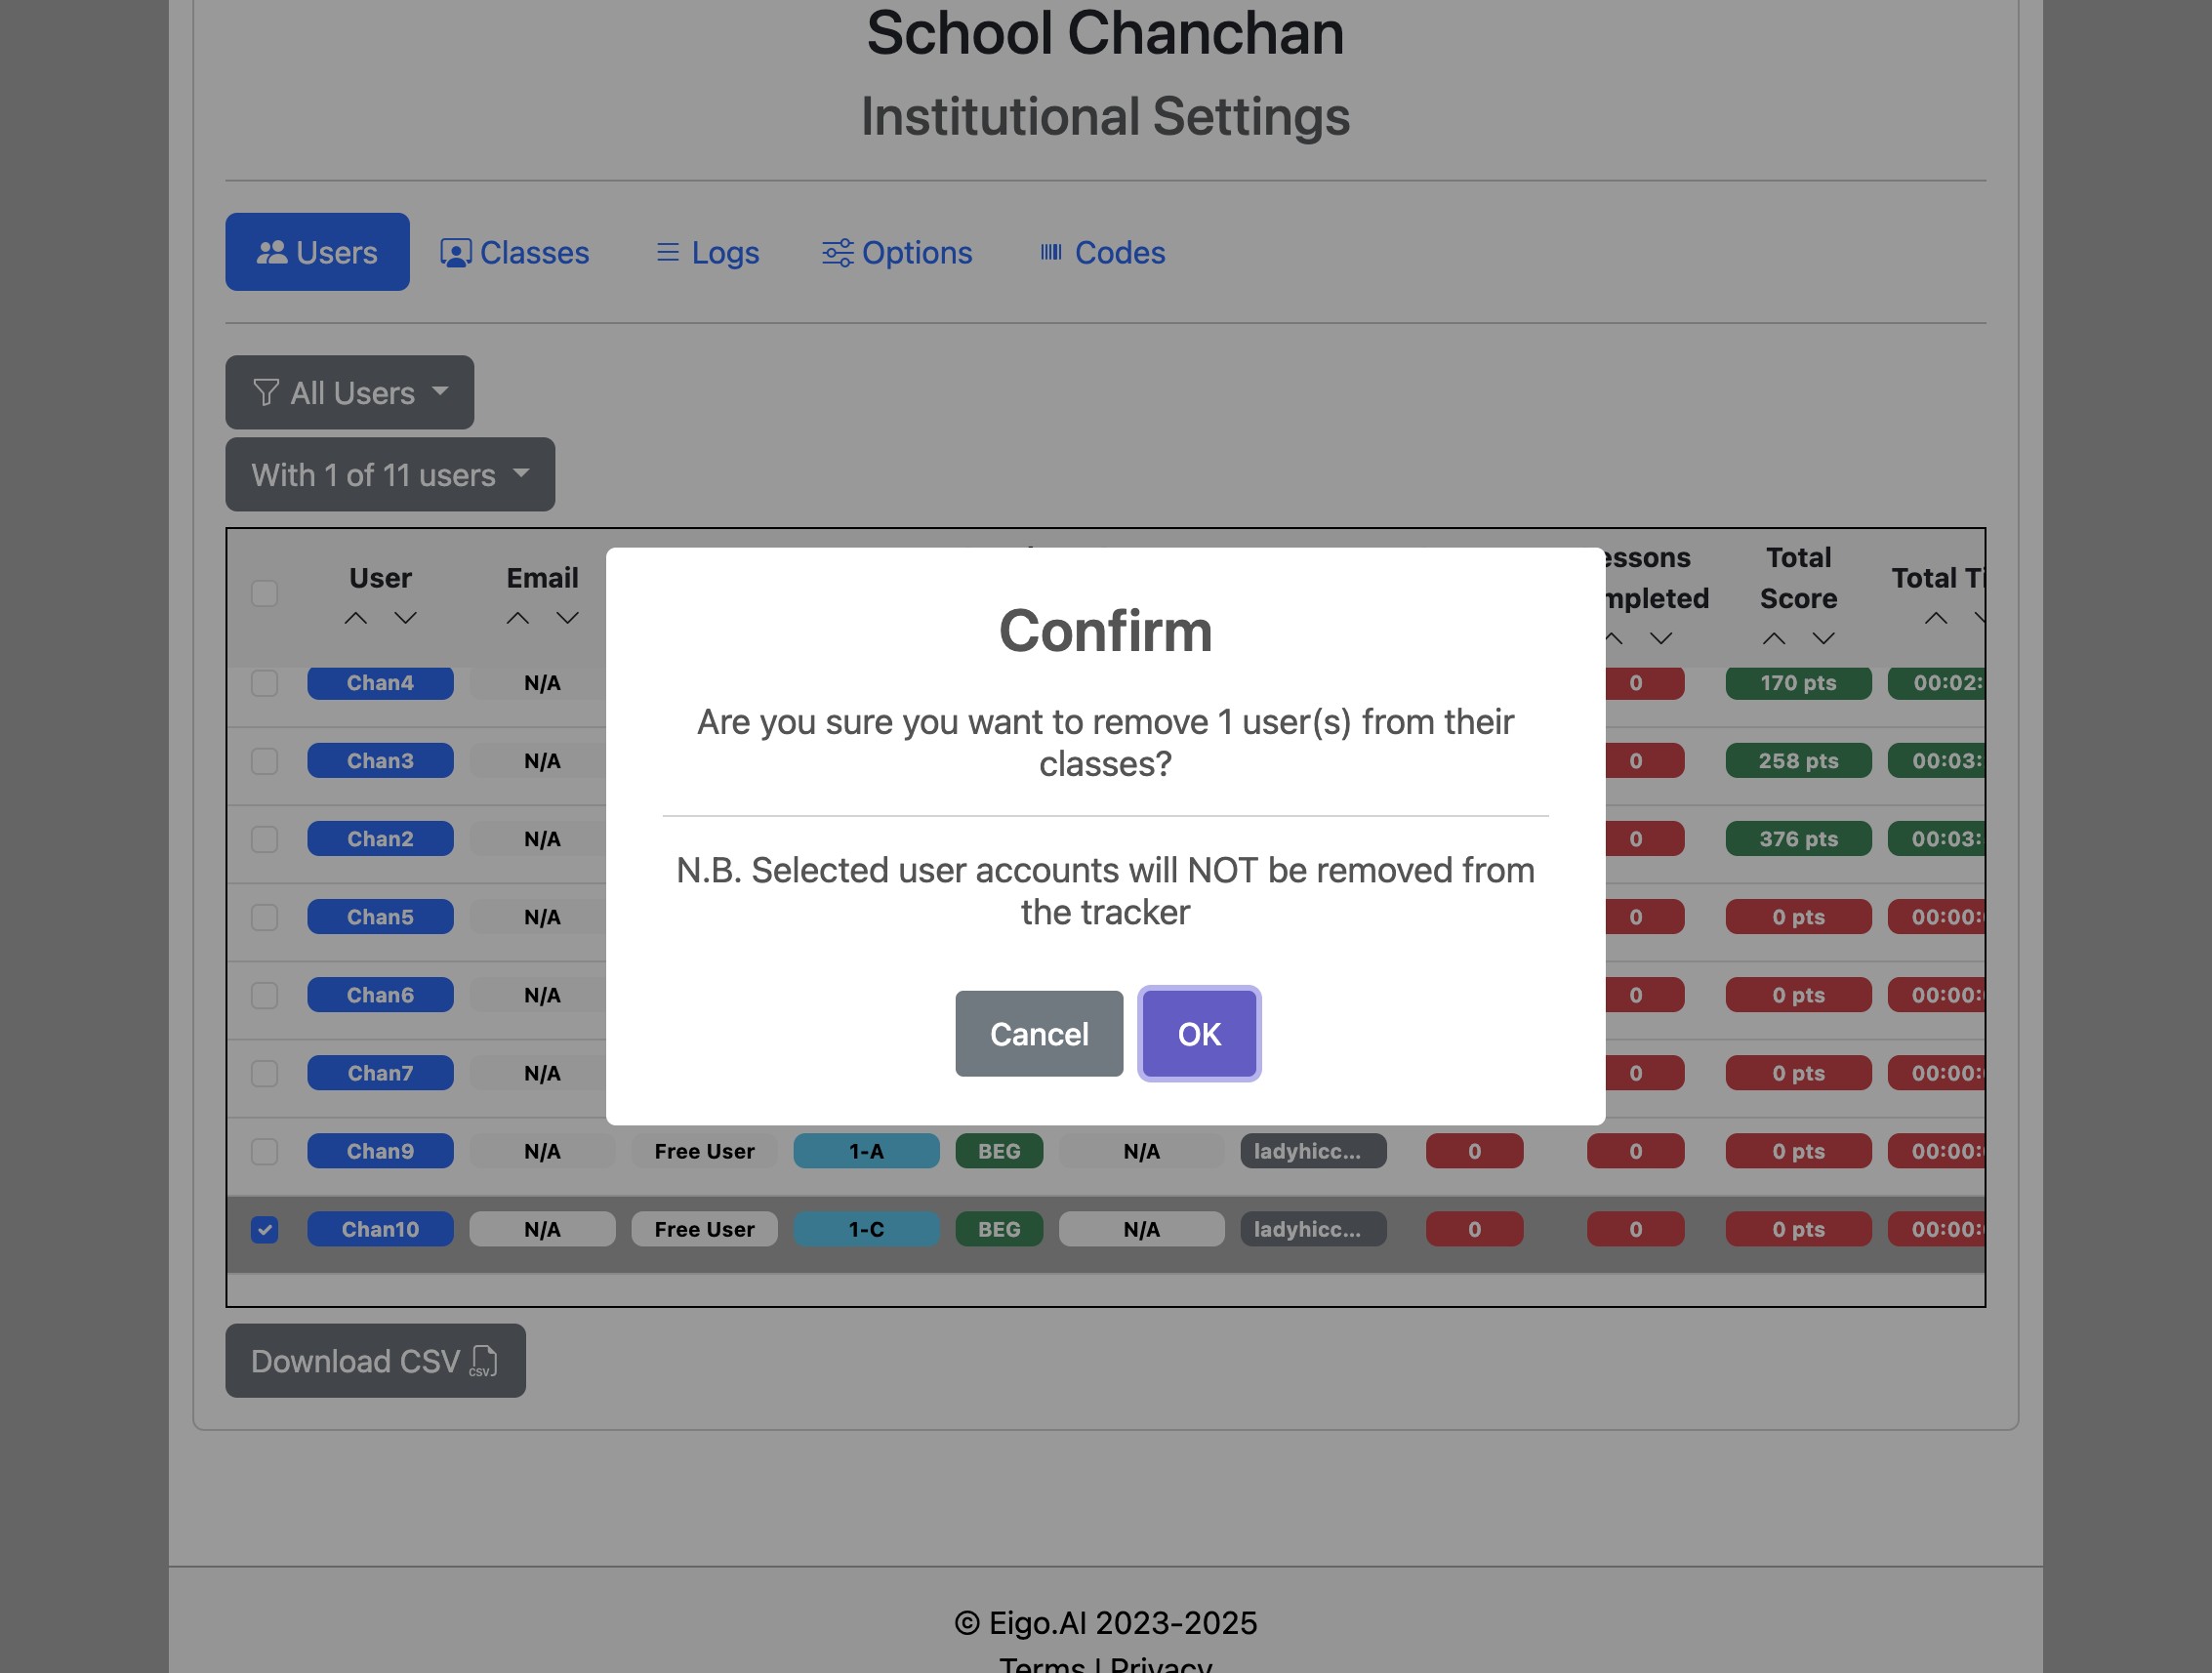
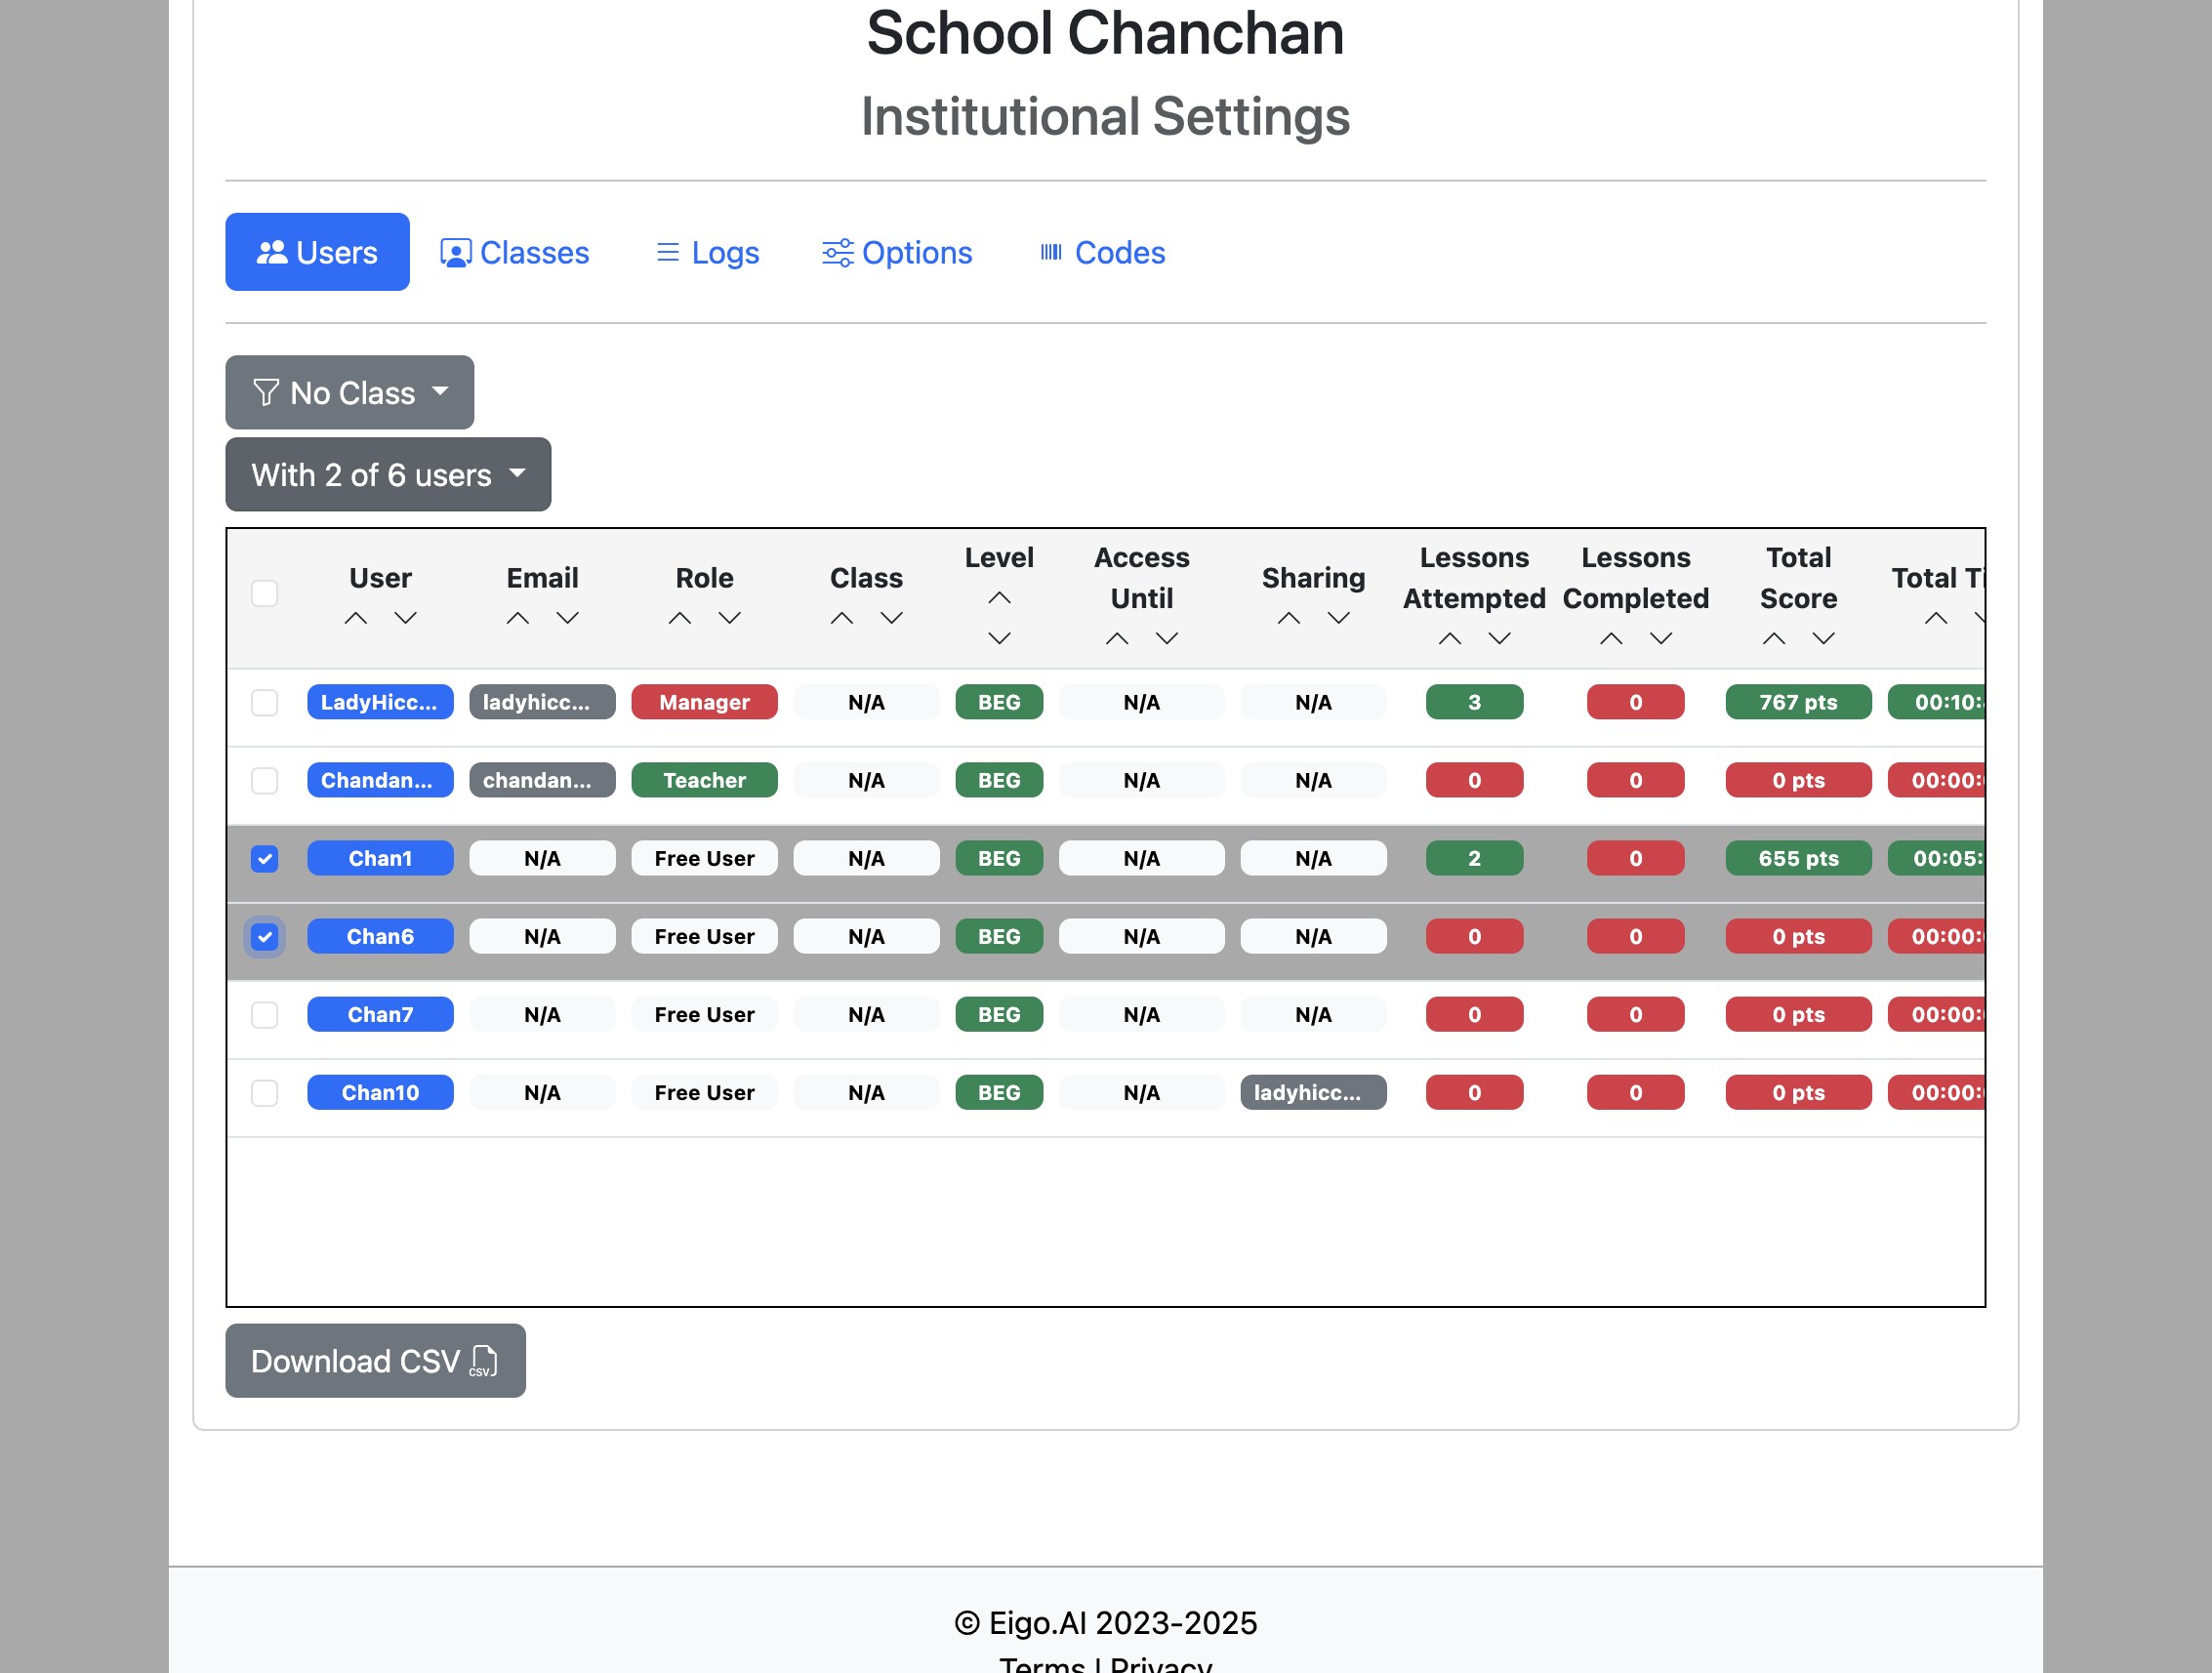
Add users to or remove them from a tracker
Adding users to a tracker allows the owner of the tracker, which must be a teacher registered under your institution, to view the selected students' progress and manage their accounts.
Select the users using the checkboxes on the left and click the "With x of n users" dropdown button.
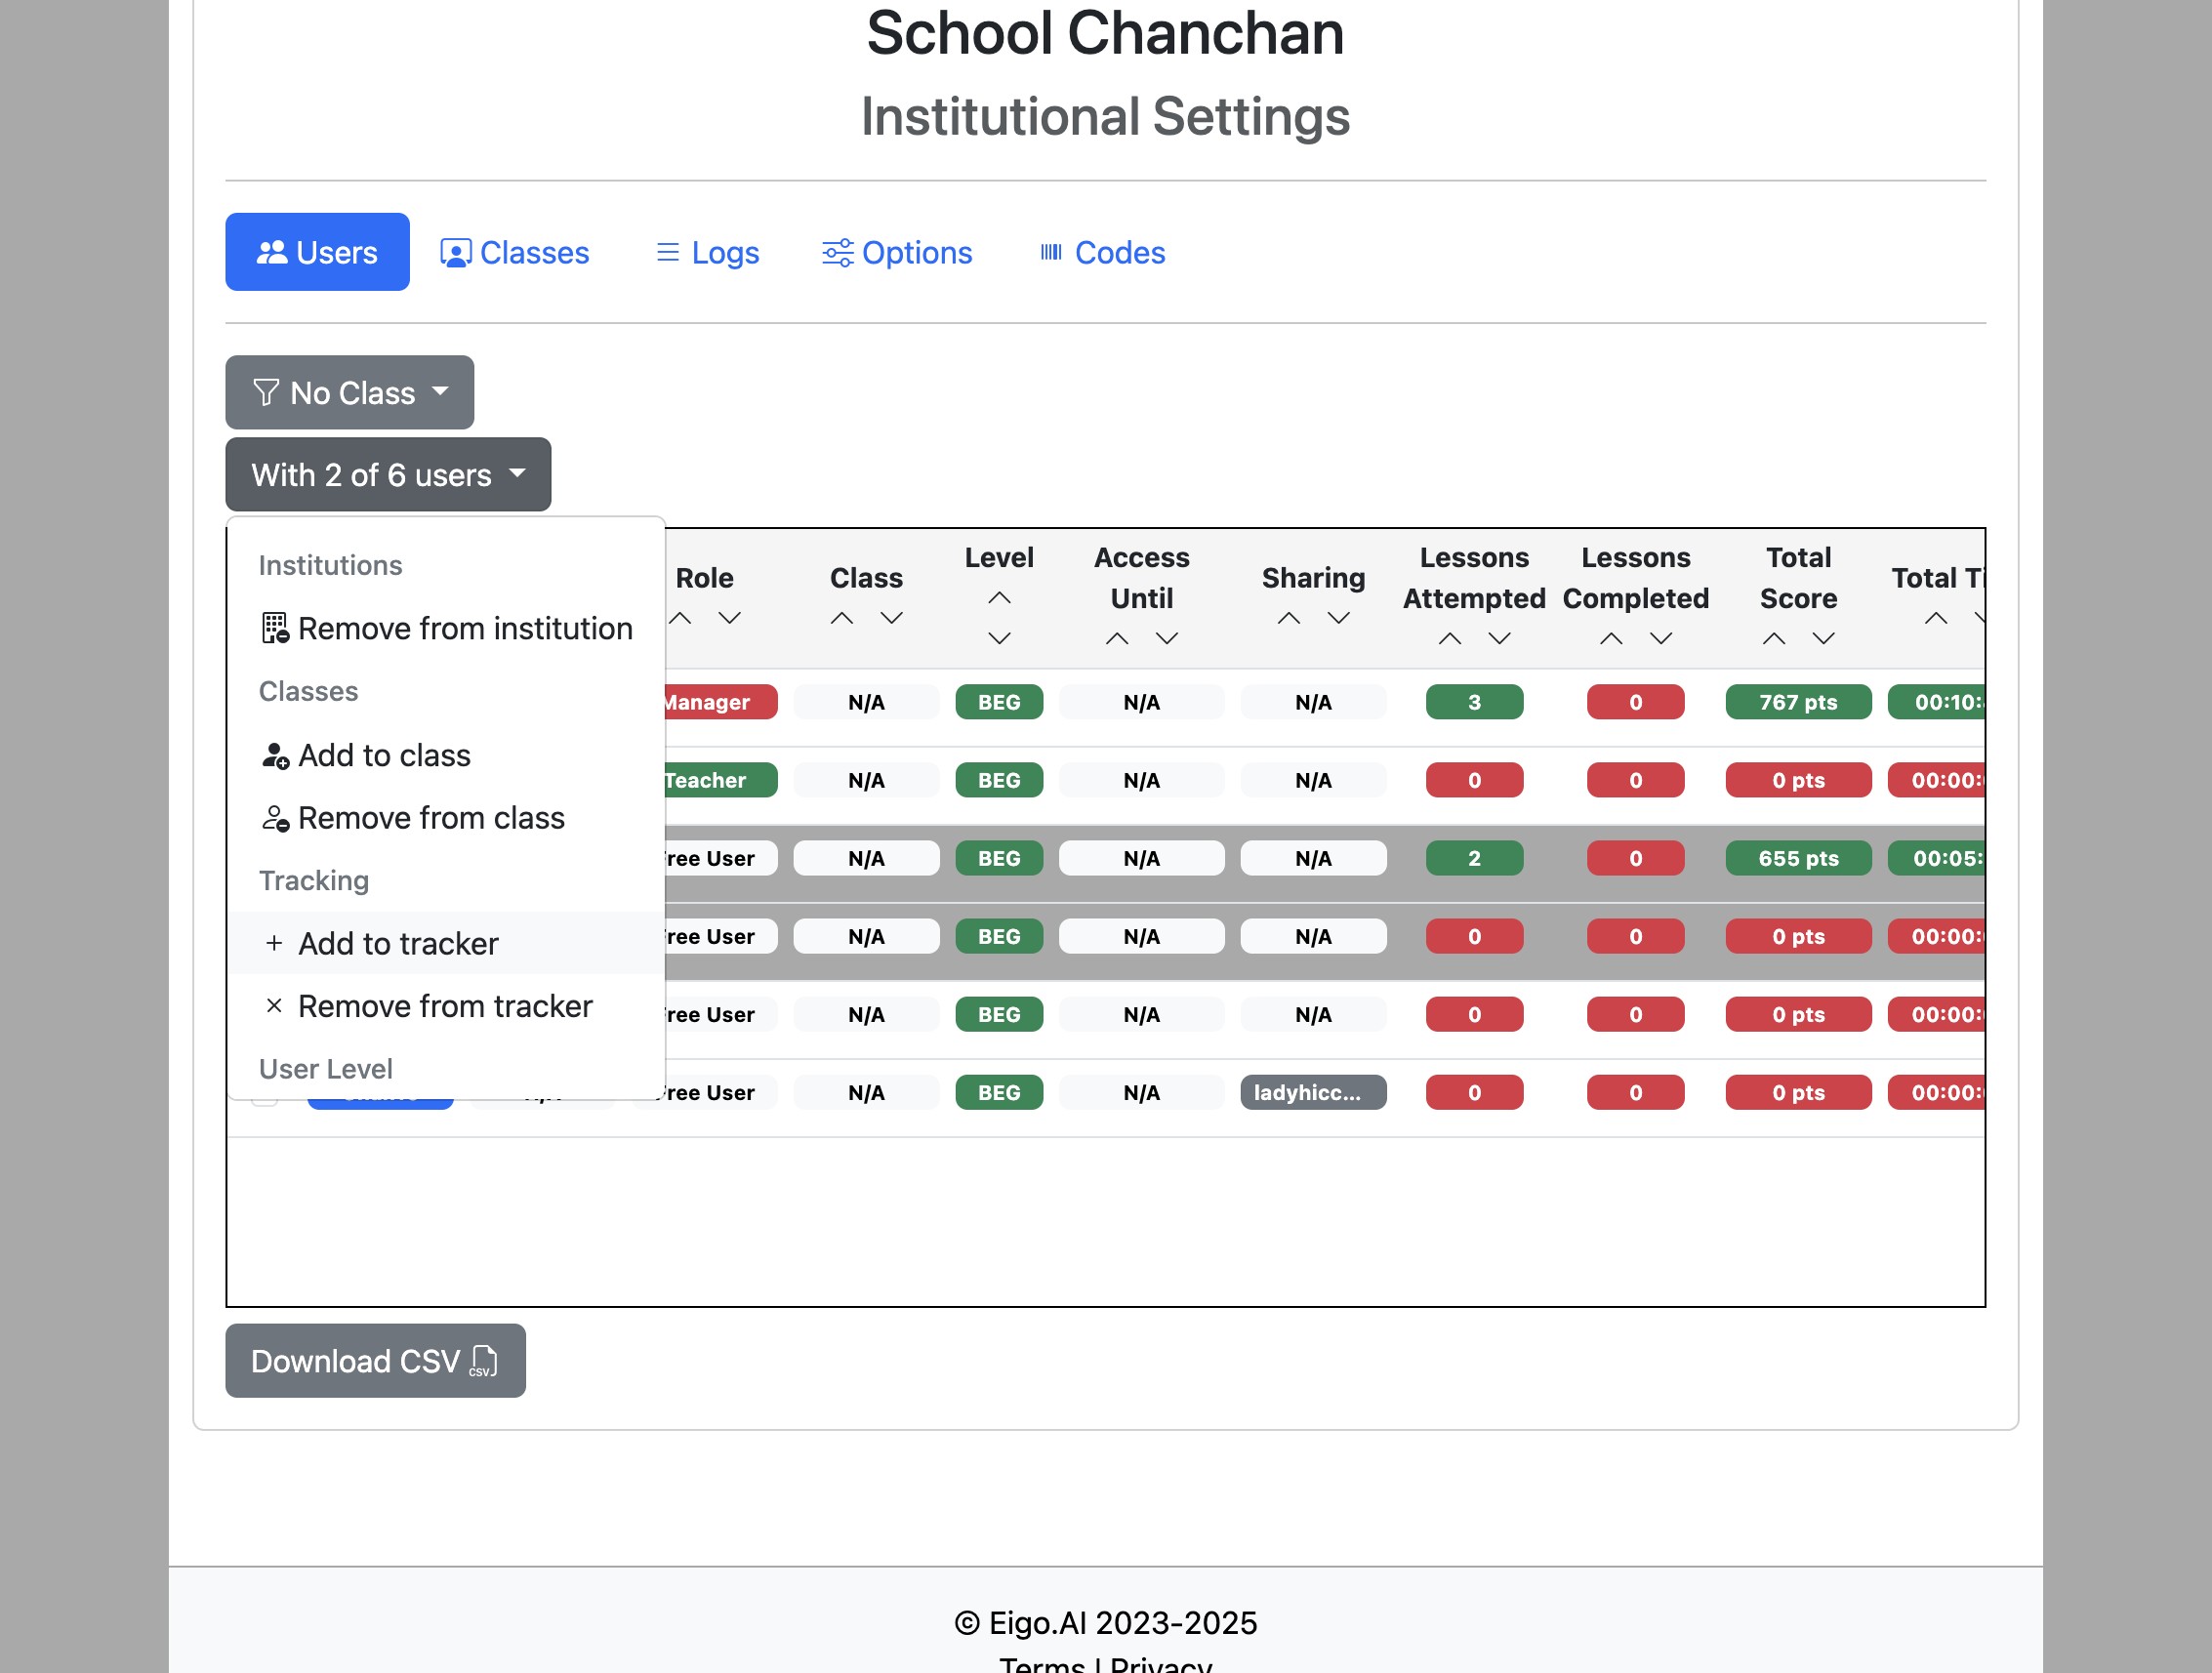
Click "Add to tracker".
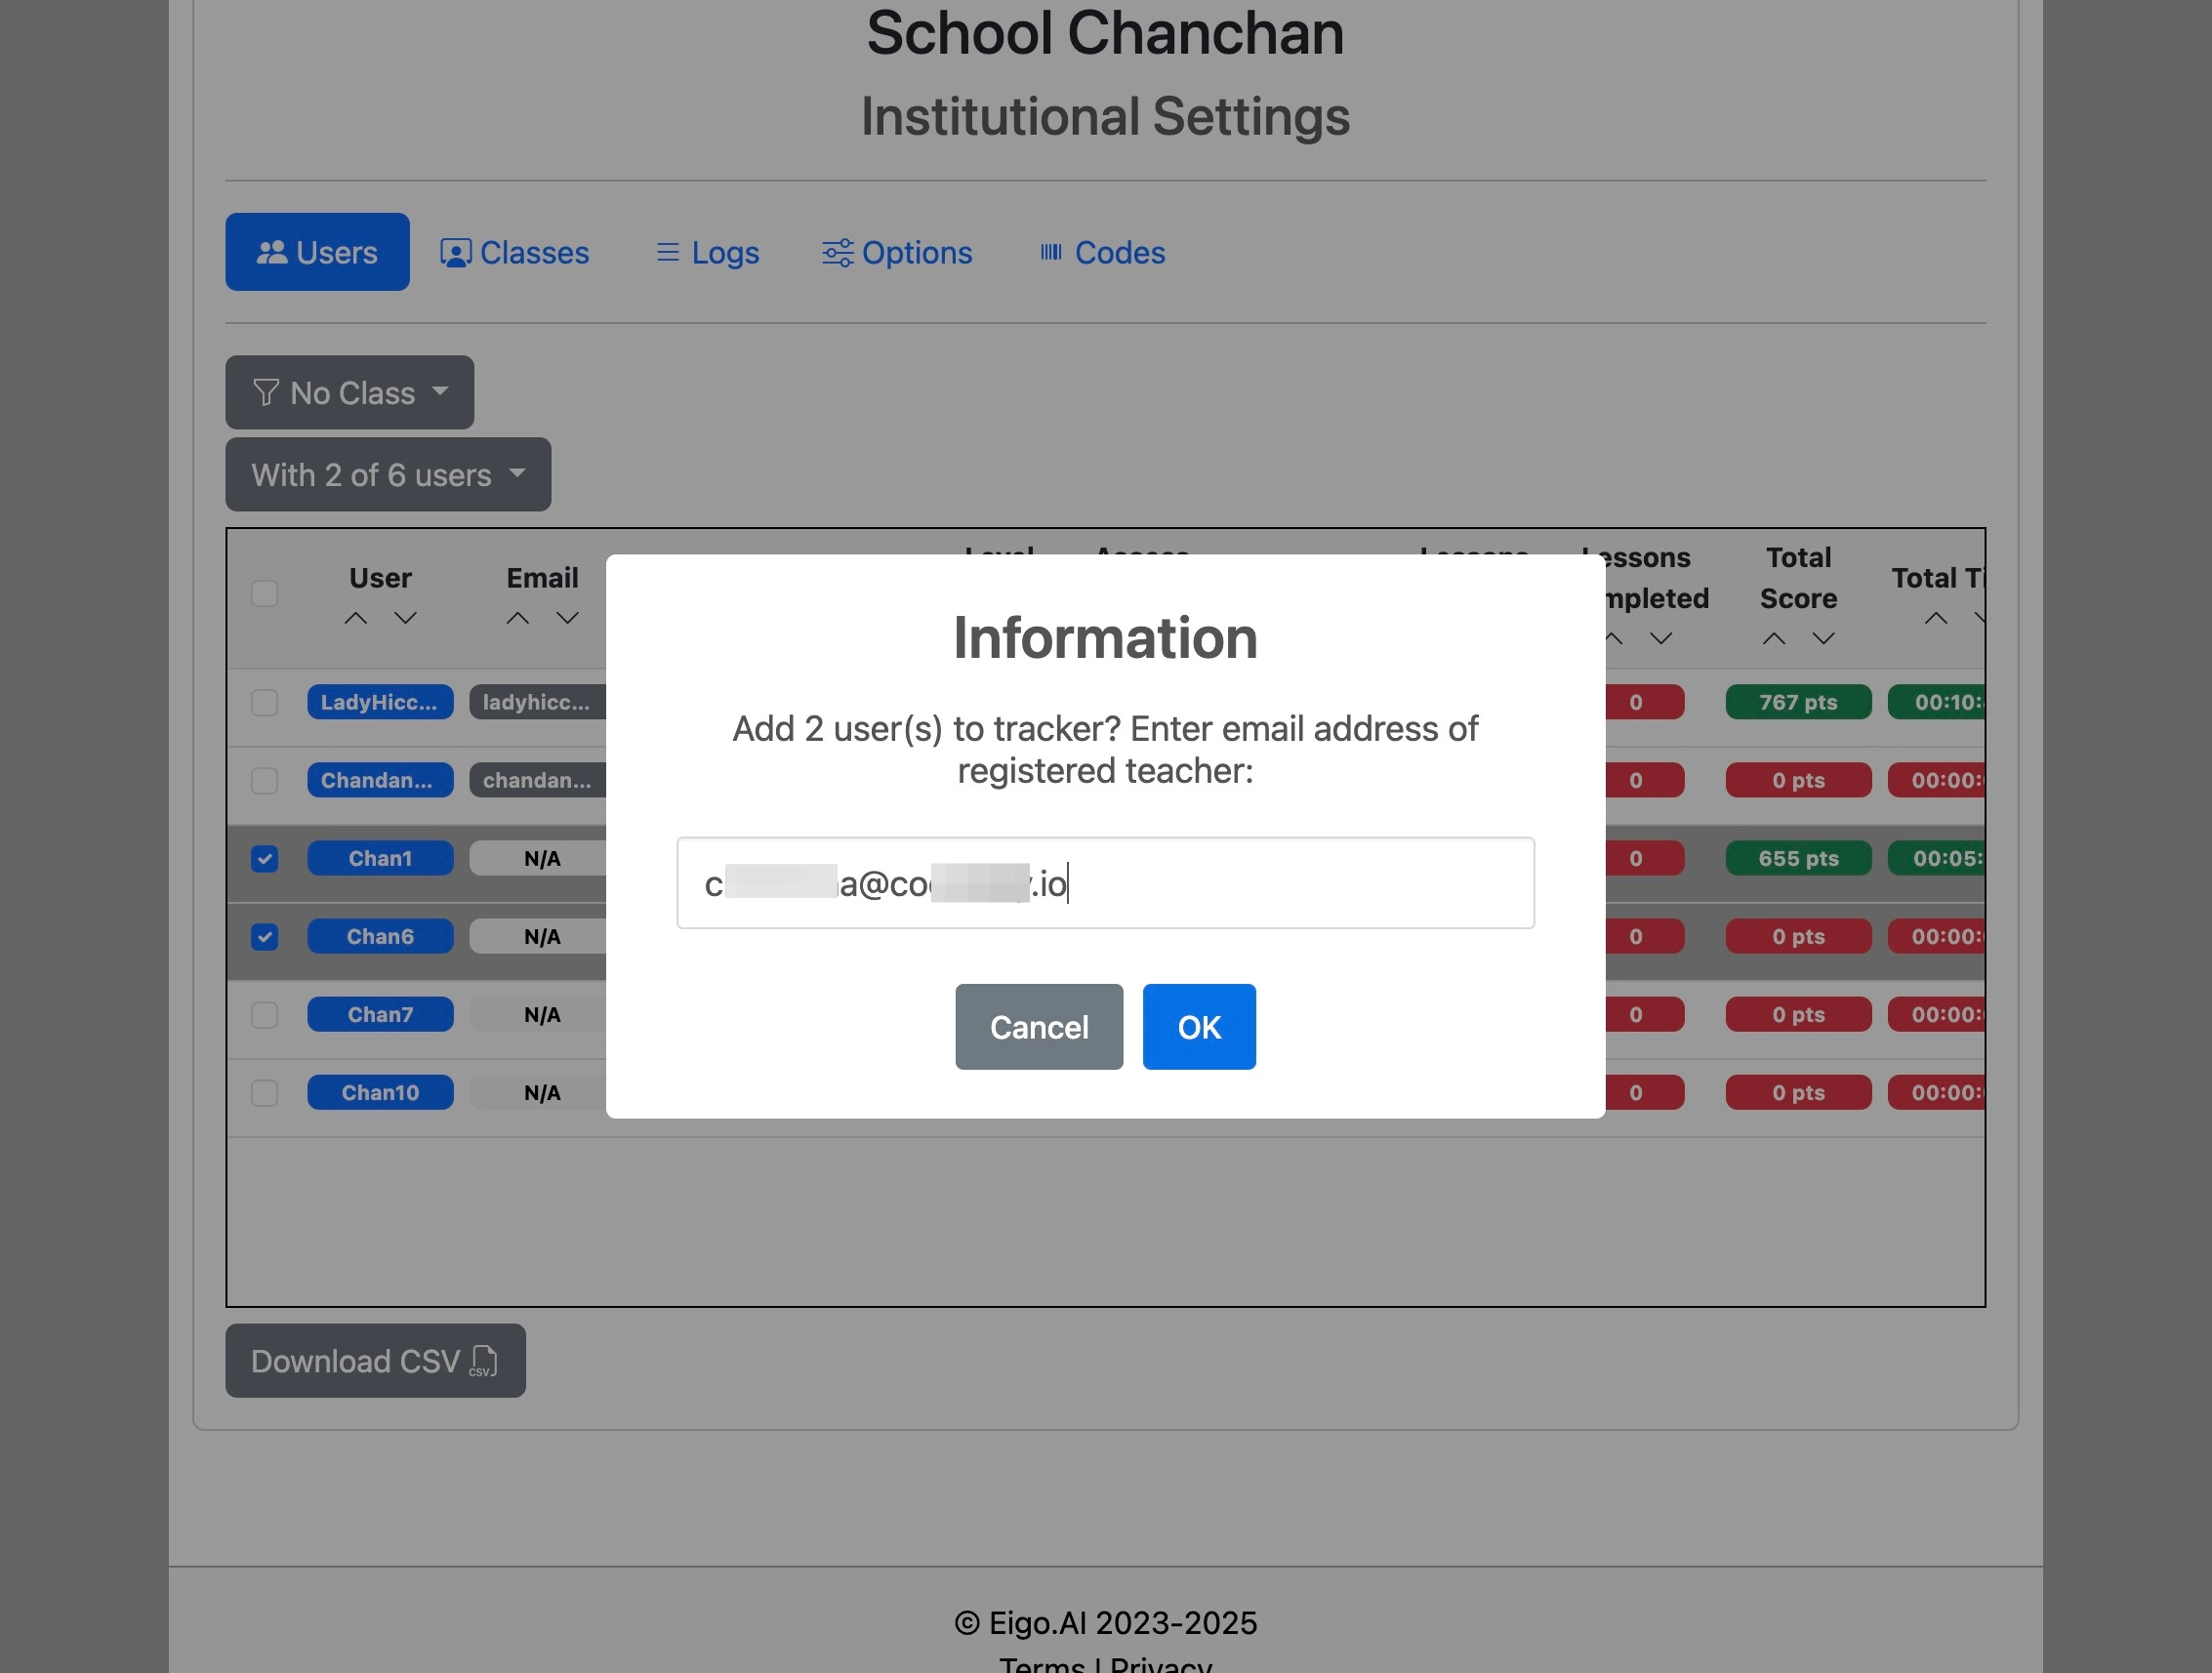
Enter the email address of a teacher registered under your institutional subscription and click "OK".
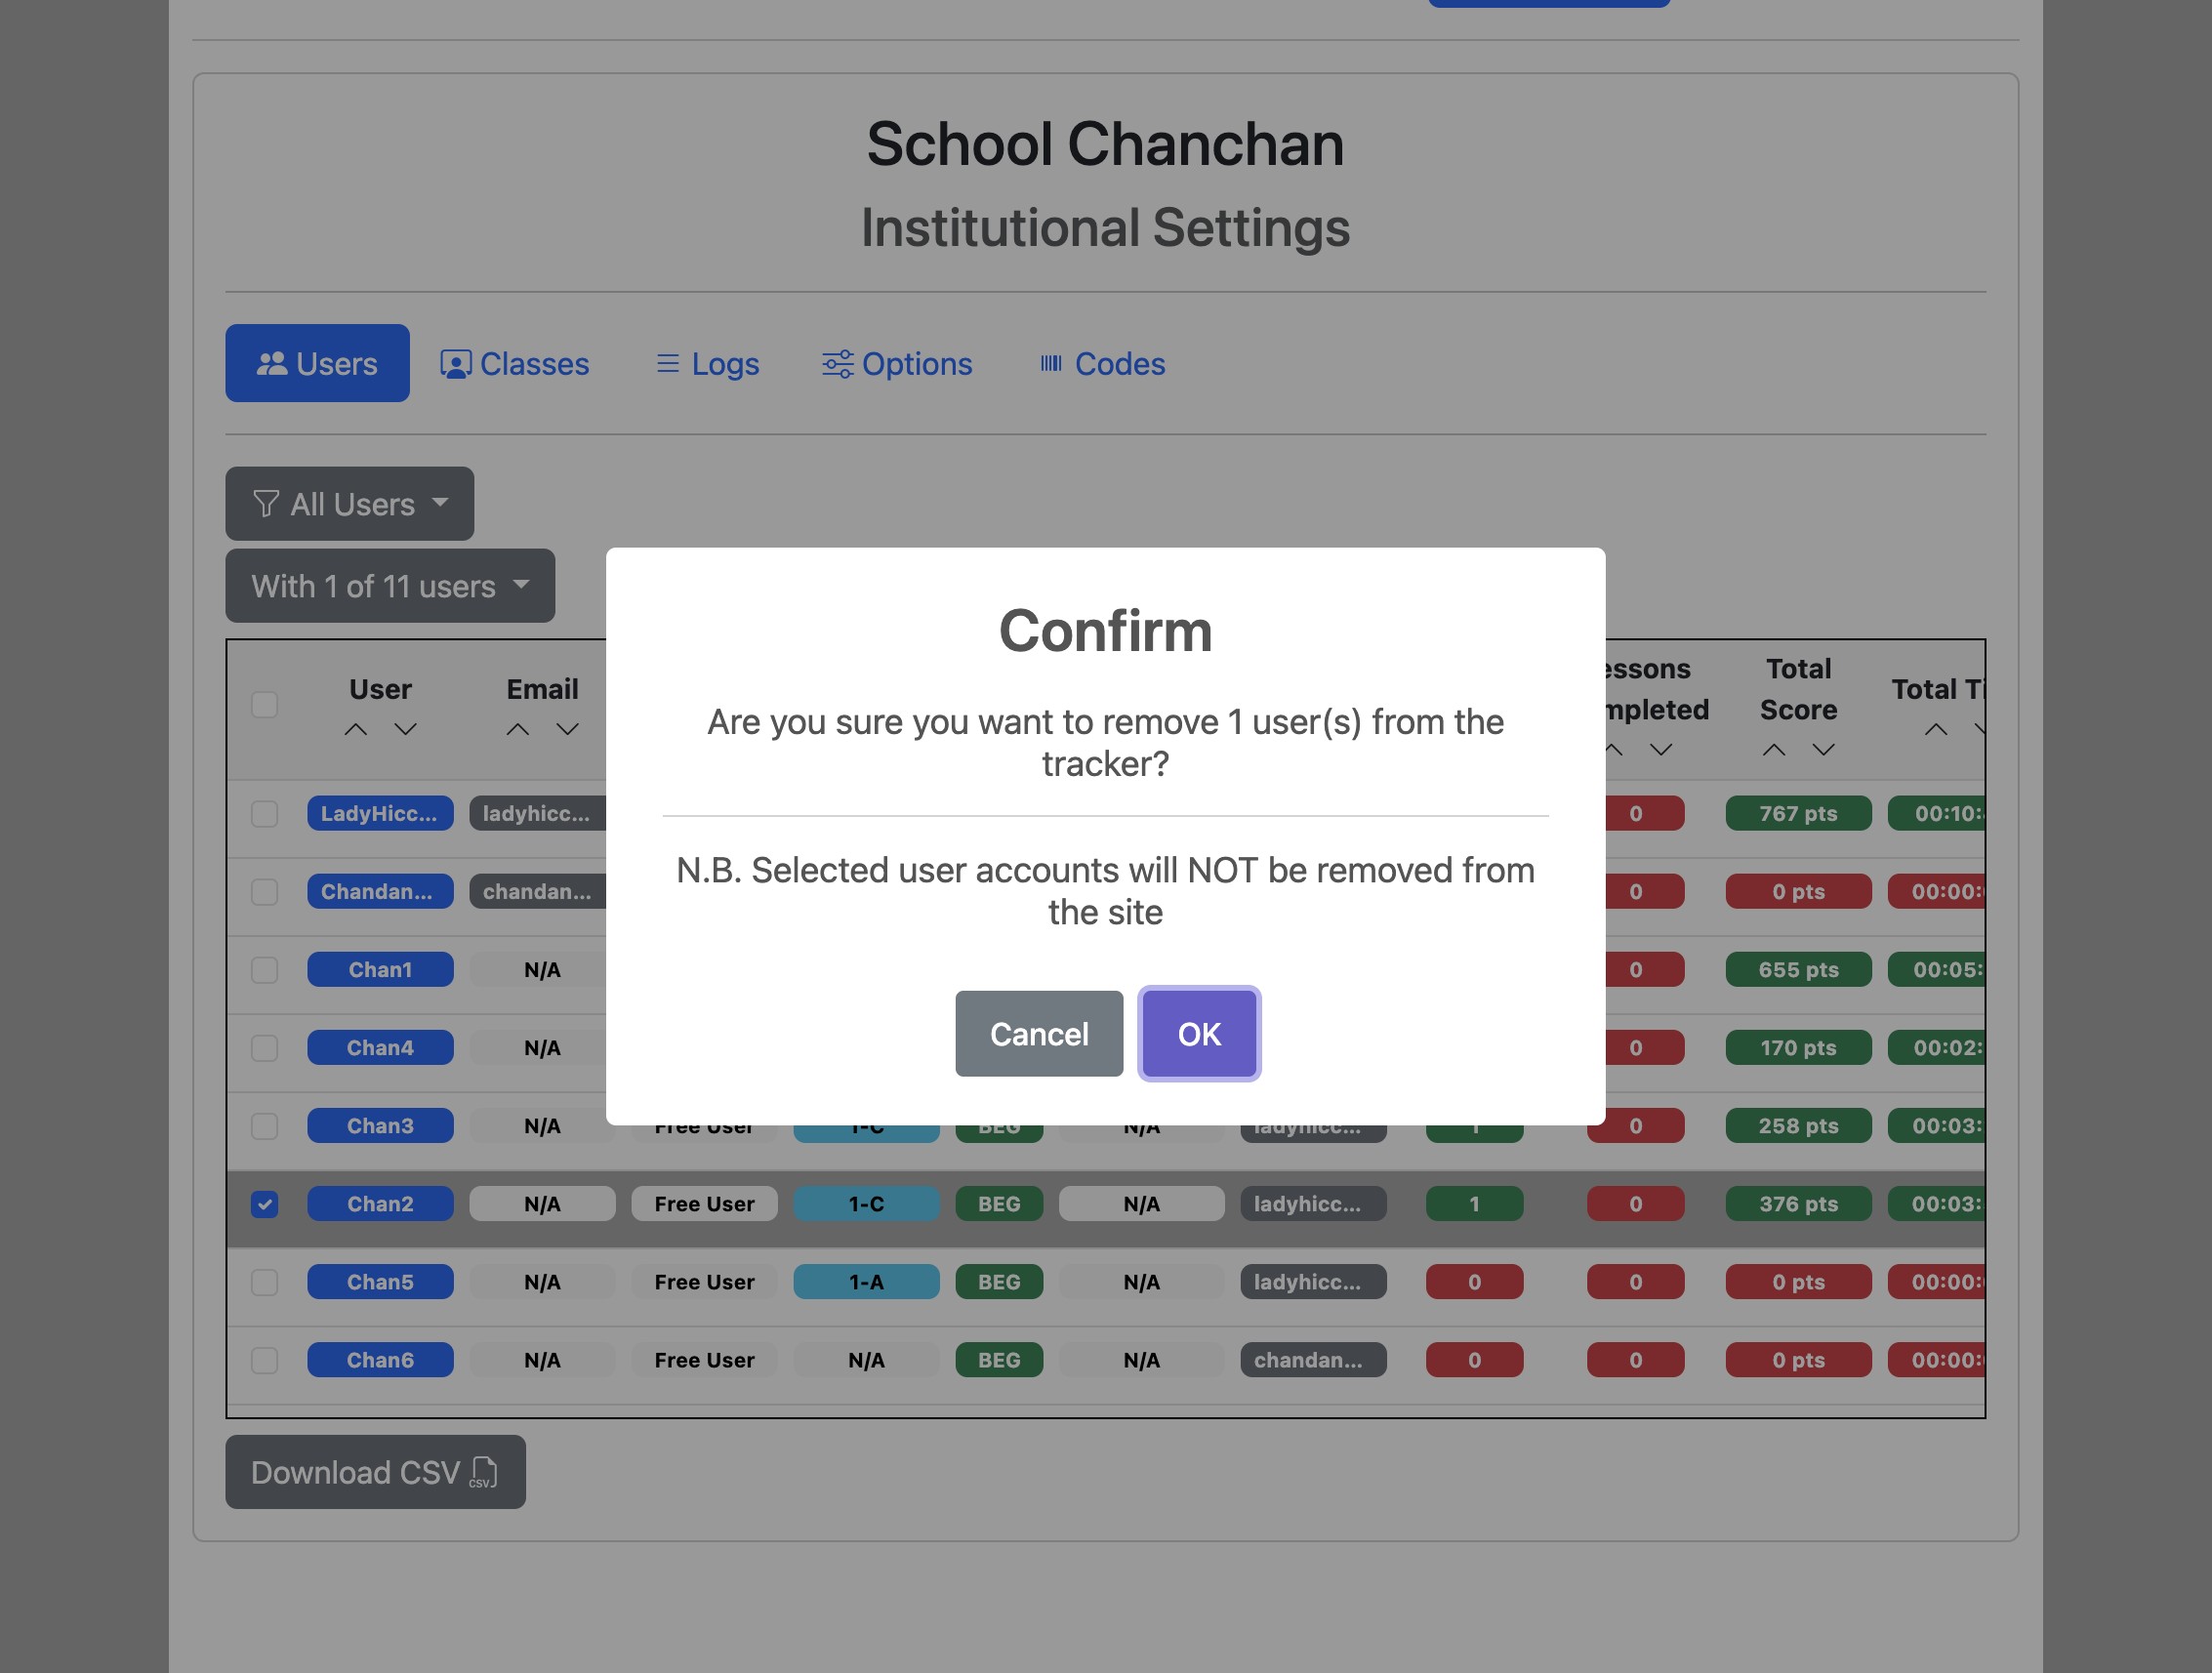
To remove users from the tracker they are currently assigned to, click "Remove from tracker".
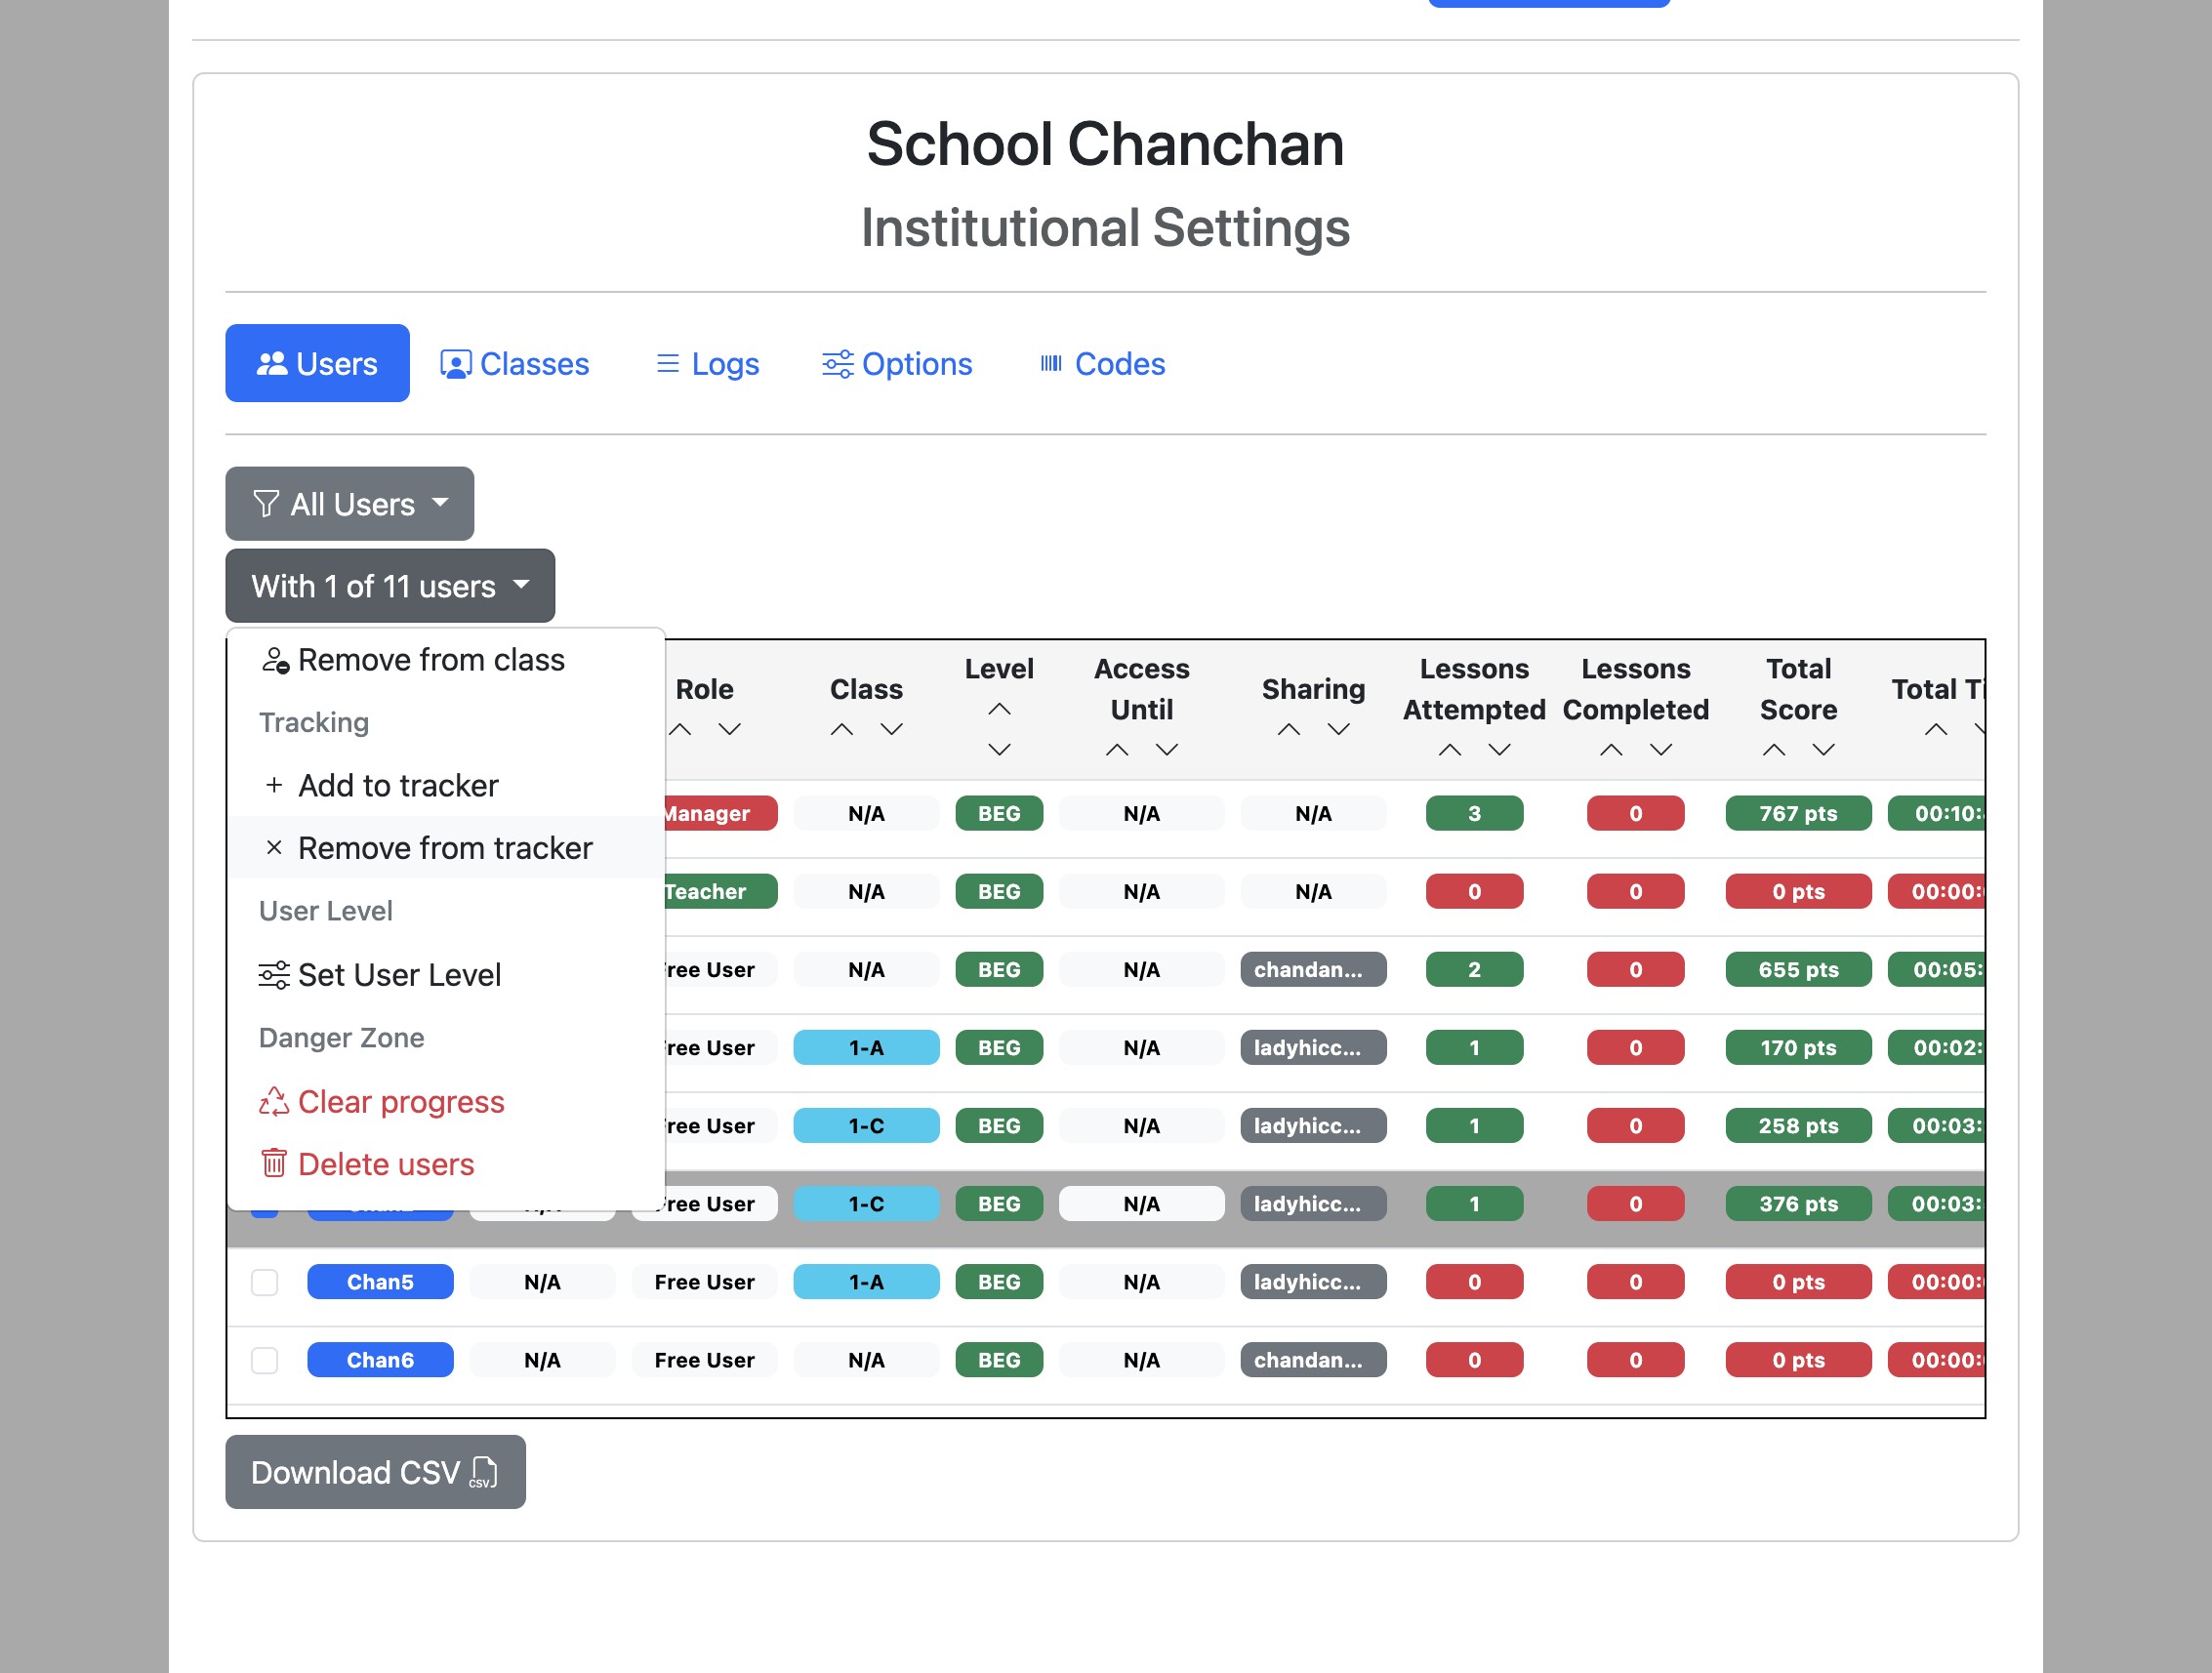
Click "OK" to confirm.
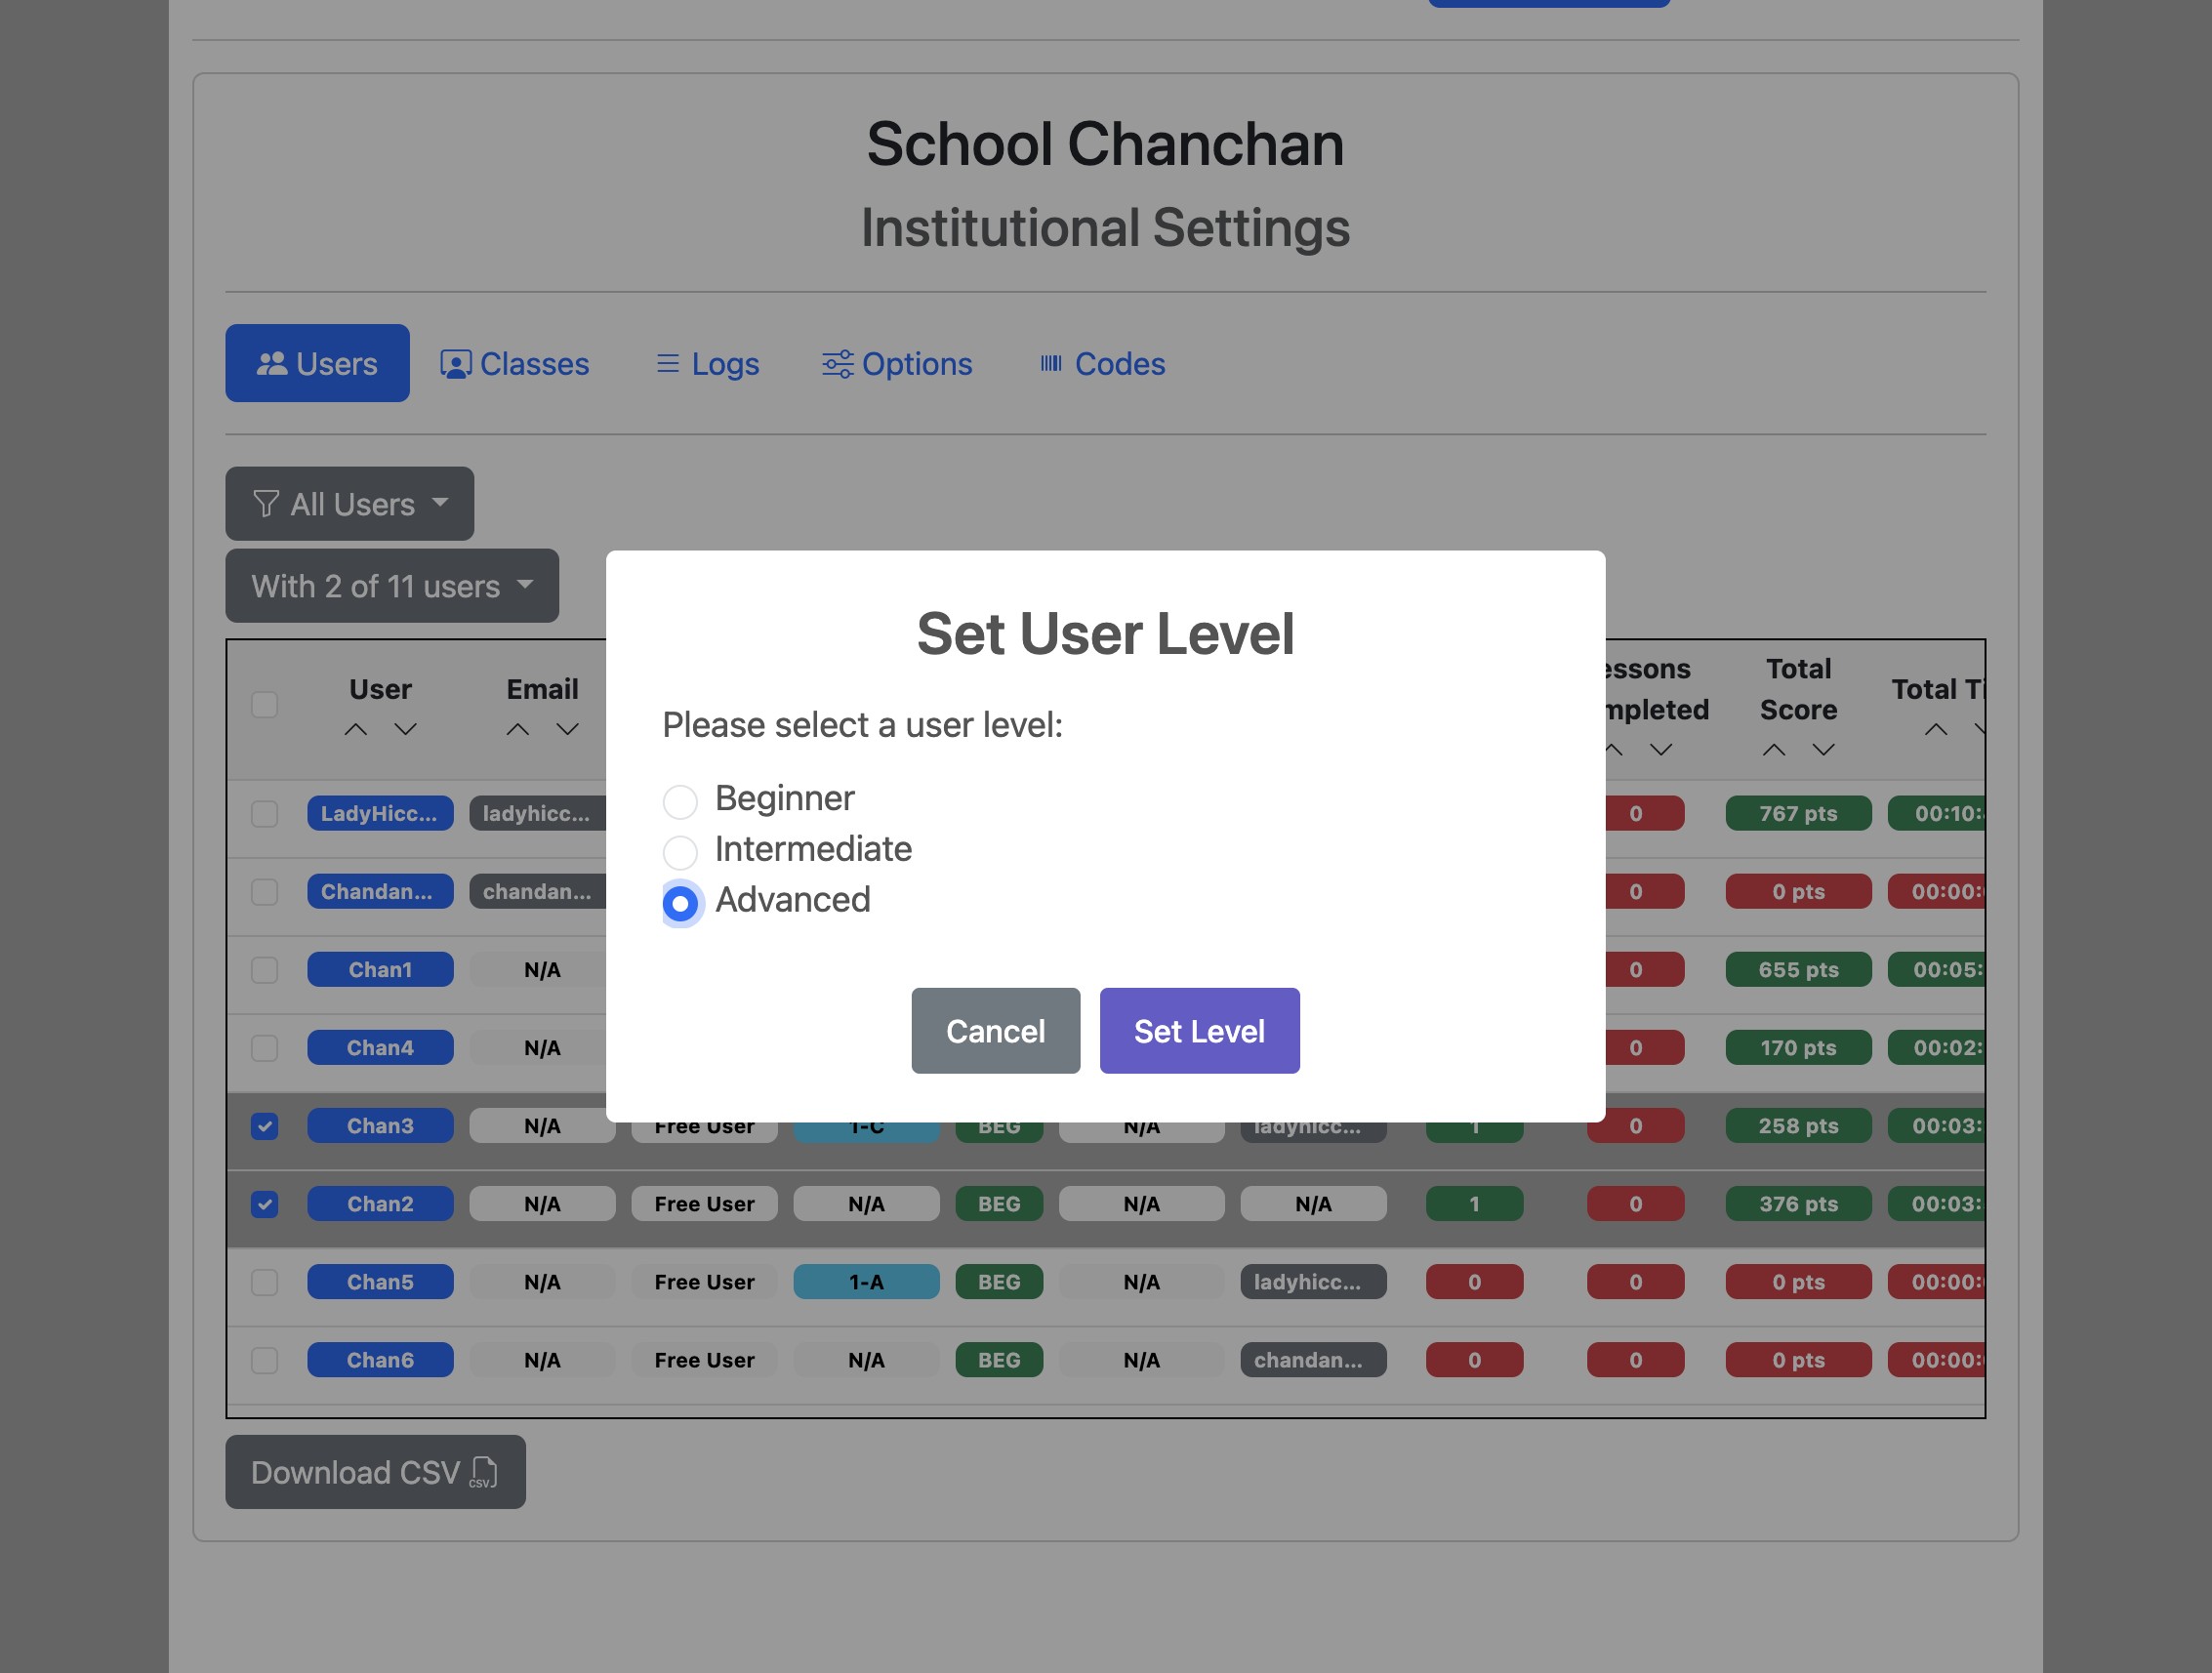
Set user levels
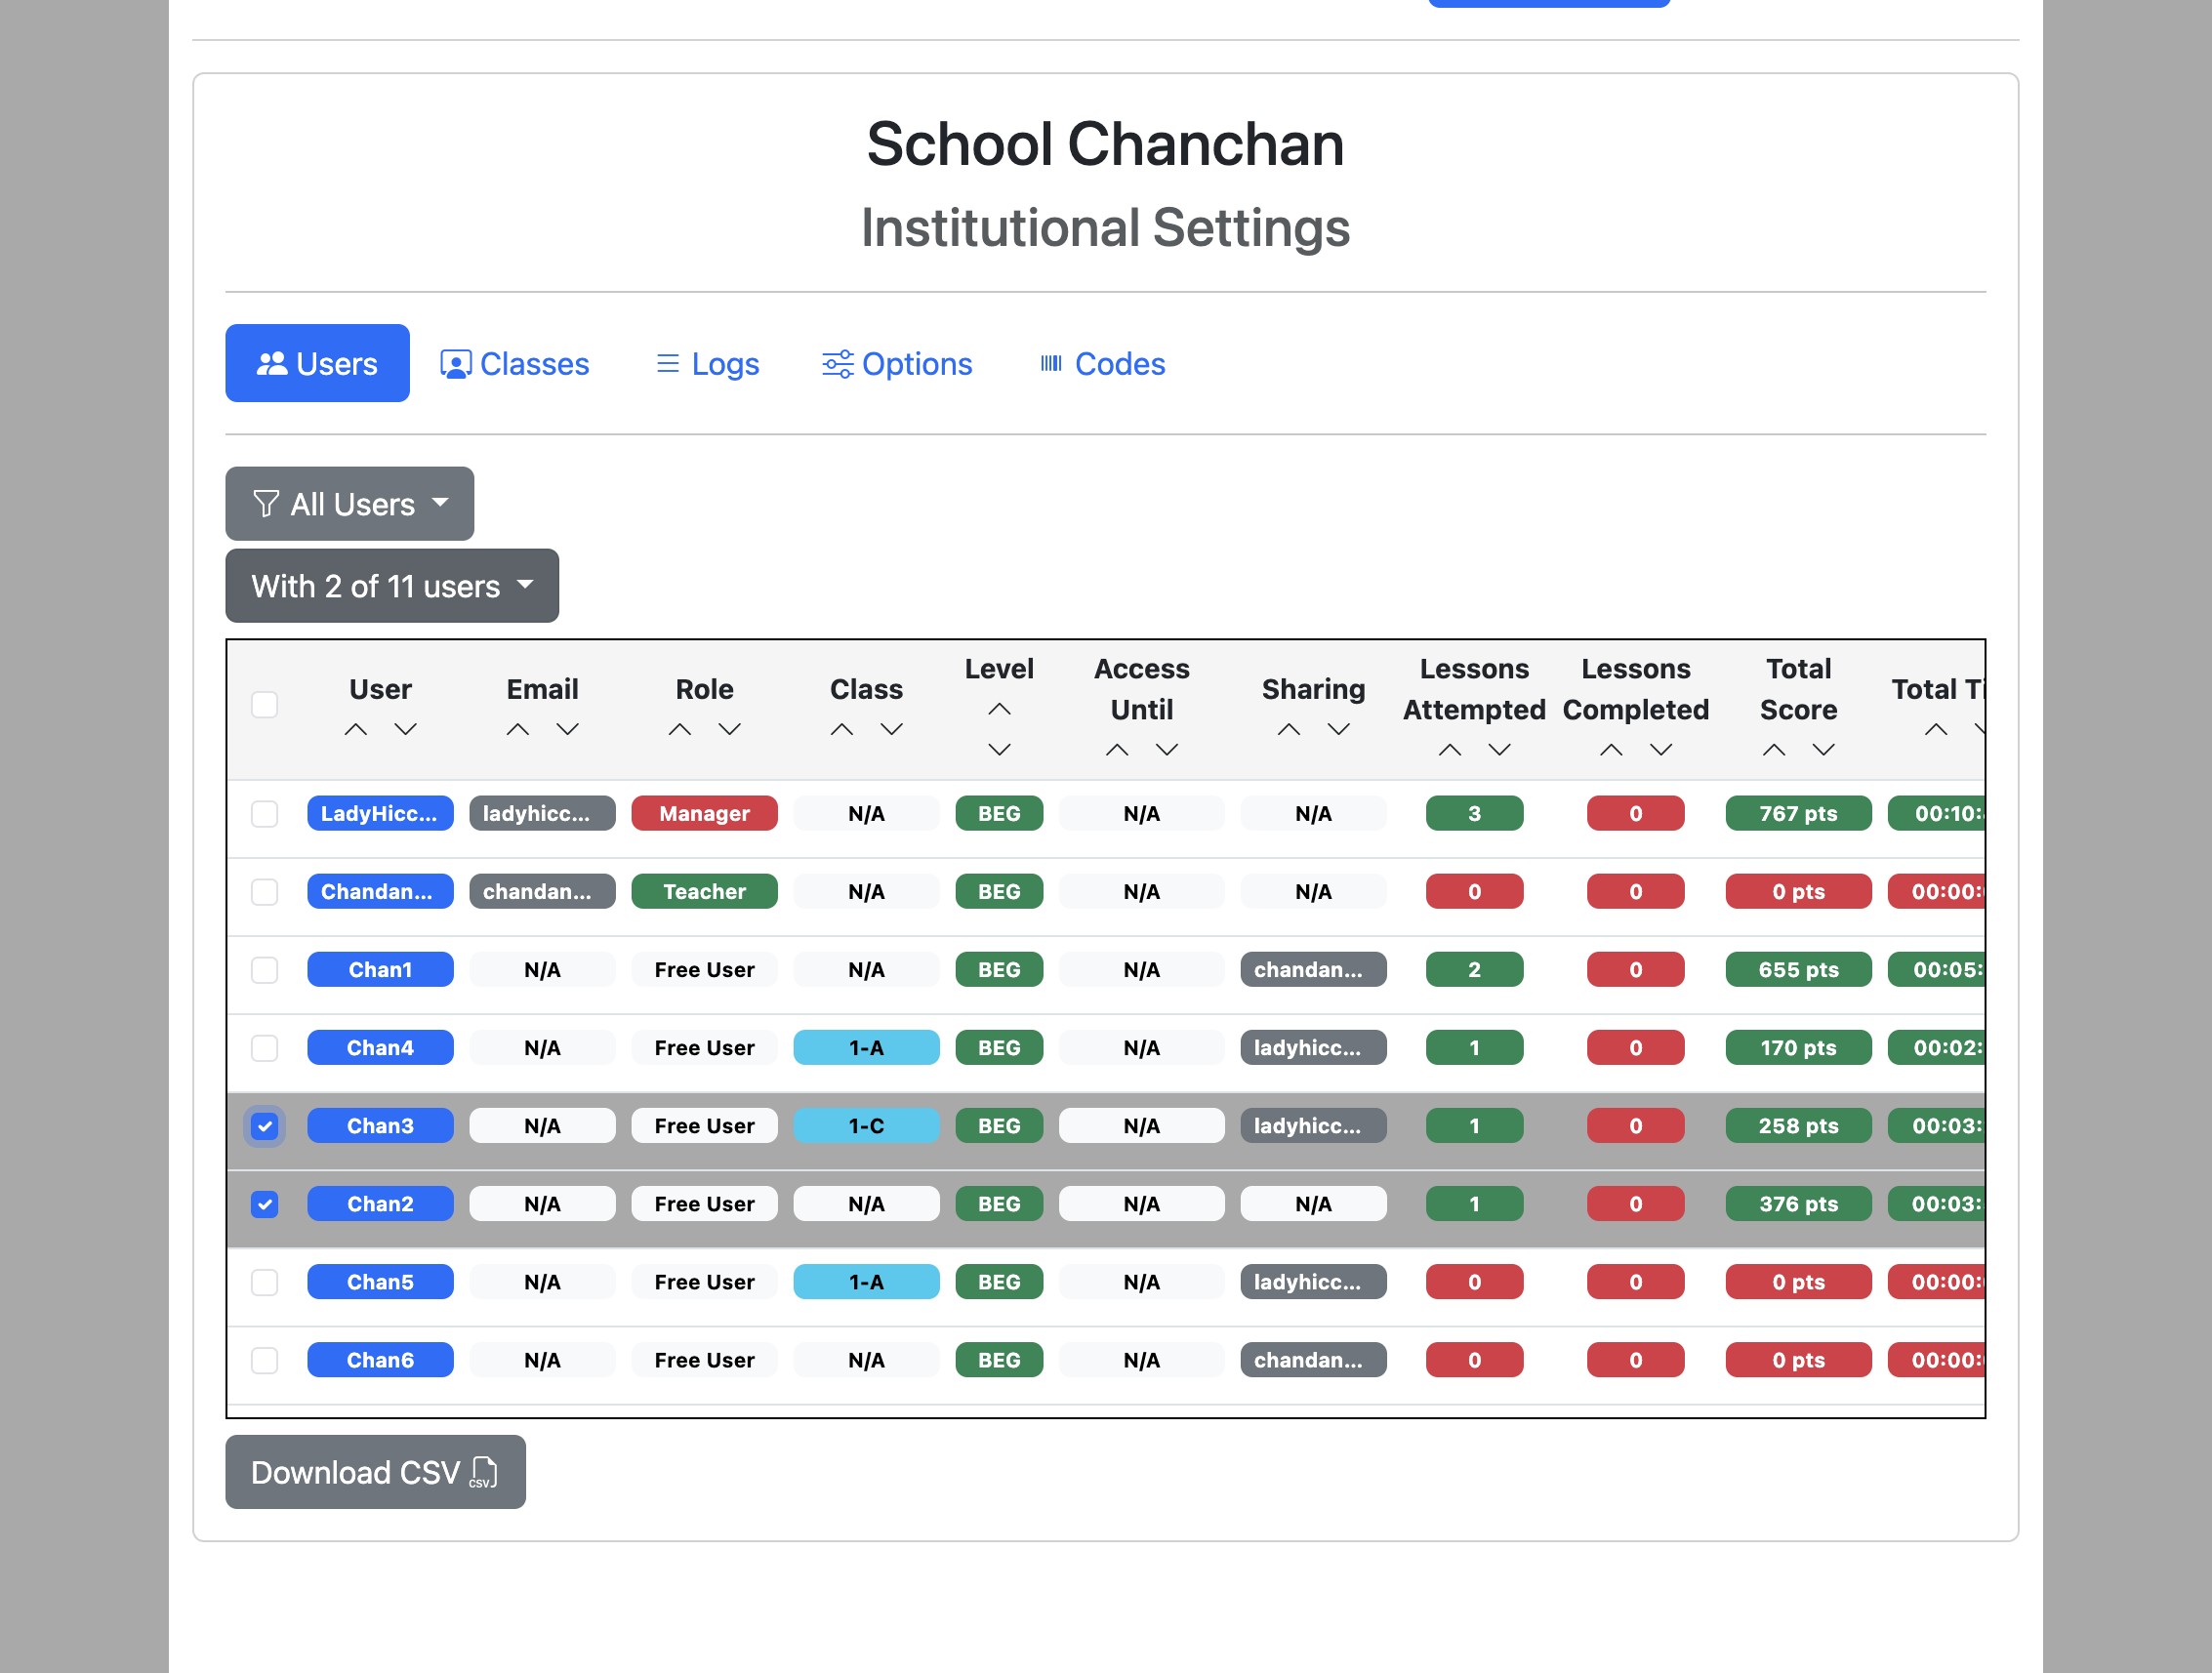
Select the users using the checkboxes on the left and click the "With x of n users" dropdown button.
Click "Set User Level".
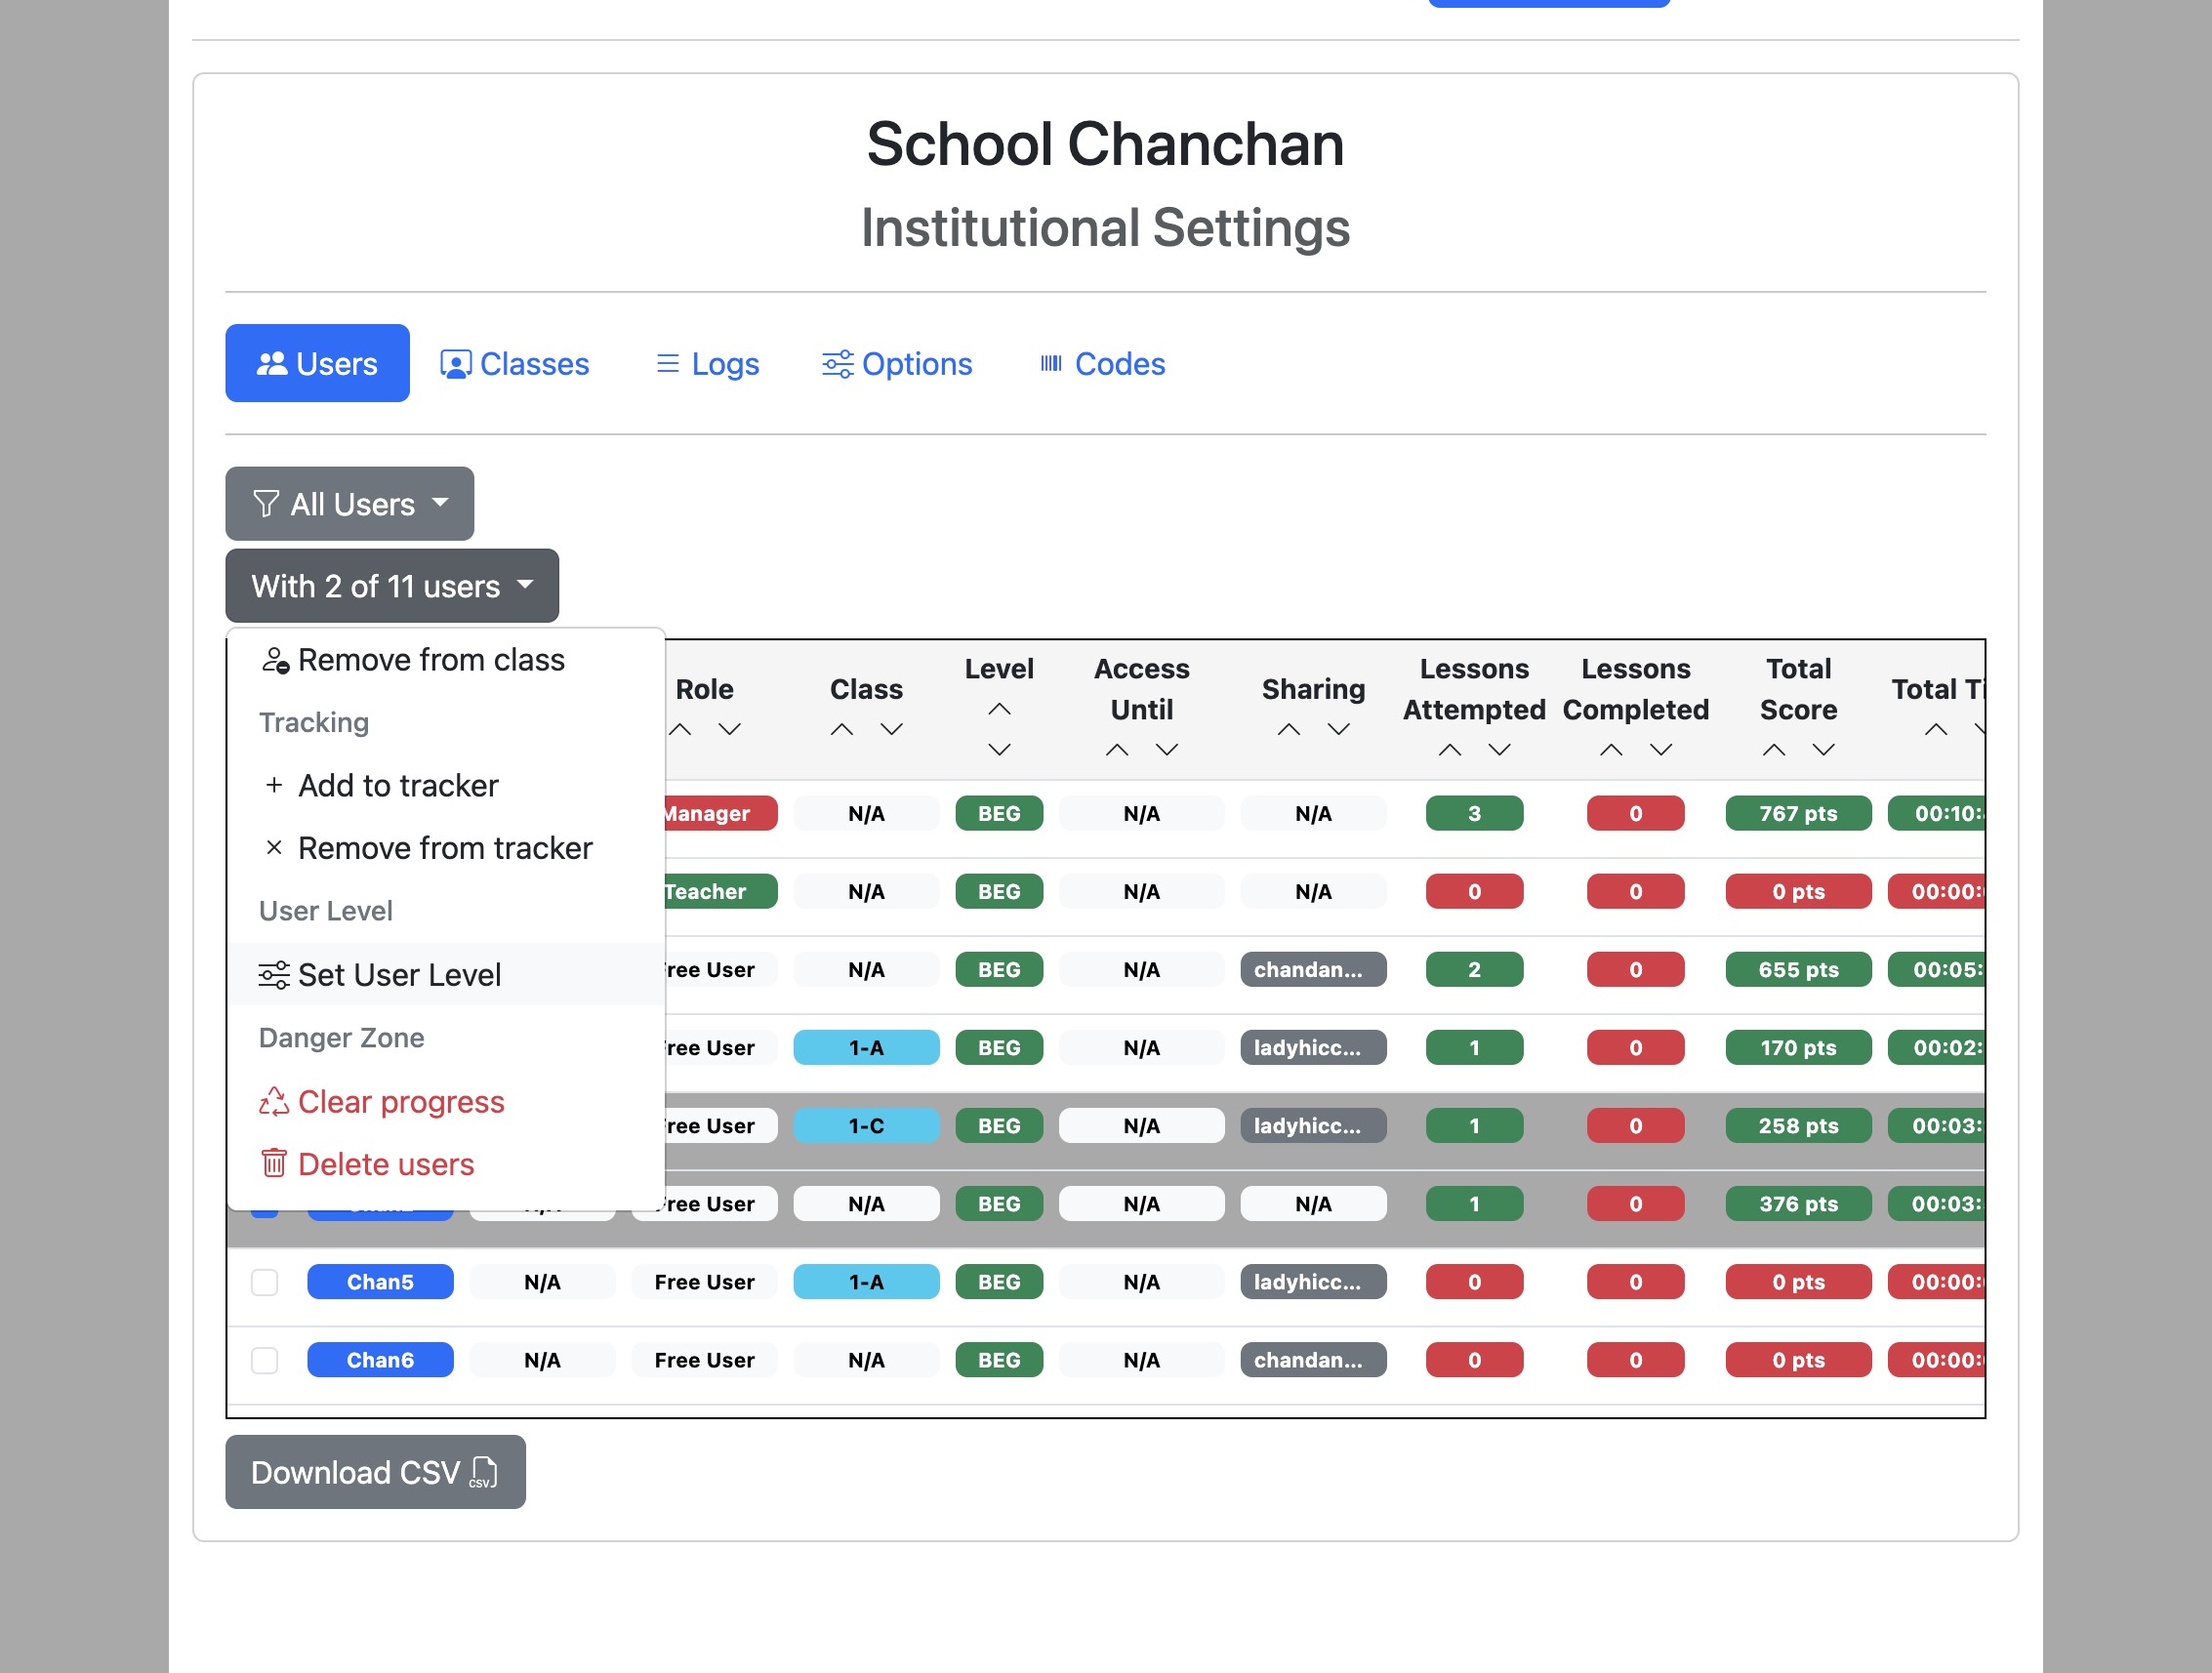
Select a level and click "Set Level" to confirm and save.
Clear user progress
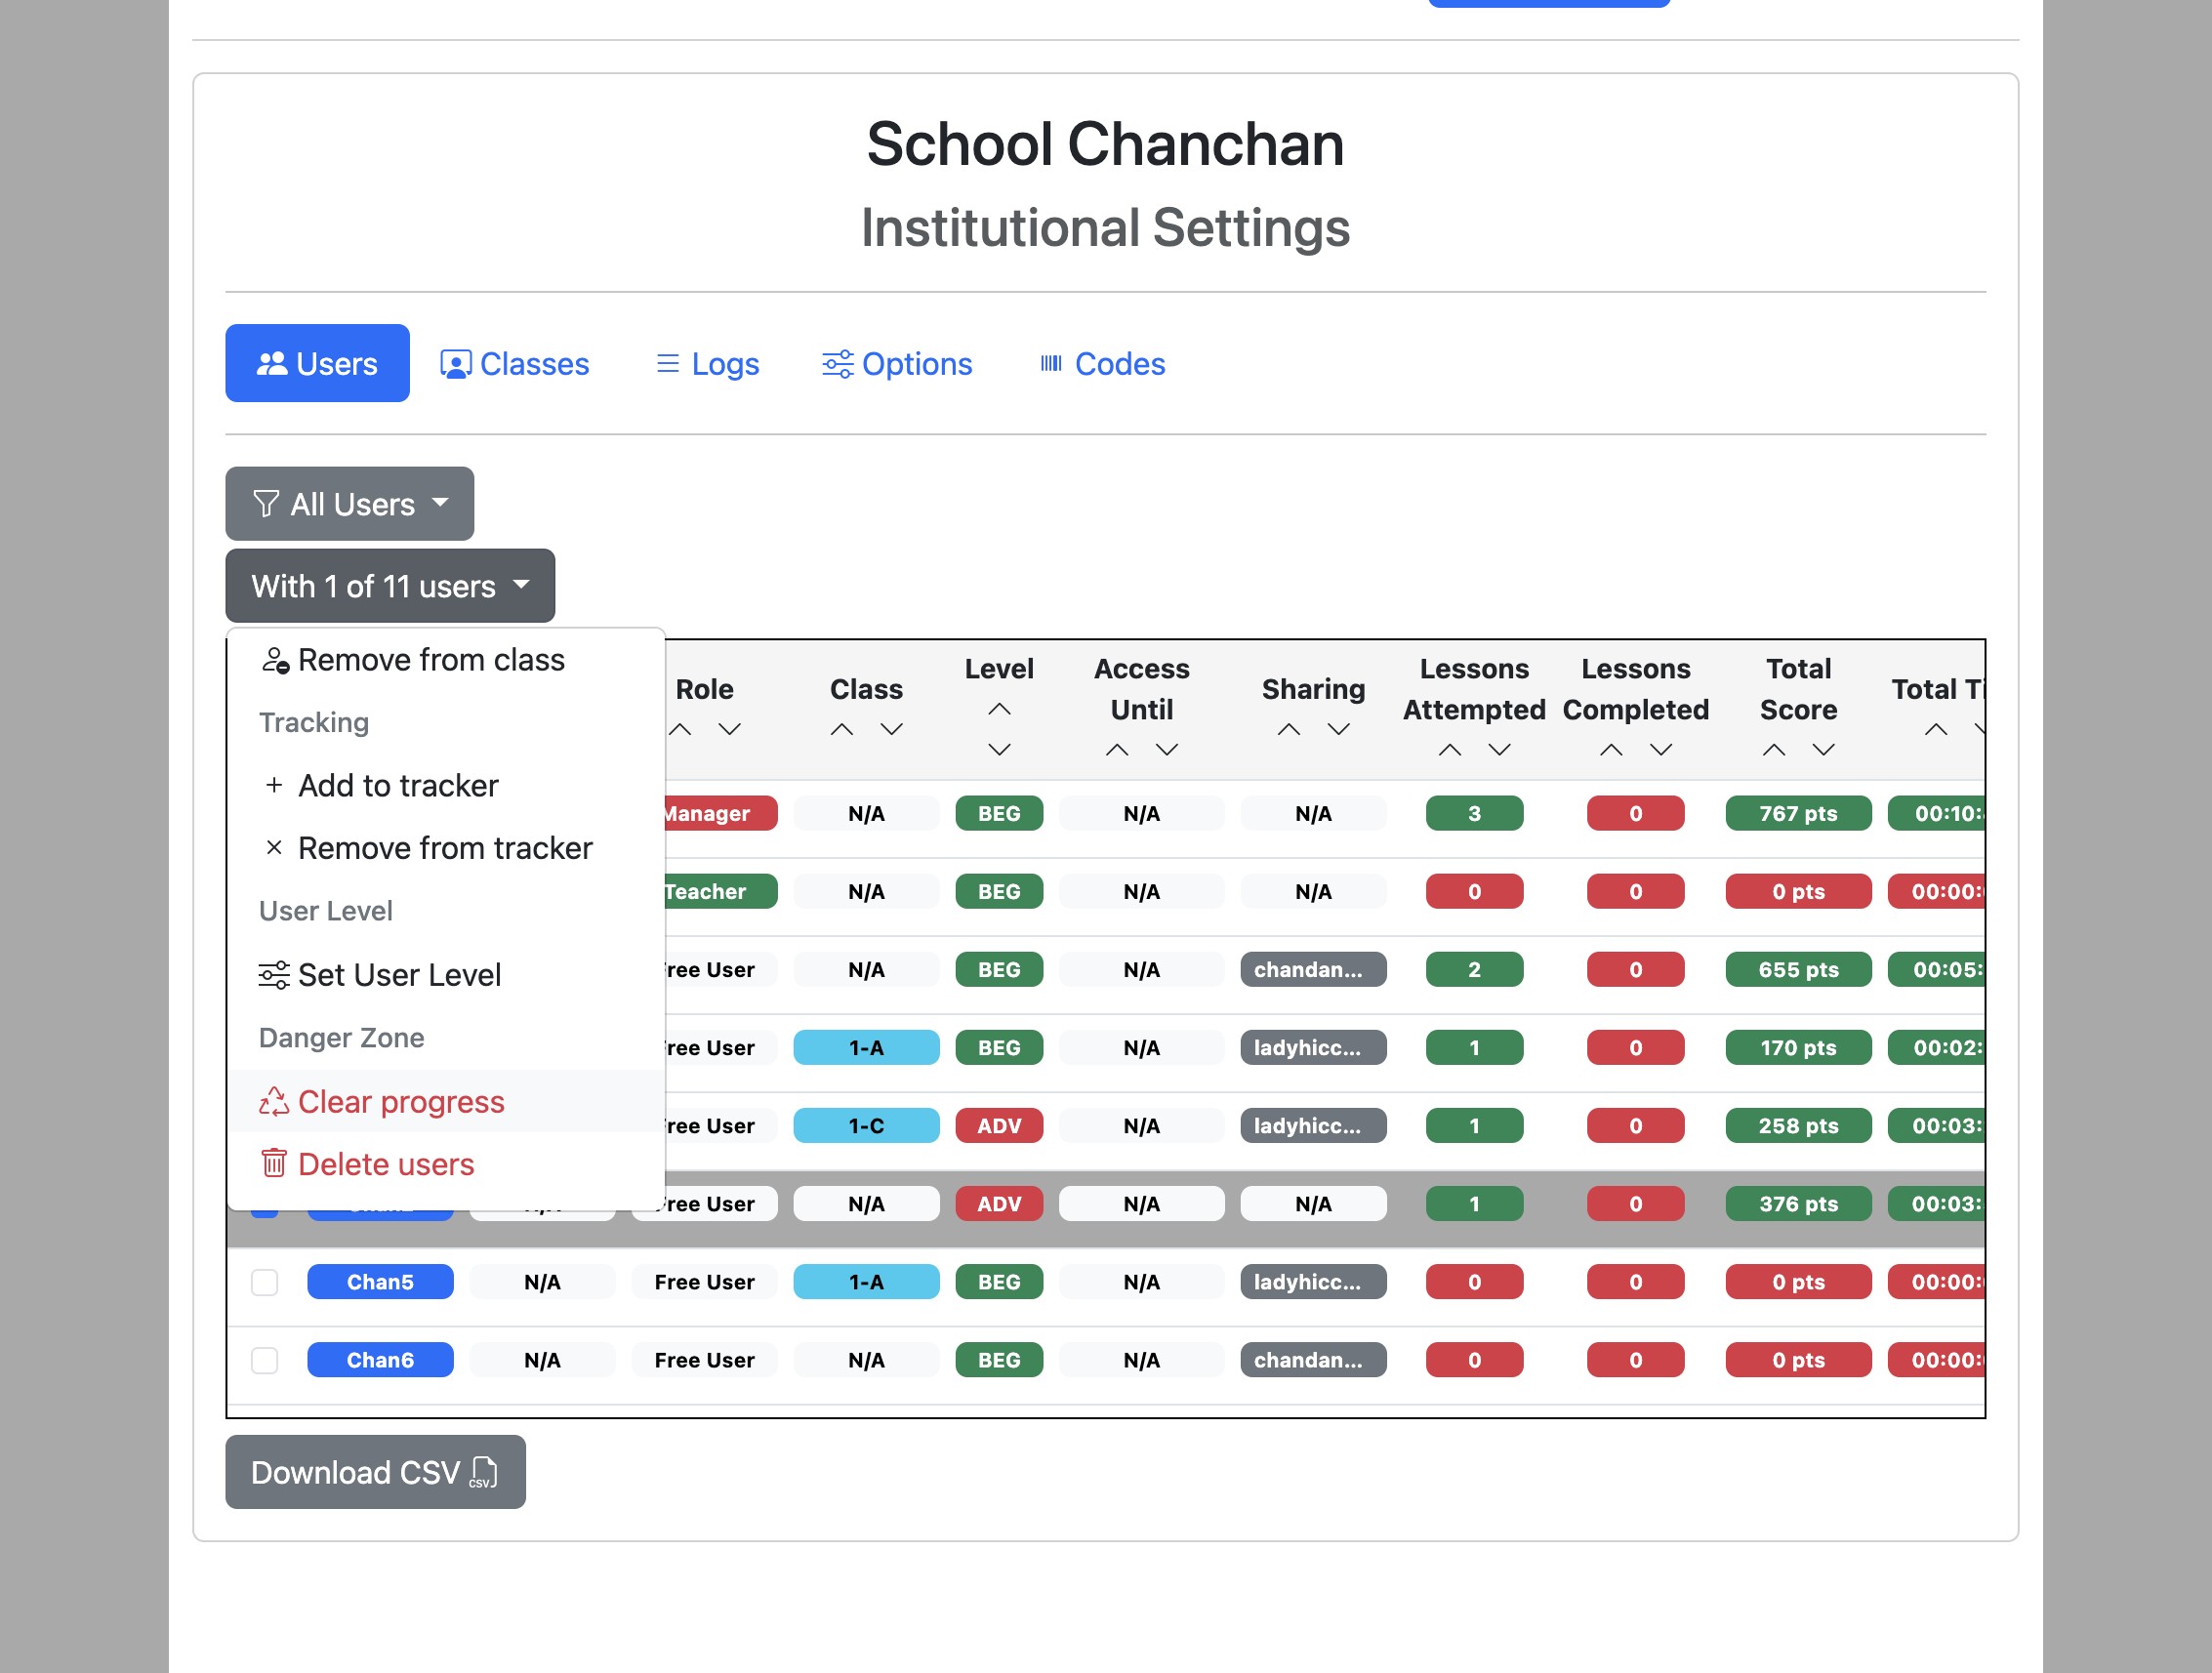
Select users using the checkboxes on the left and click the "With x of n users" dropdown button.
Click "Clear progress".
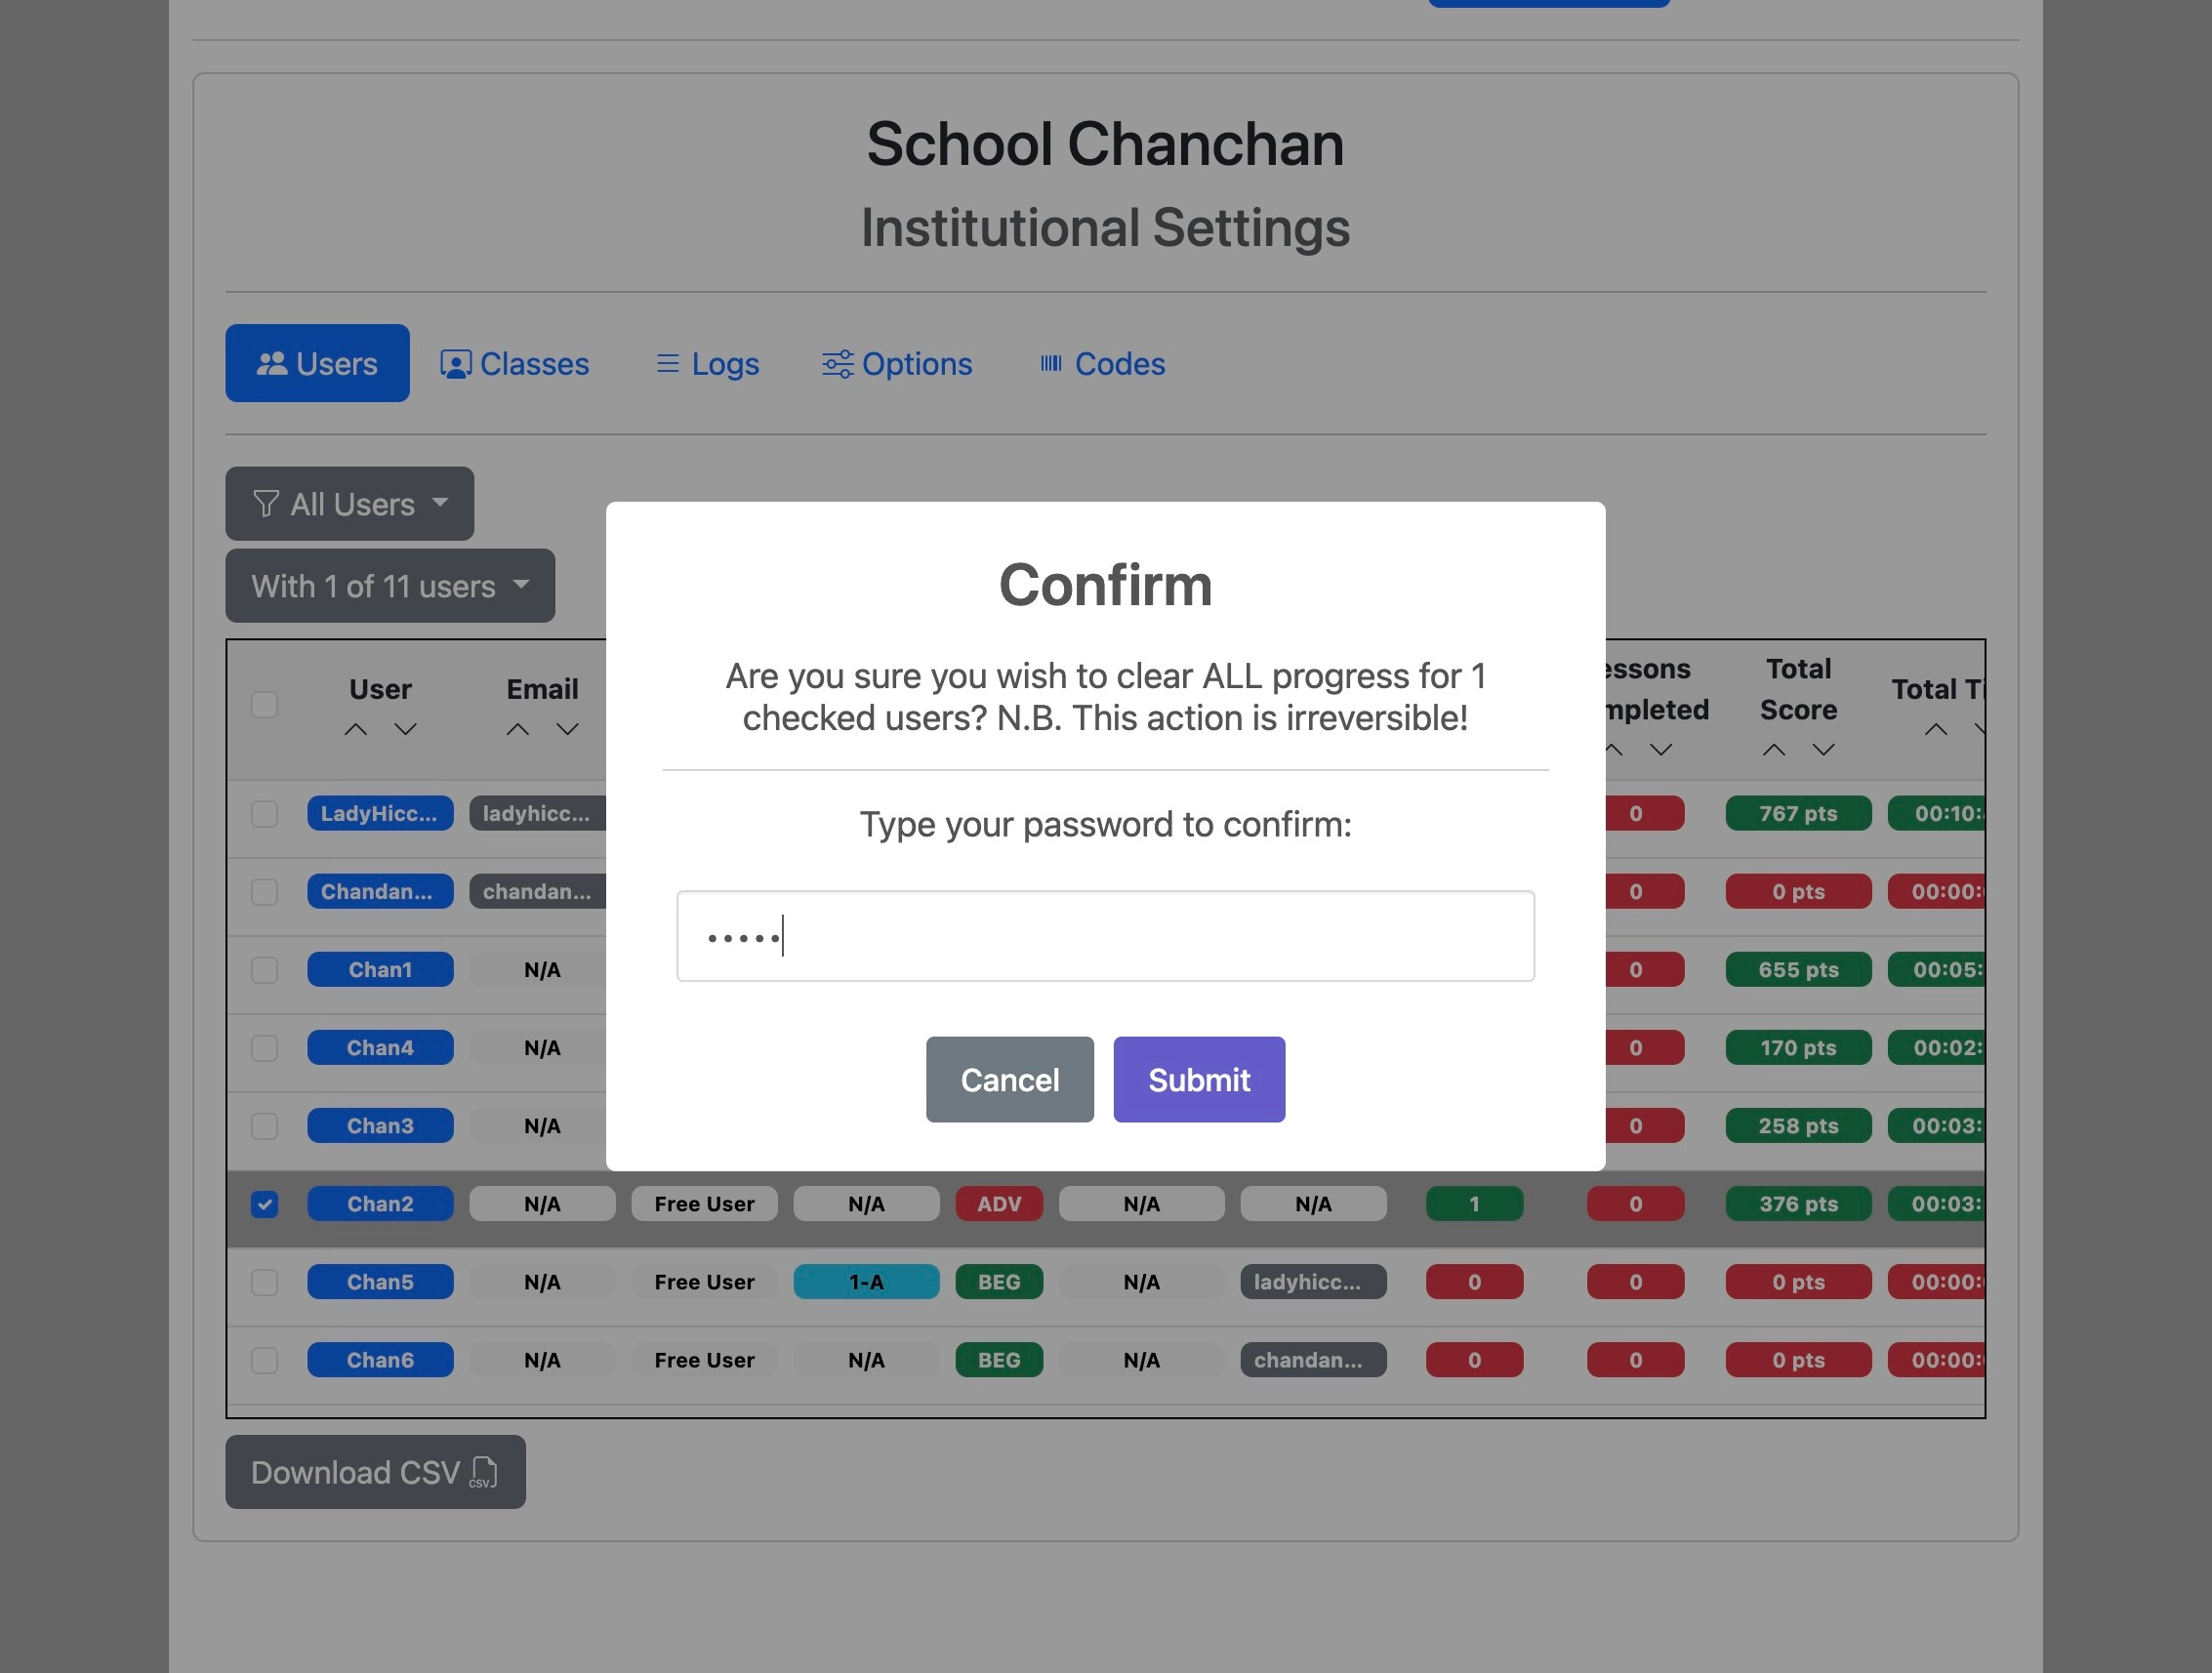
Enter your password and click "Submit" to confirm.
Remove users from your institution
Select users you wish to remove with the checkboxes on the left and click the "With x of n users" dropdown button
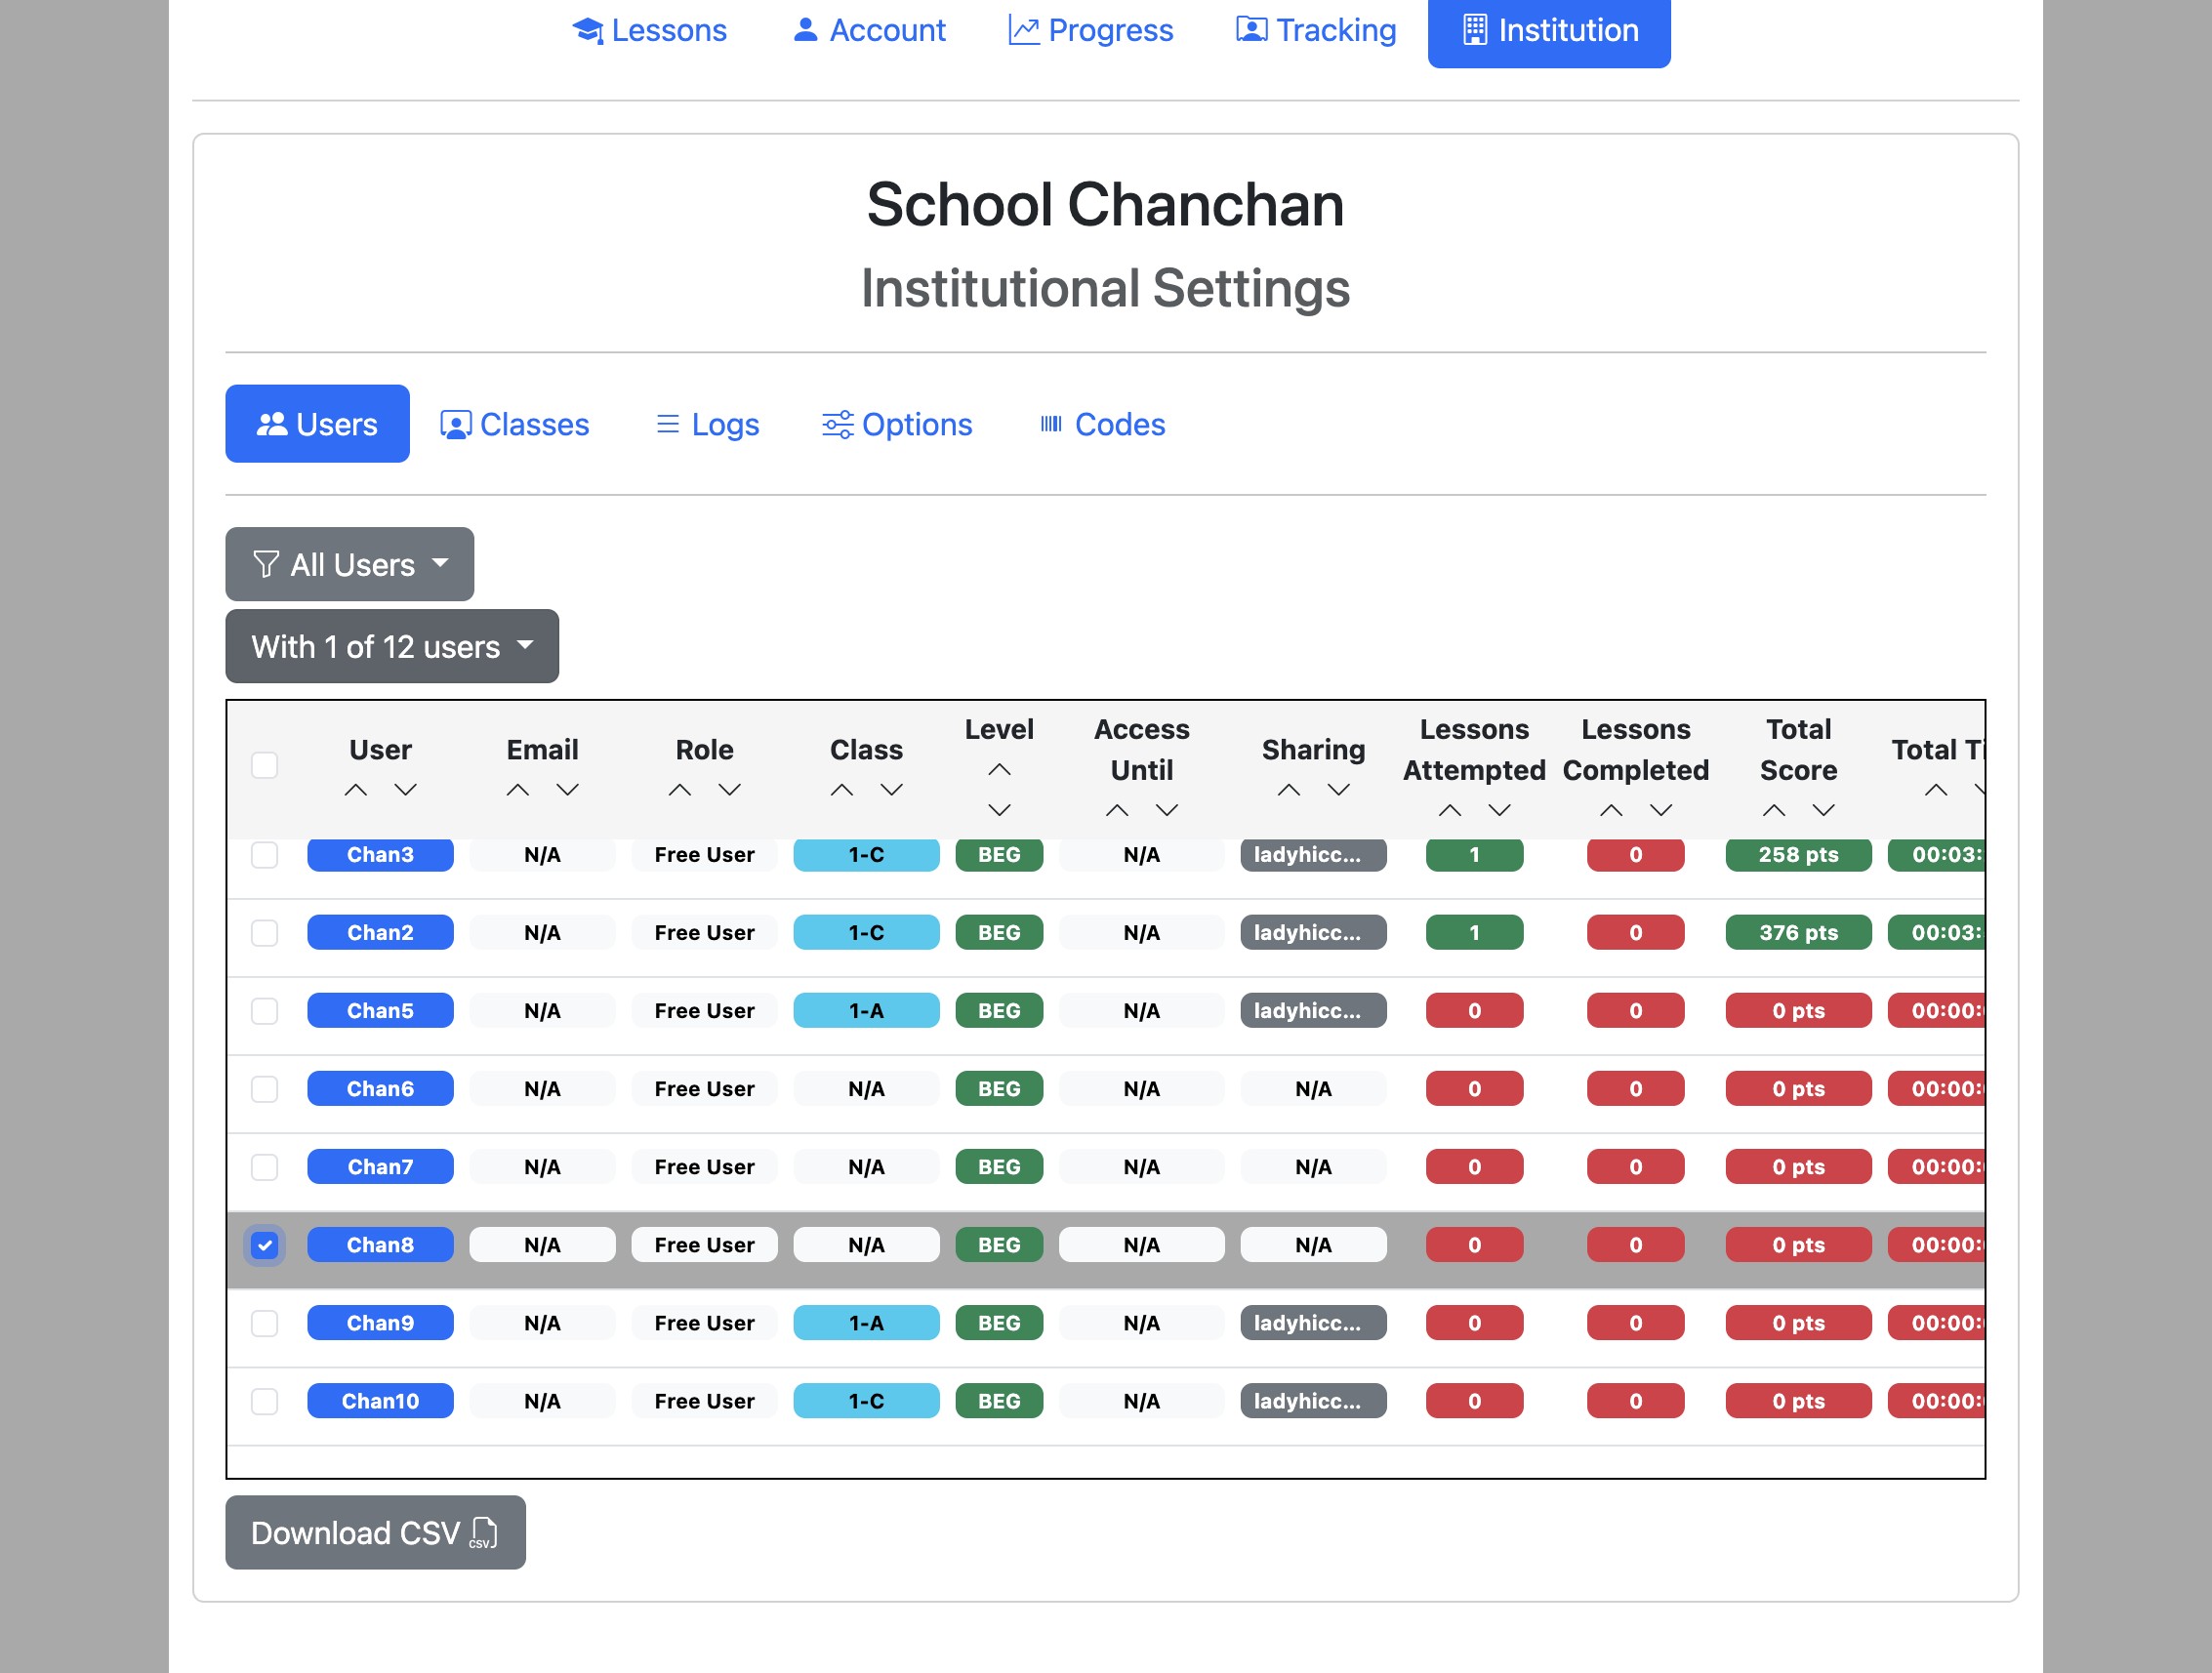
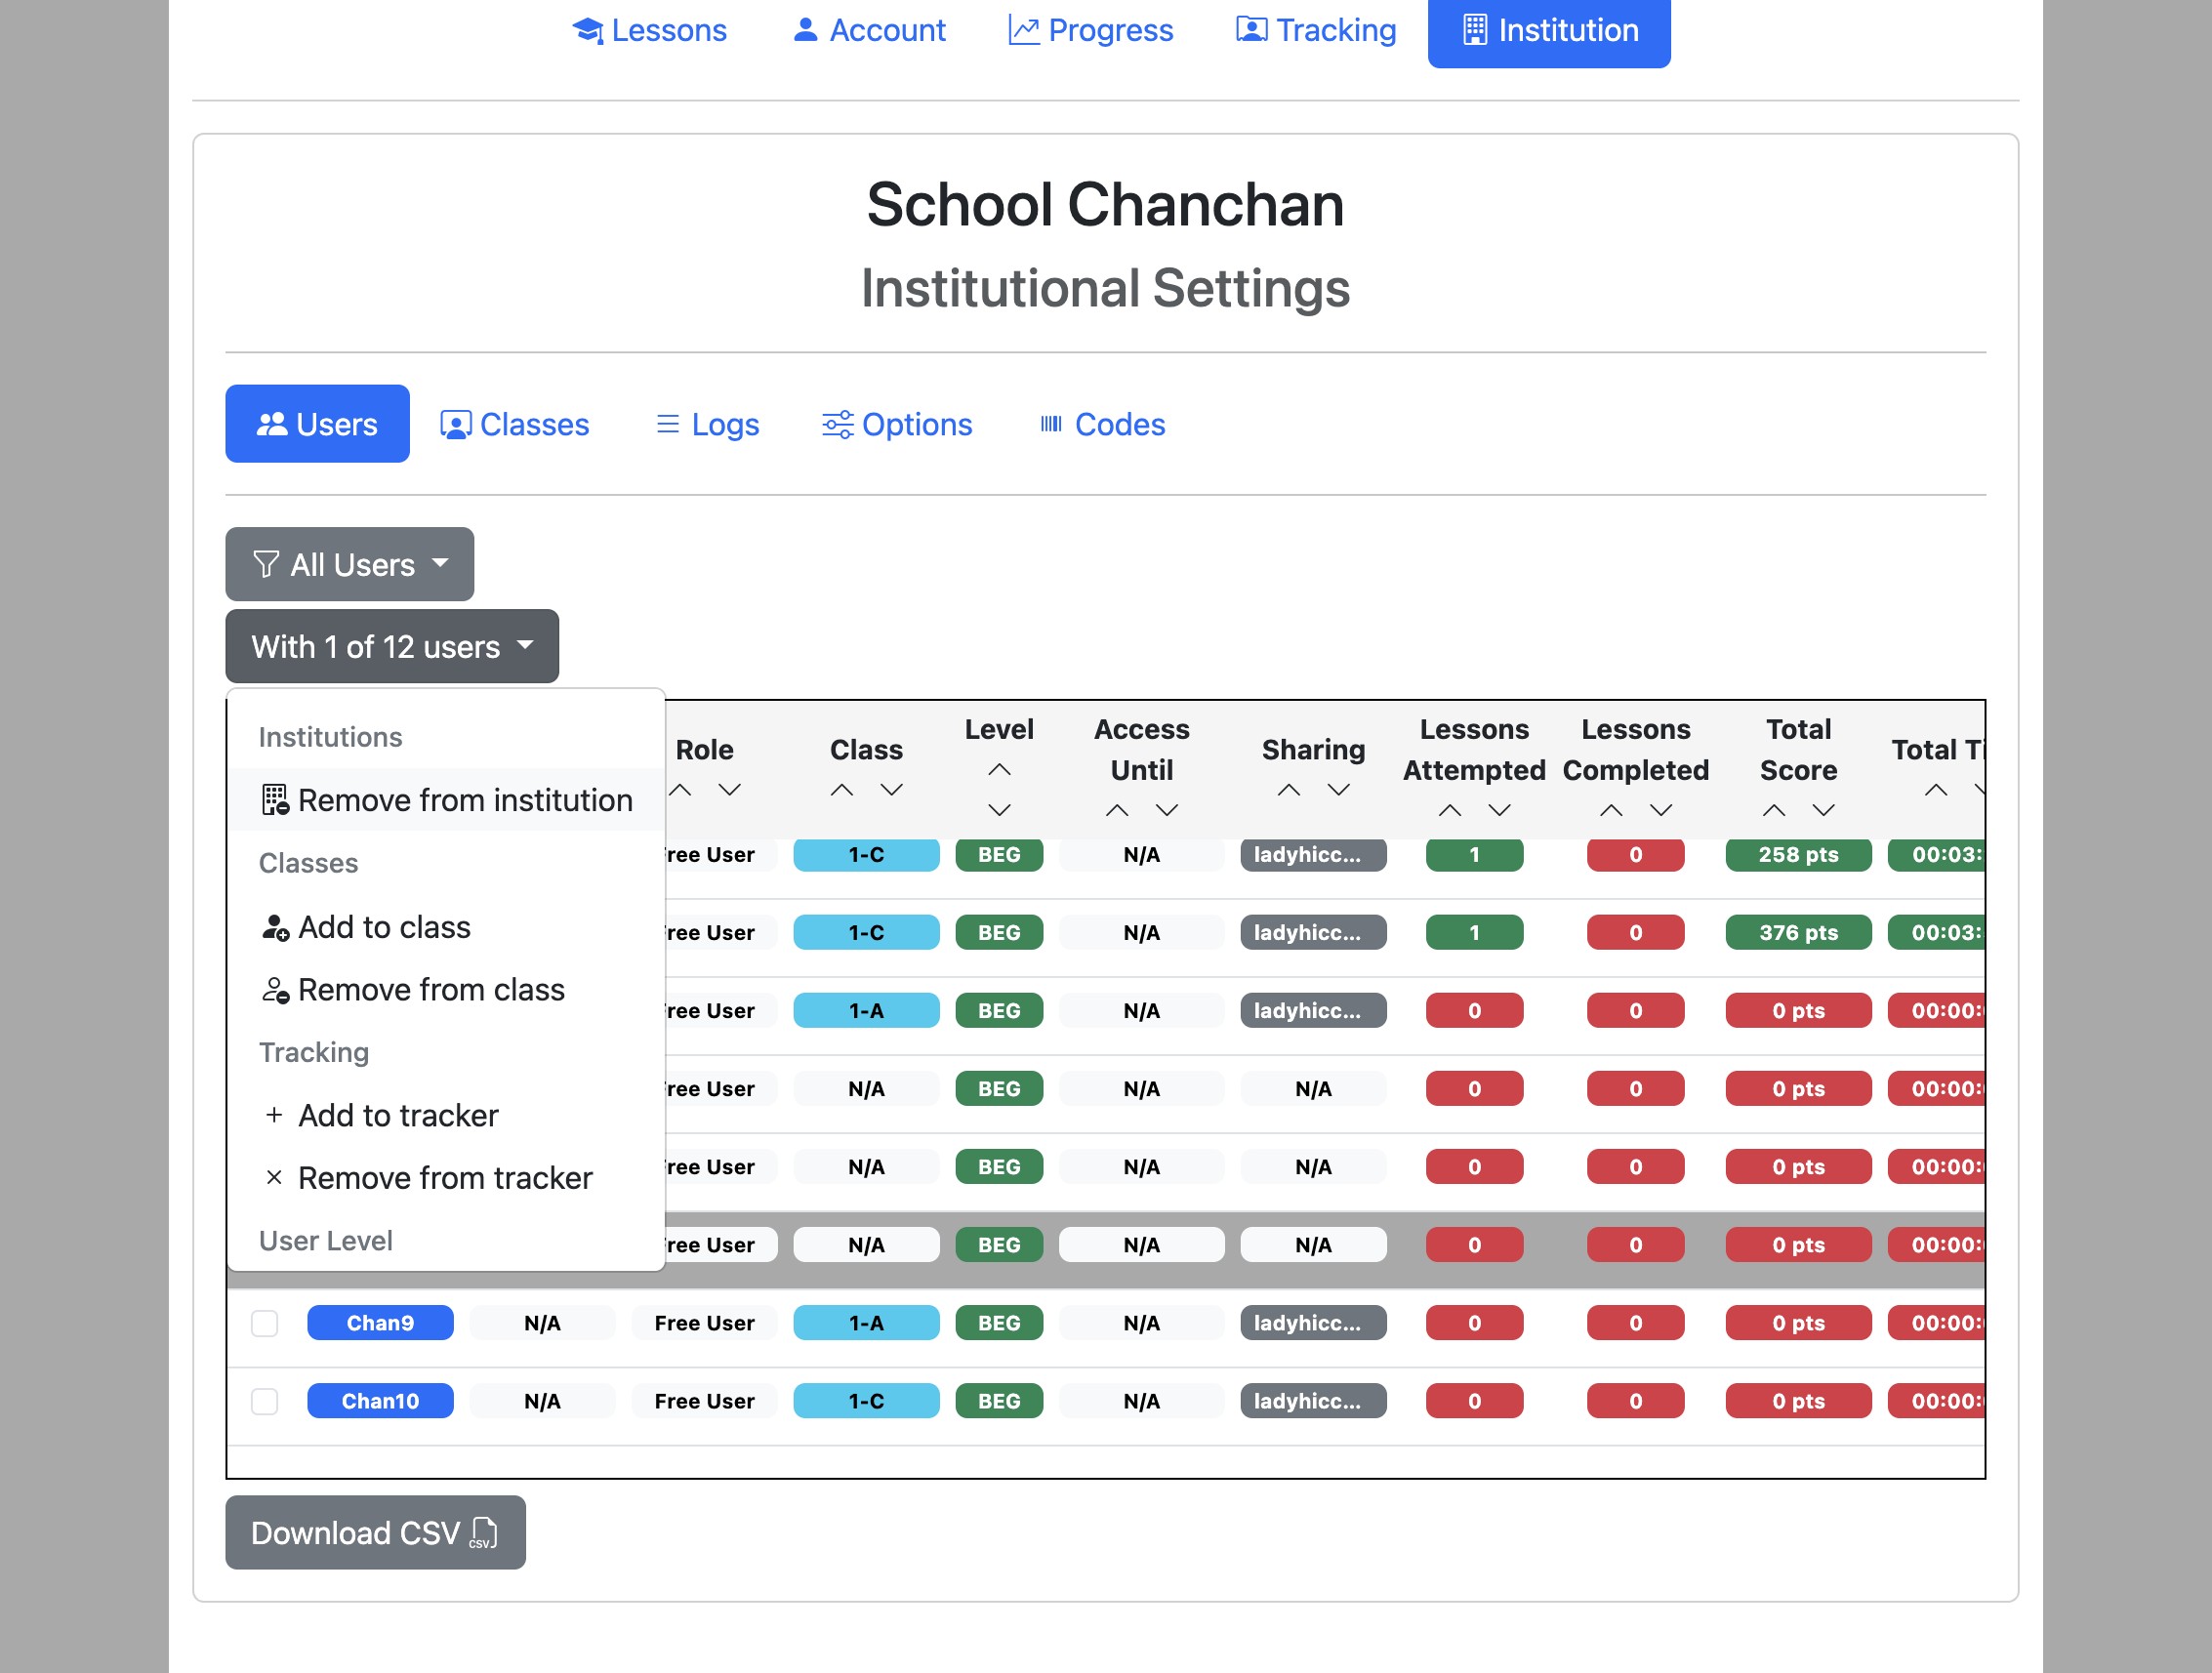
Click "Remove from institution".
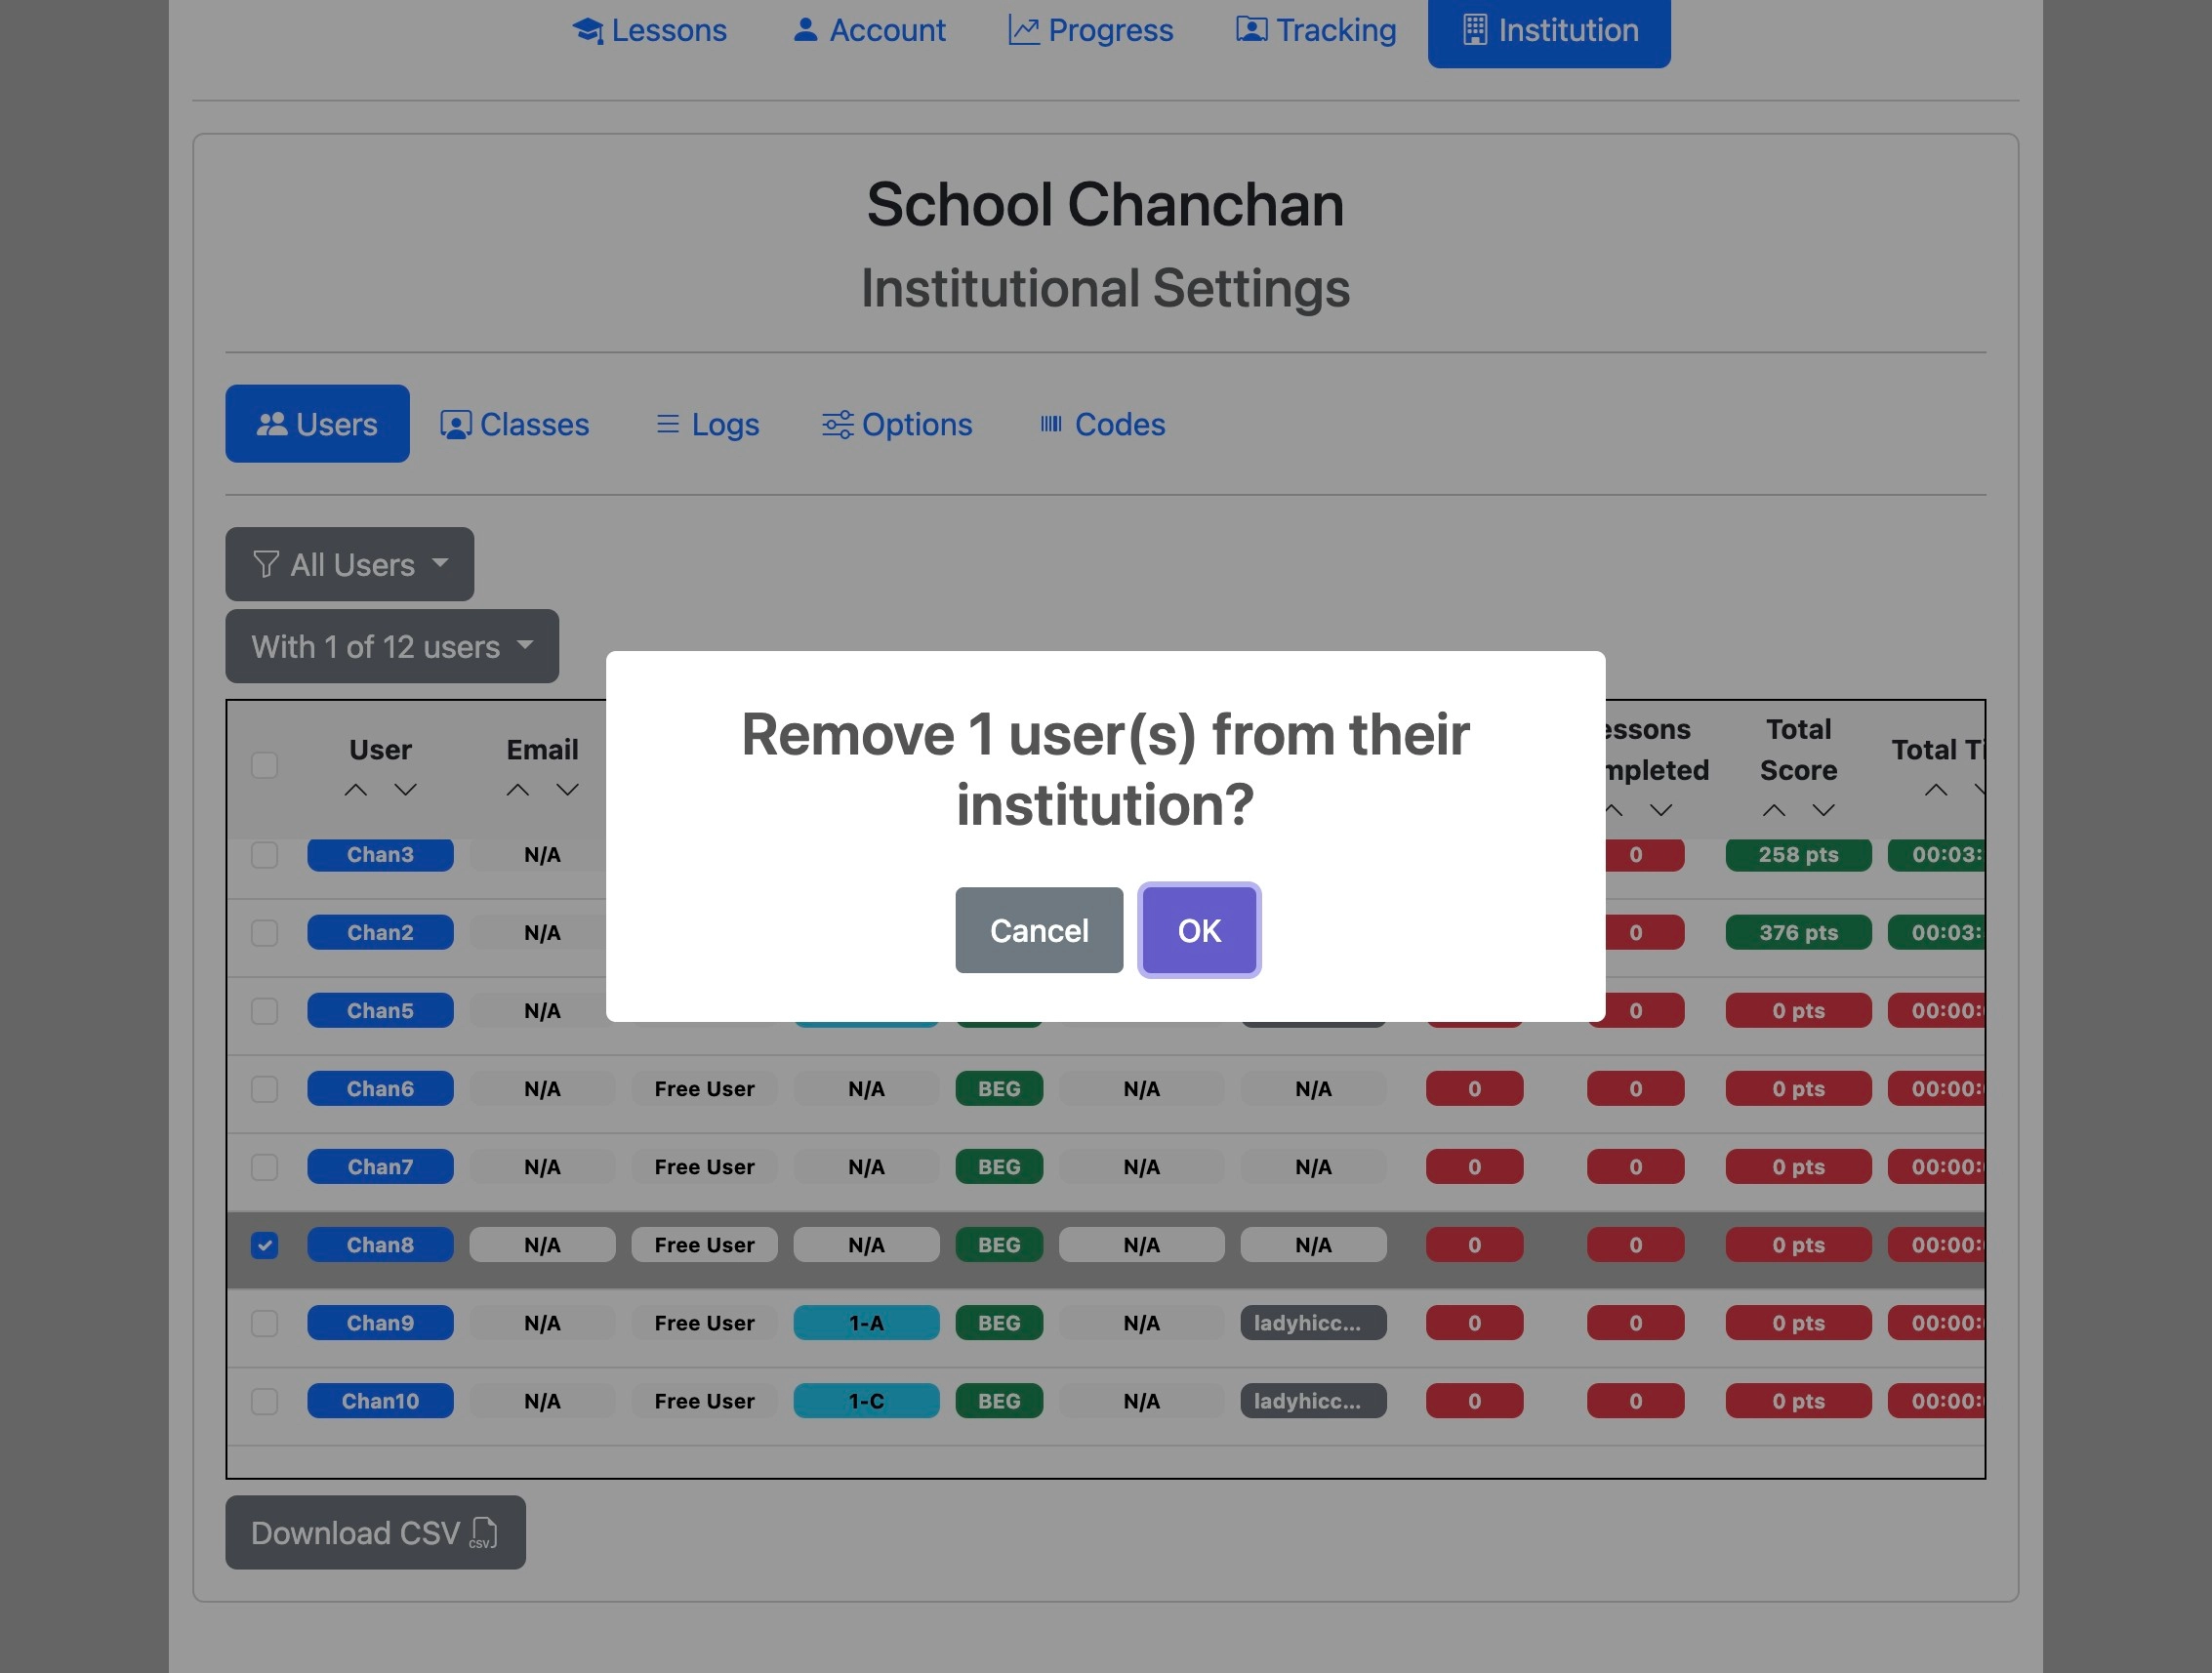
Click "OK" to confirm.
Managers cannot remove themselves from the institution.
Delete user accounts
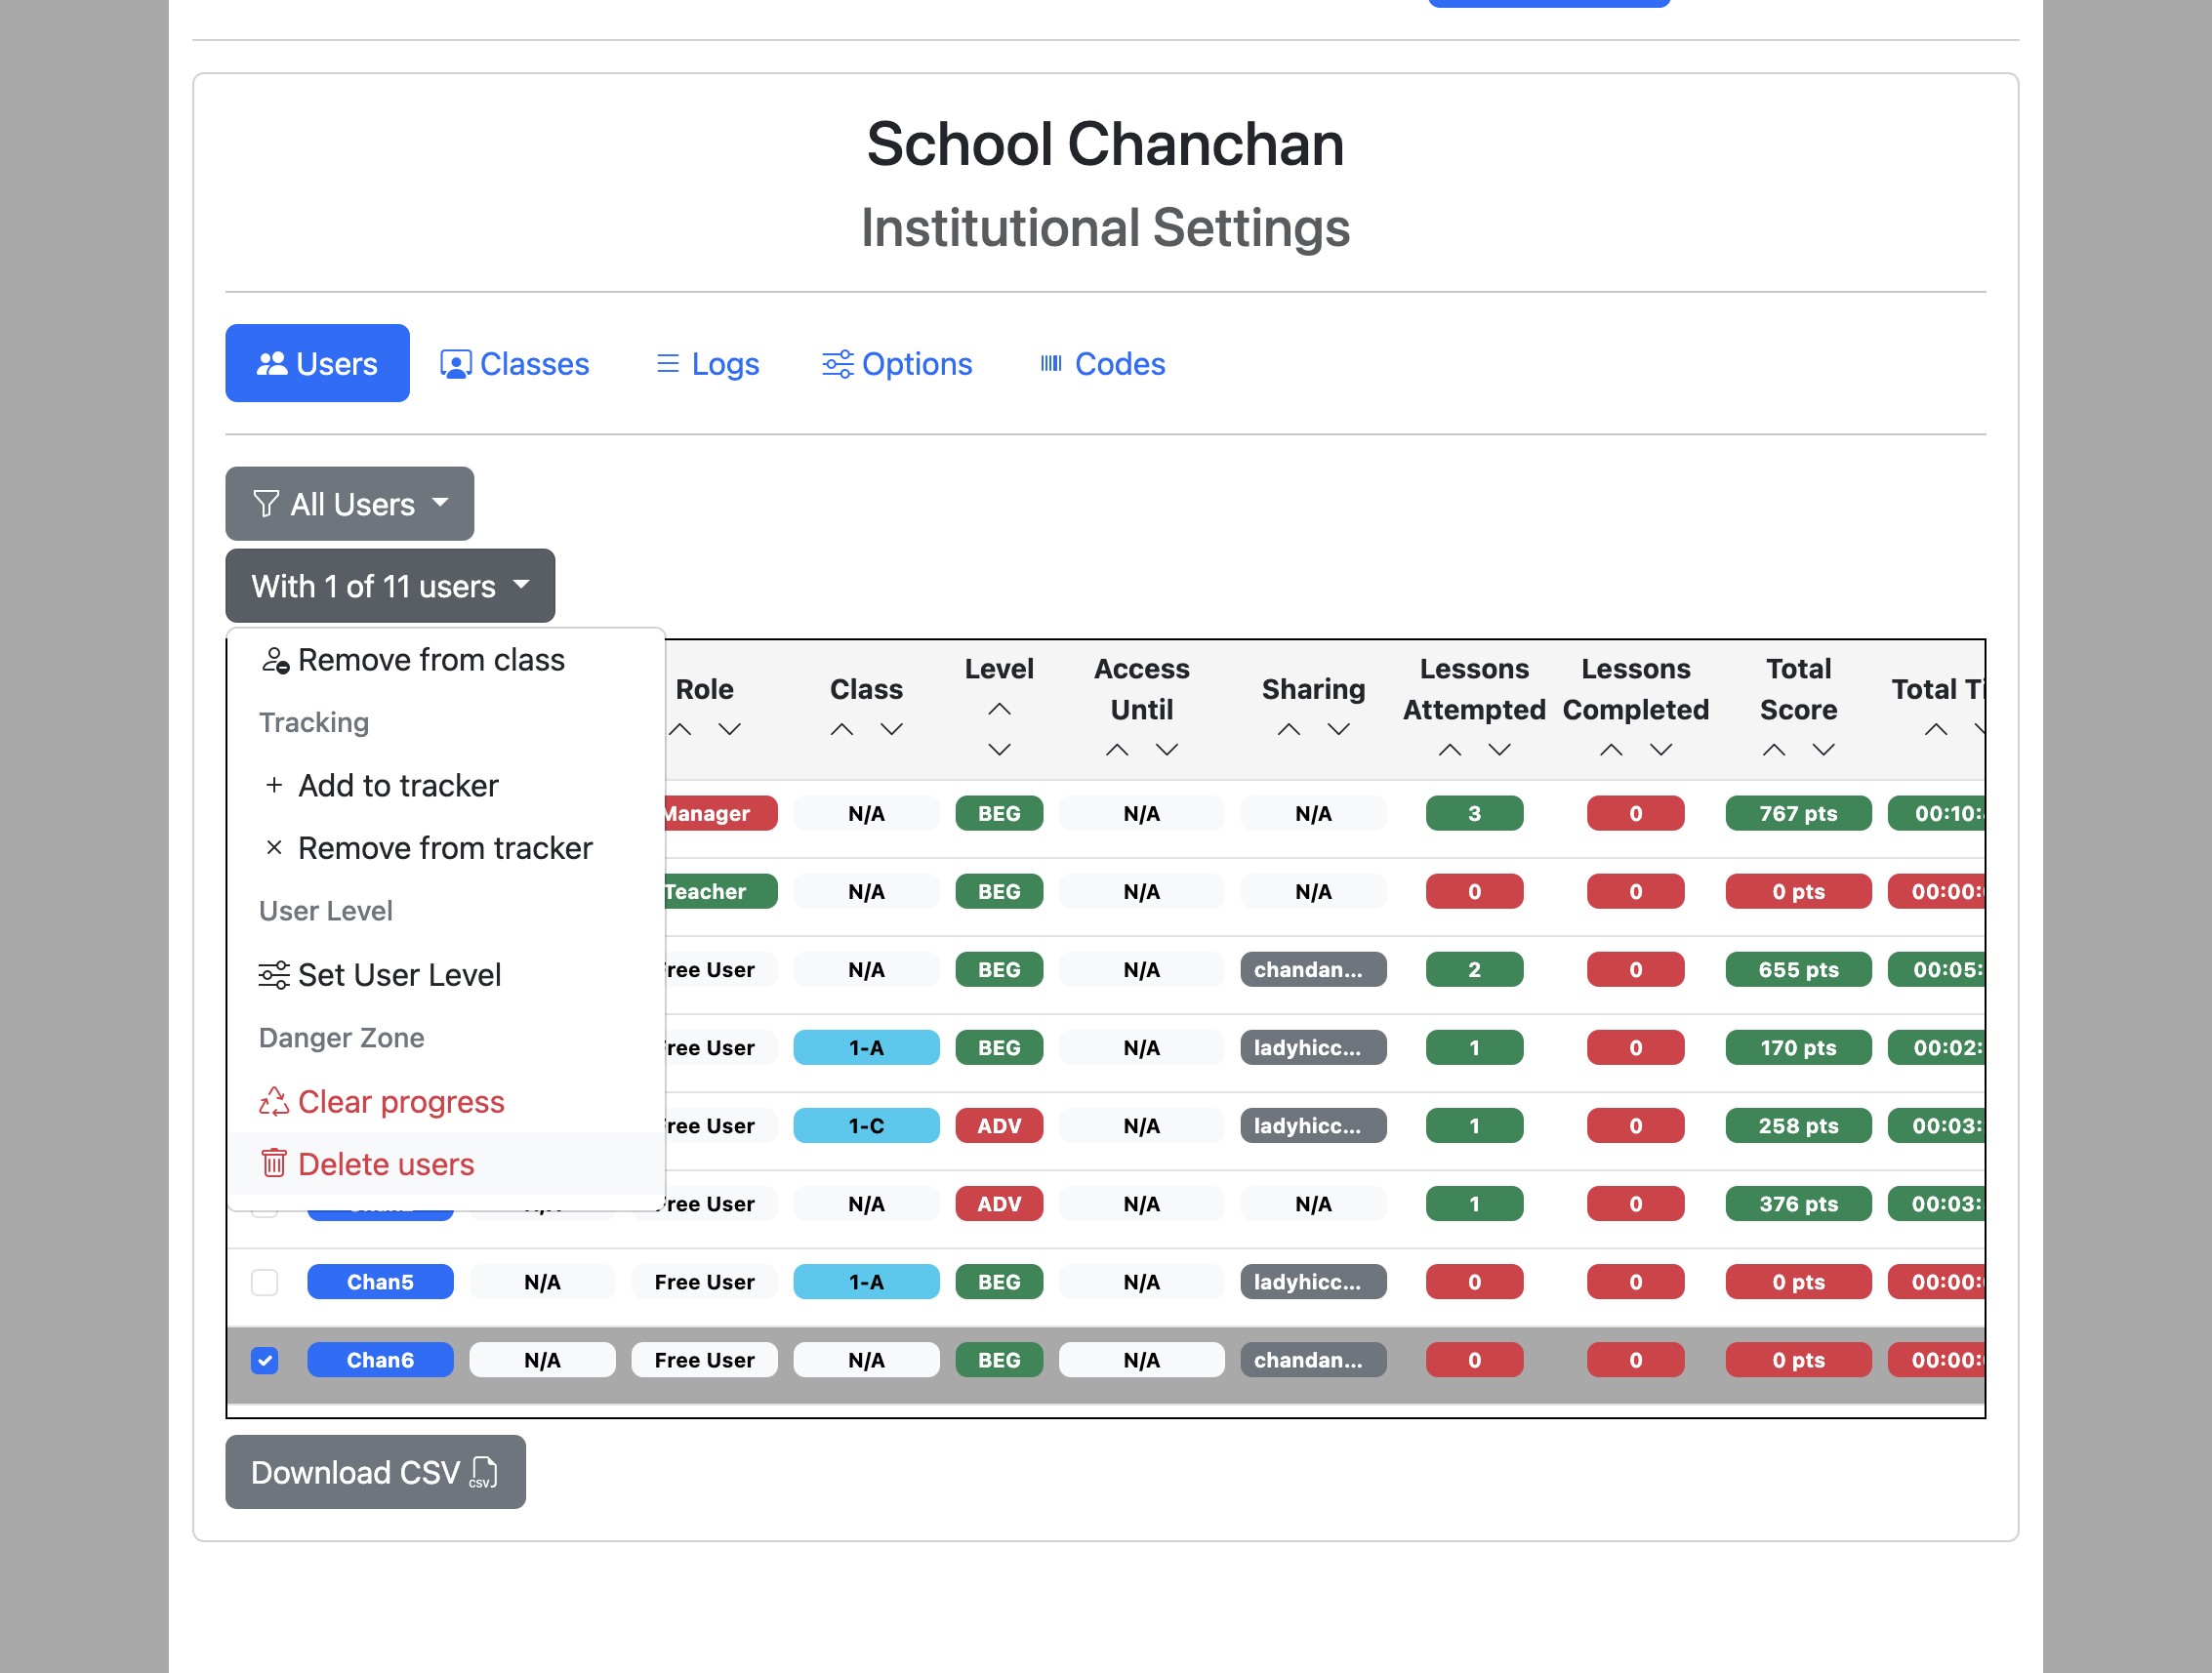
Select users using the checkboxes on the left and click the "With x of n users" dropdown button.
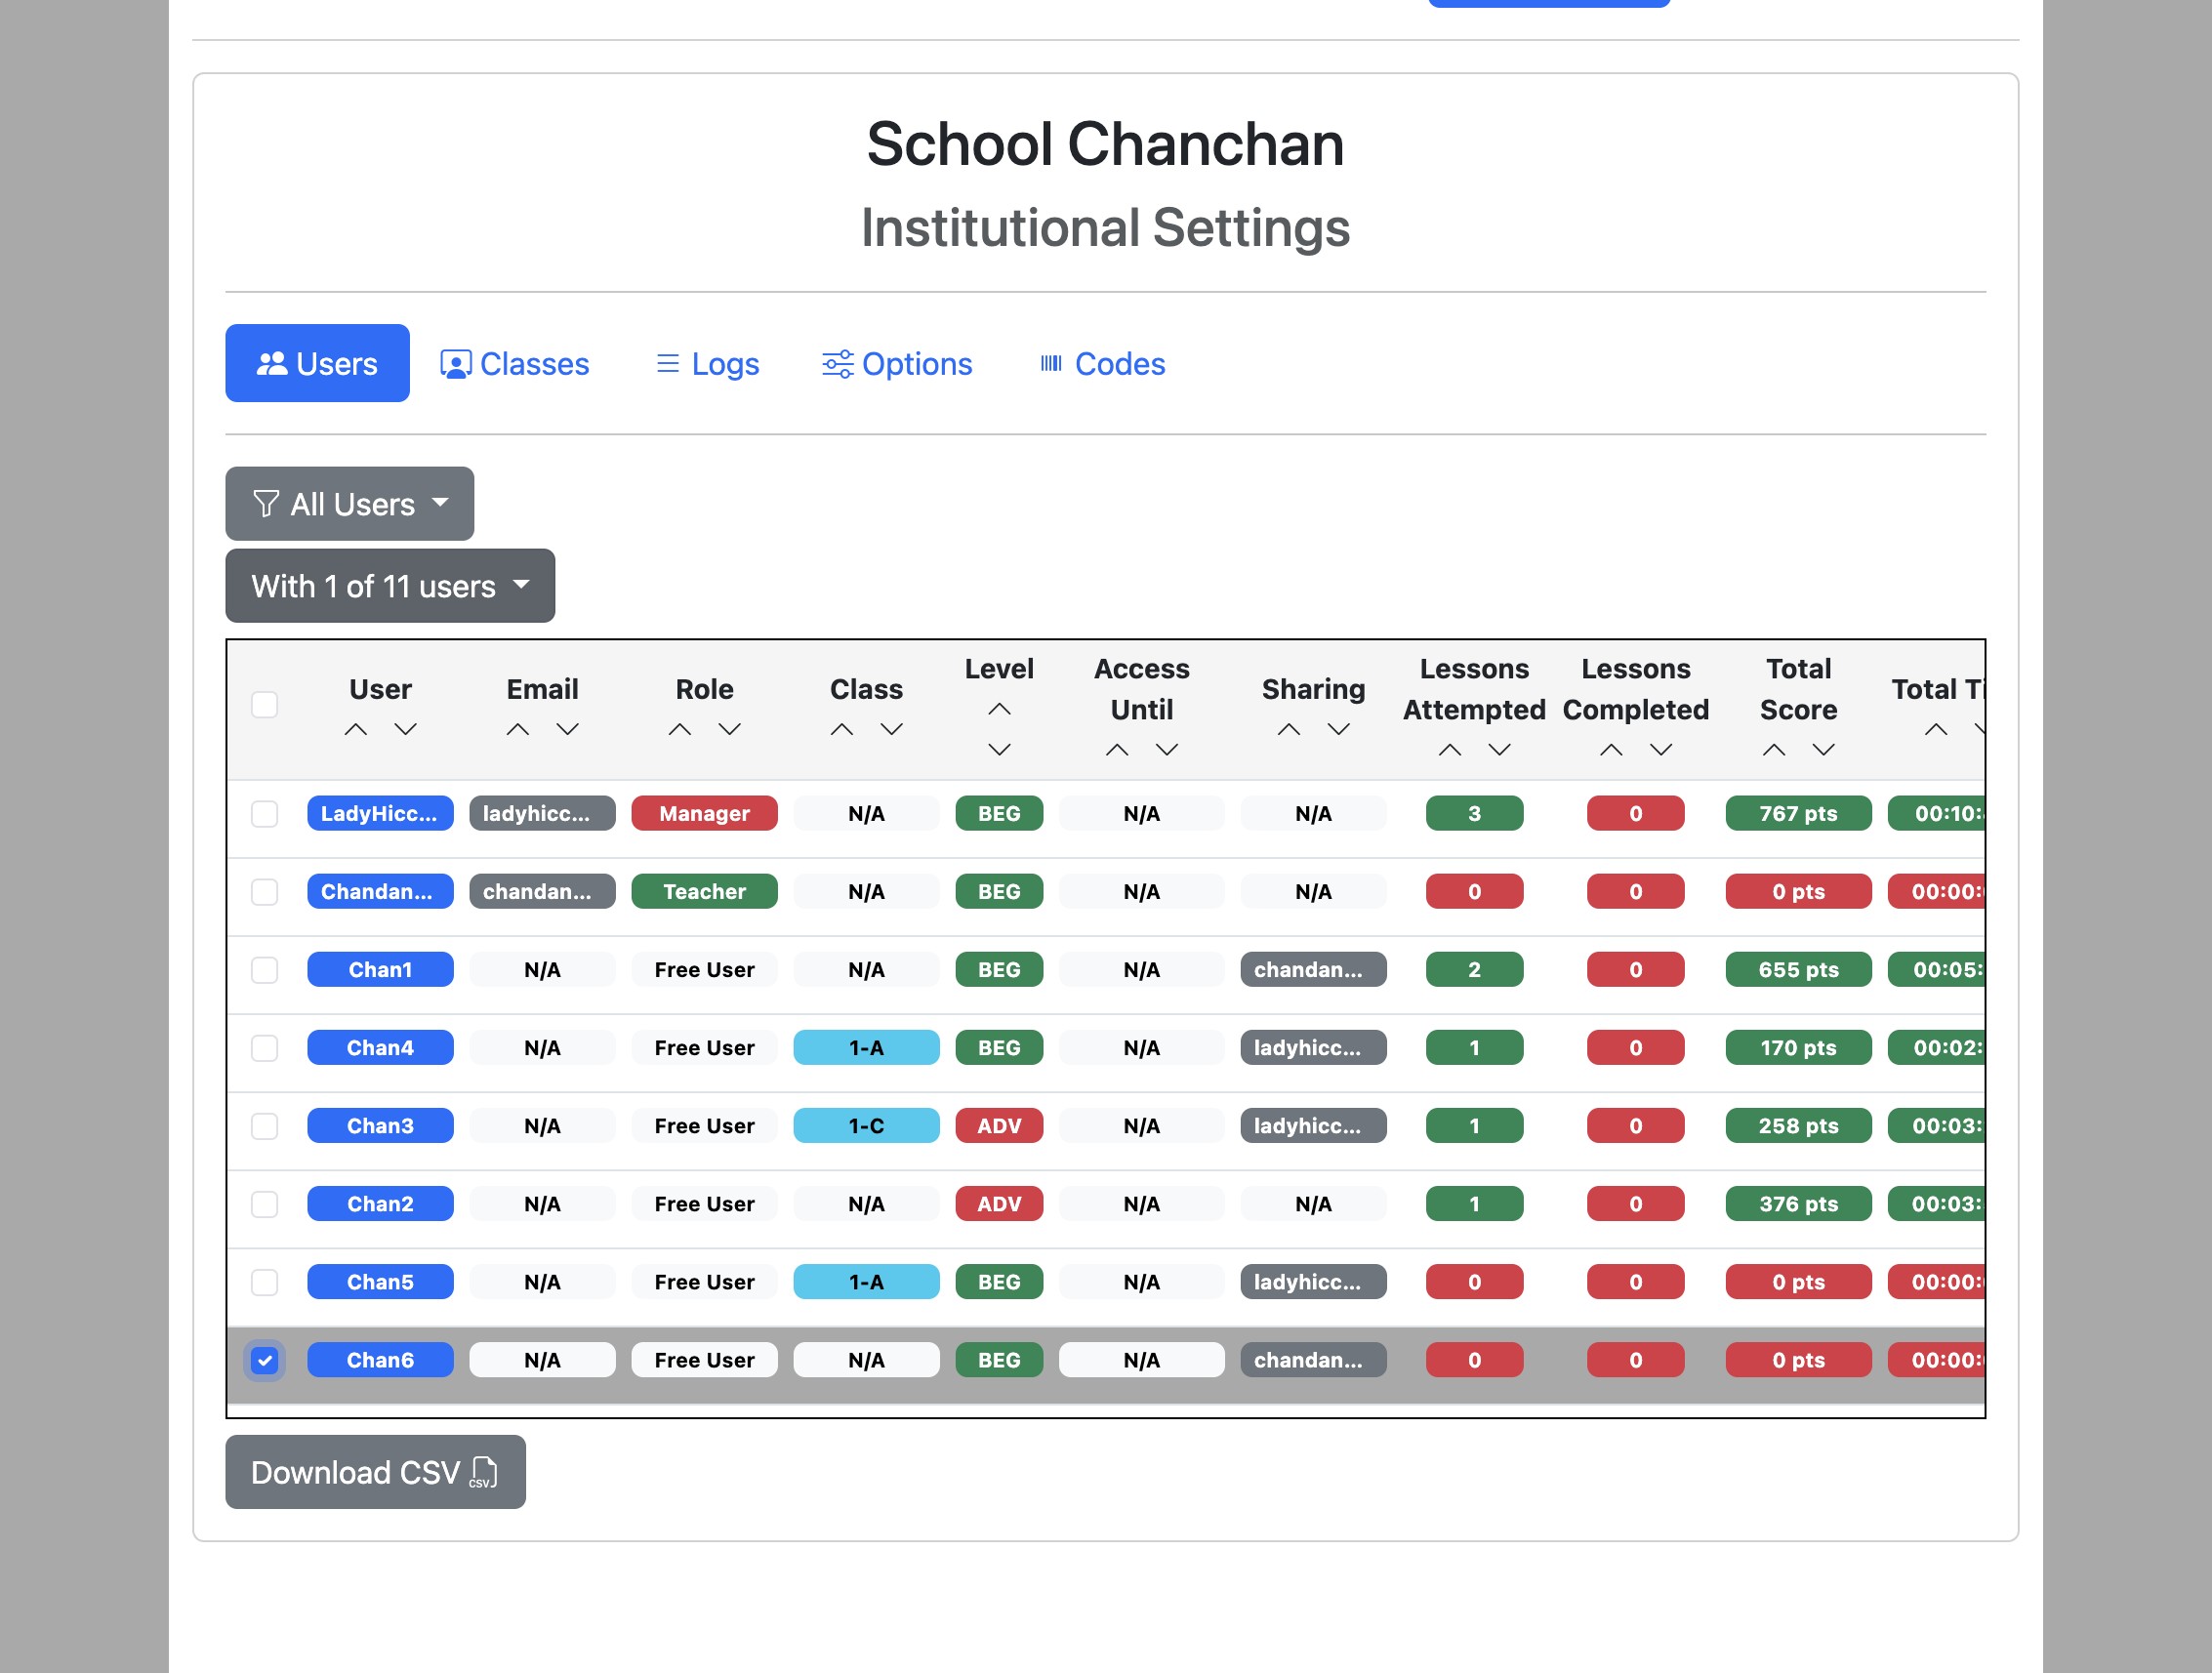
Click "Delete users".
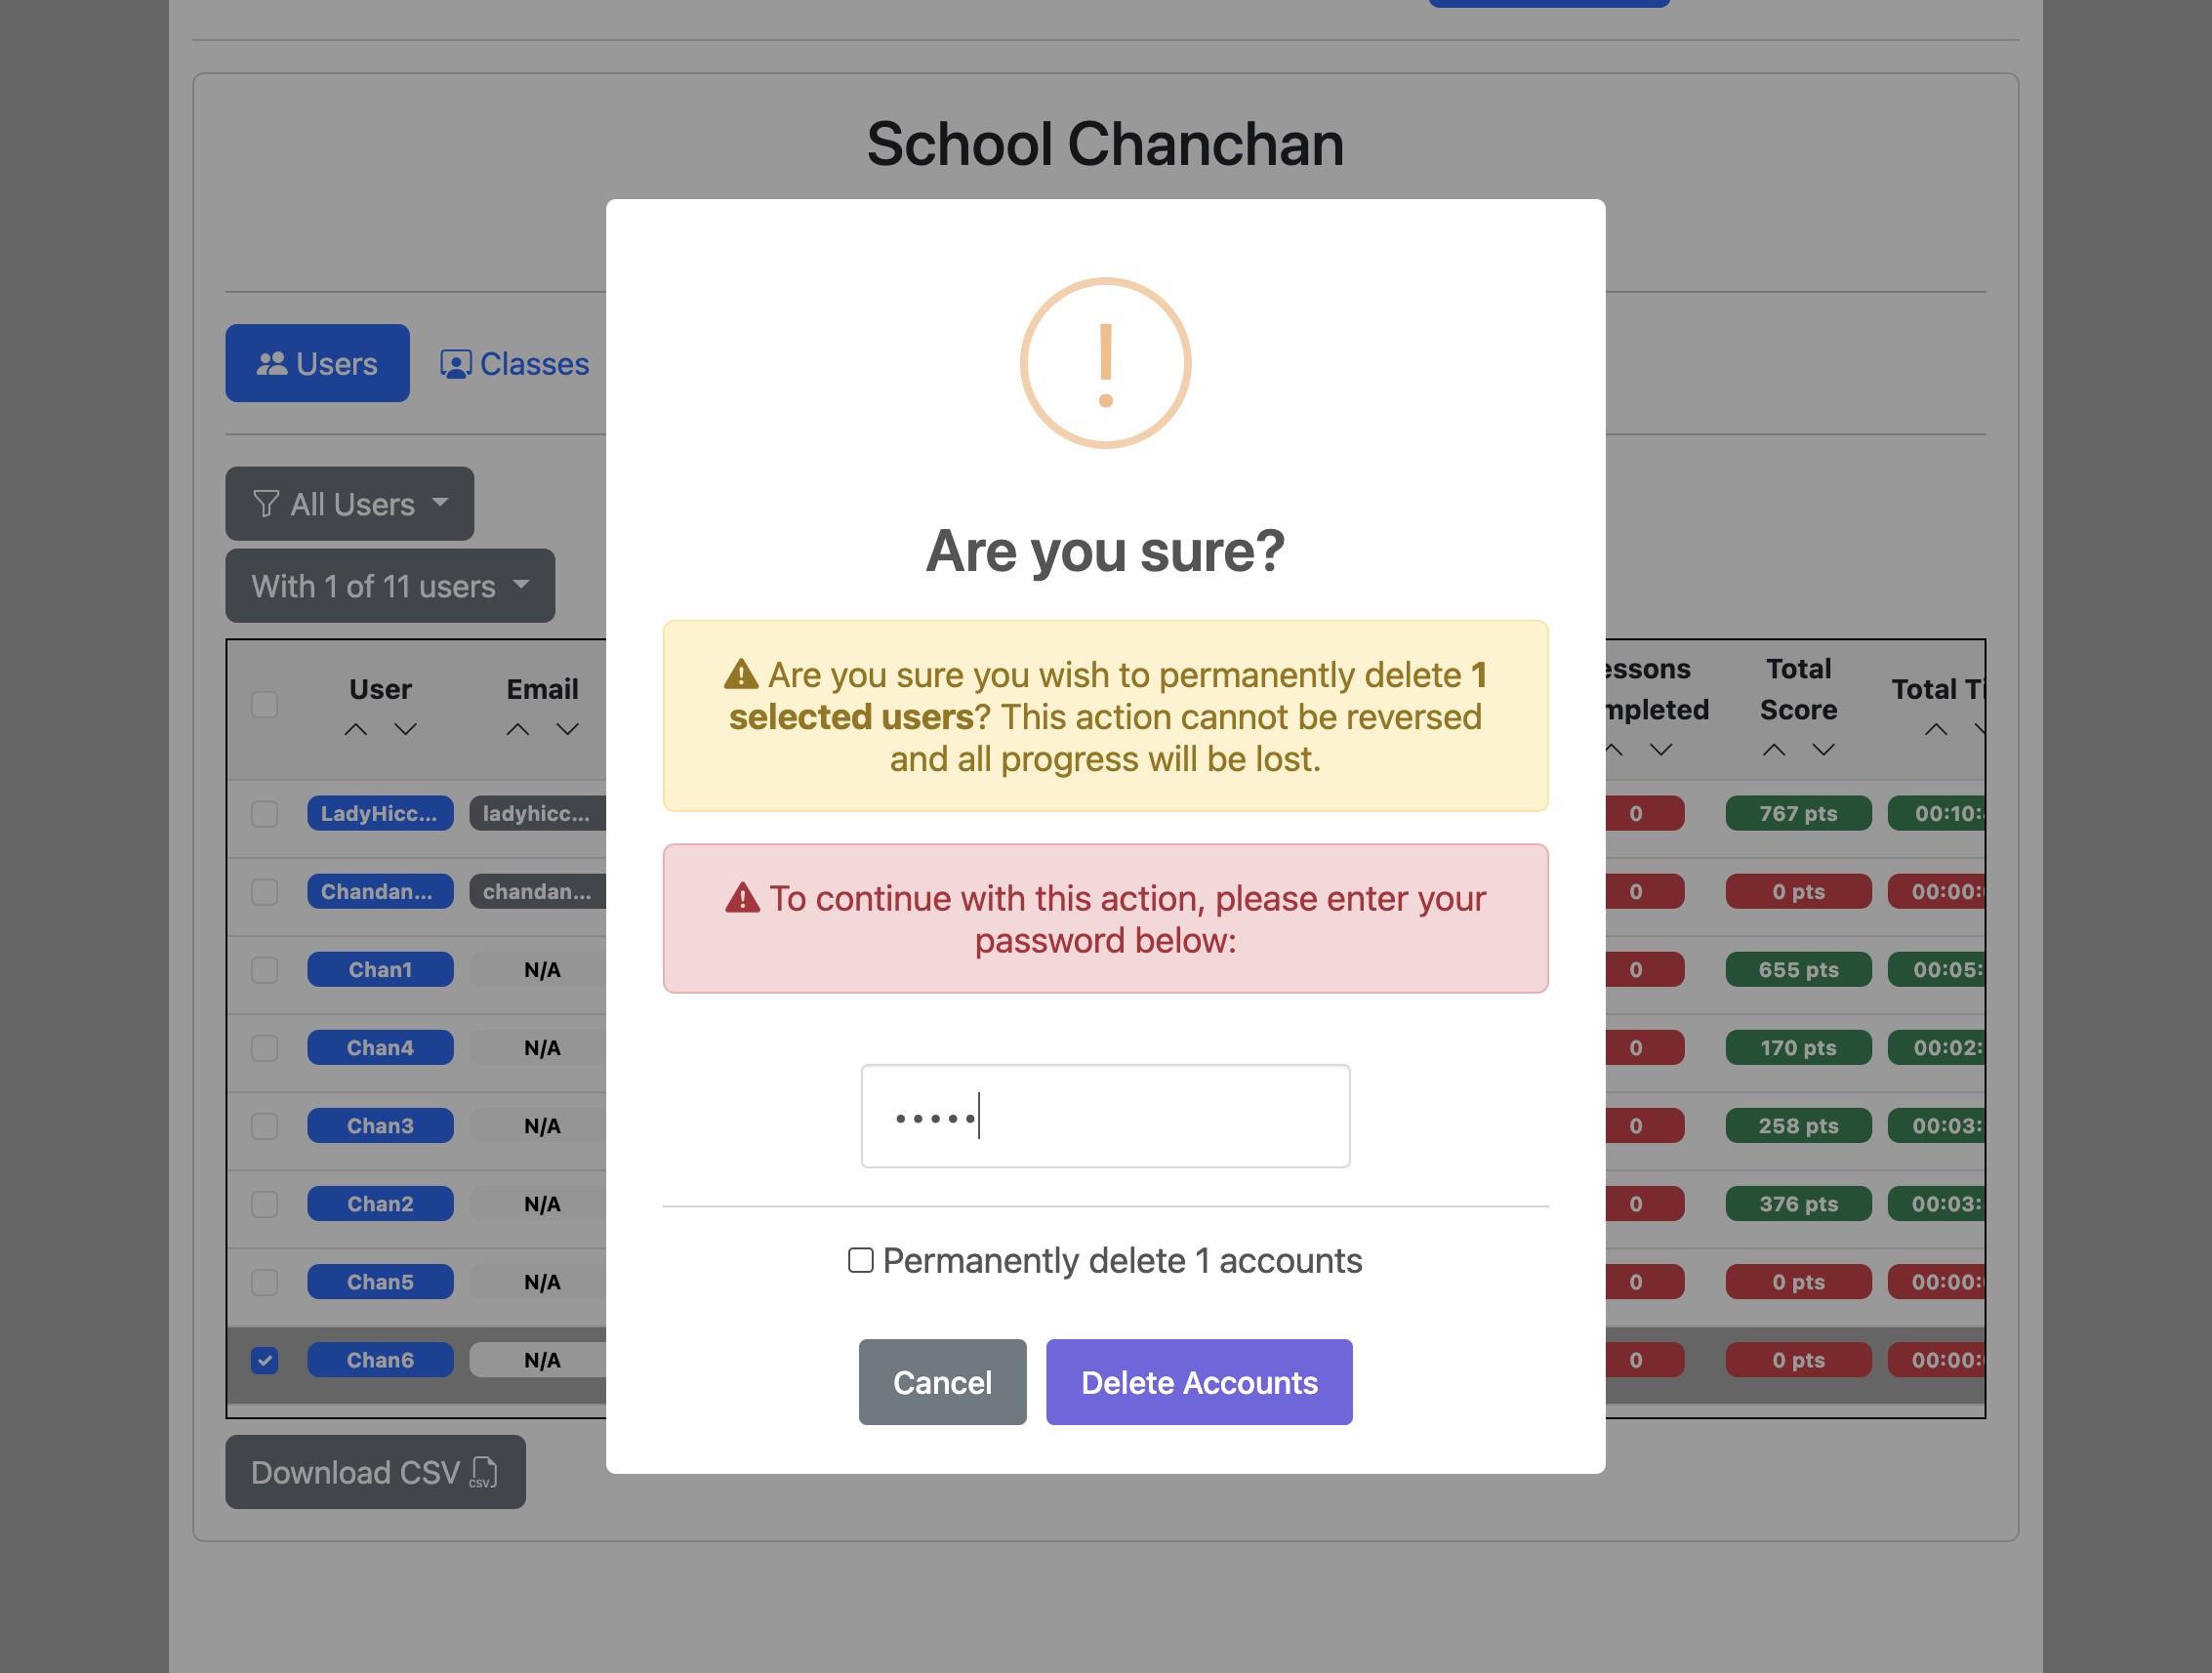
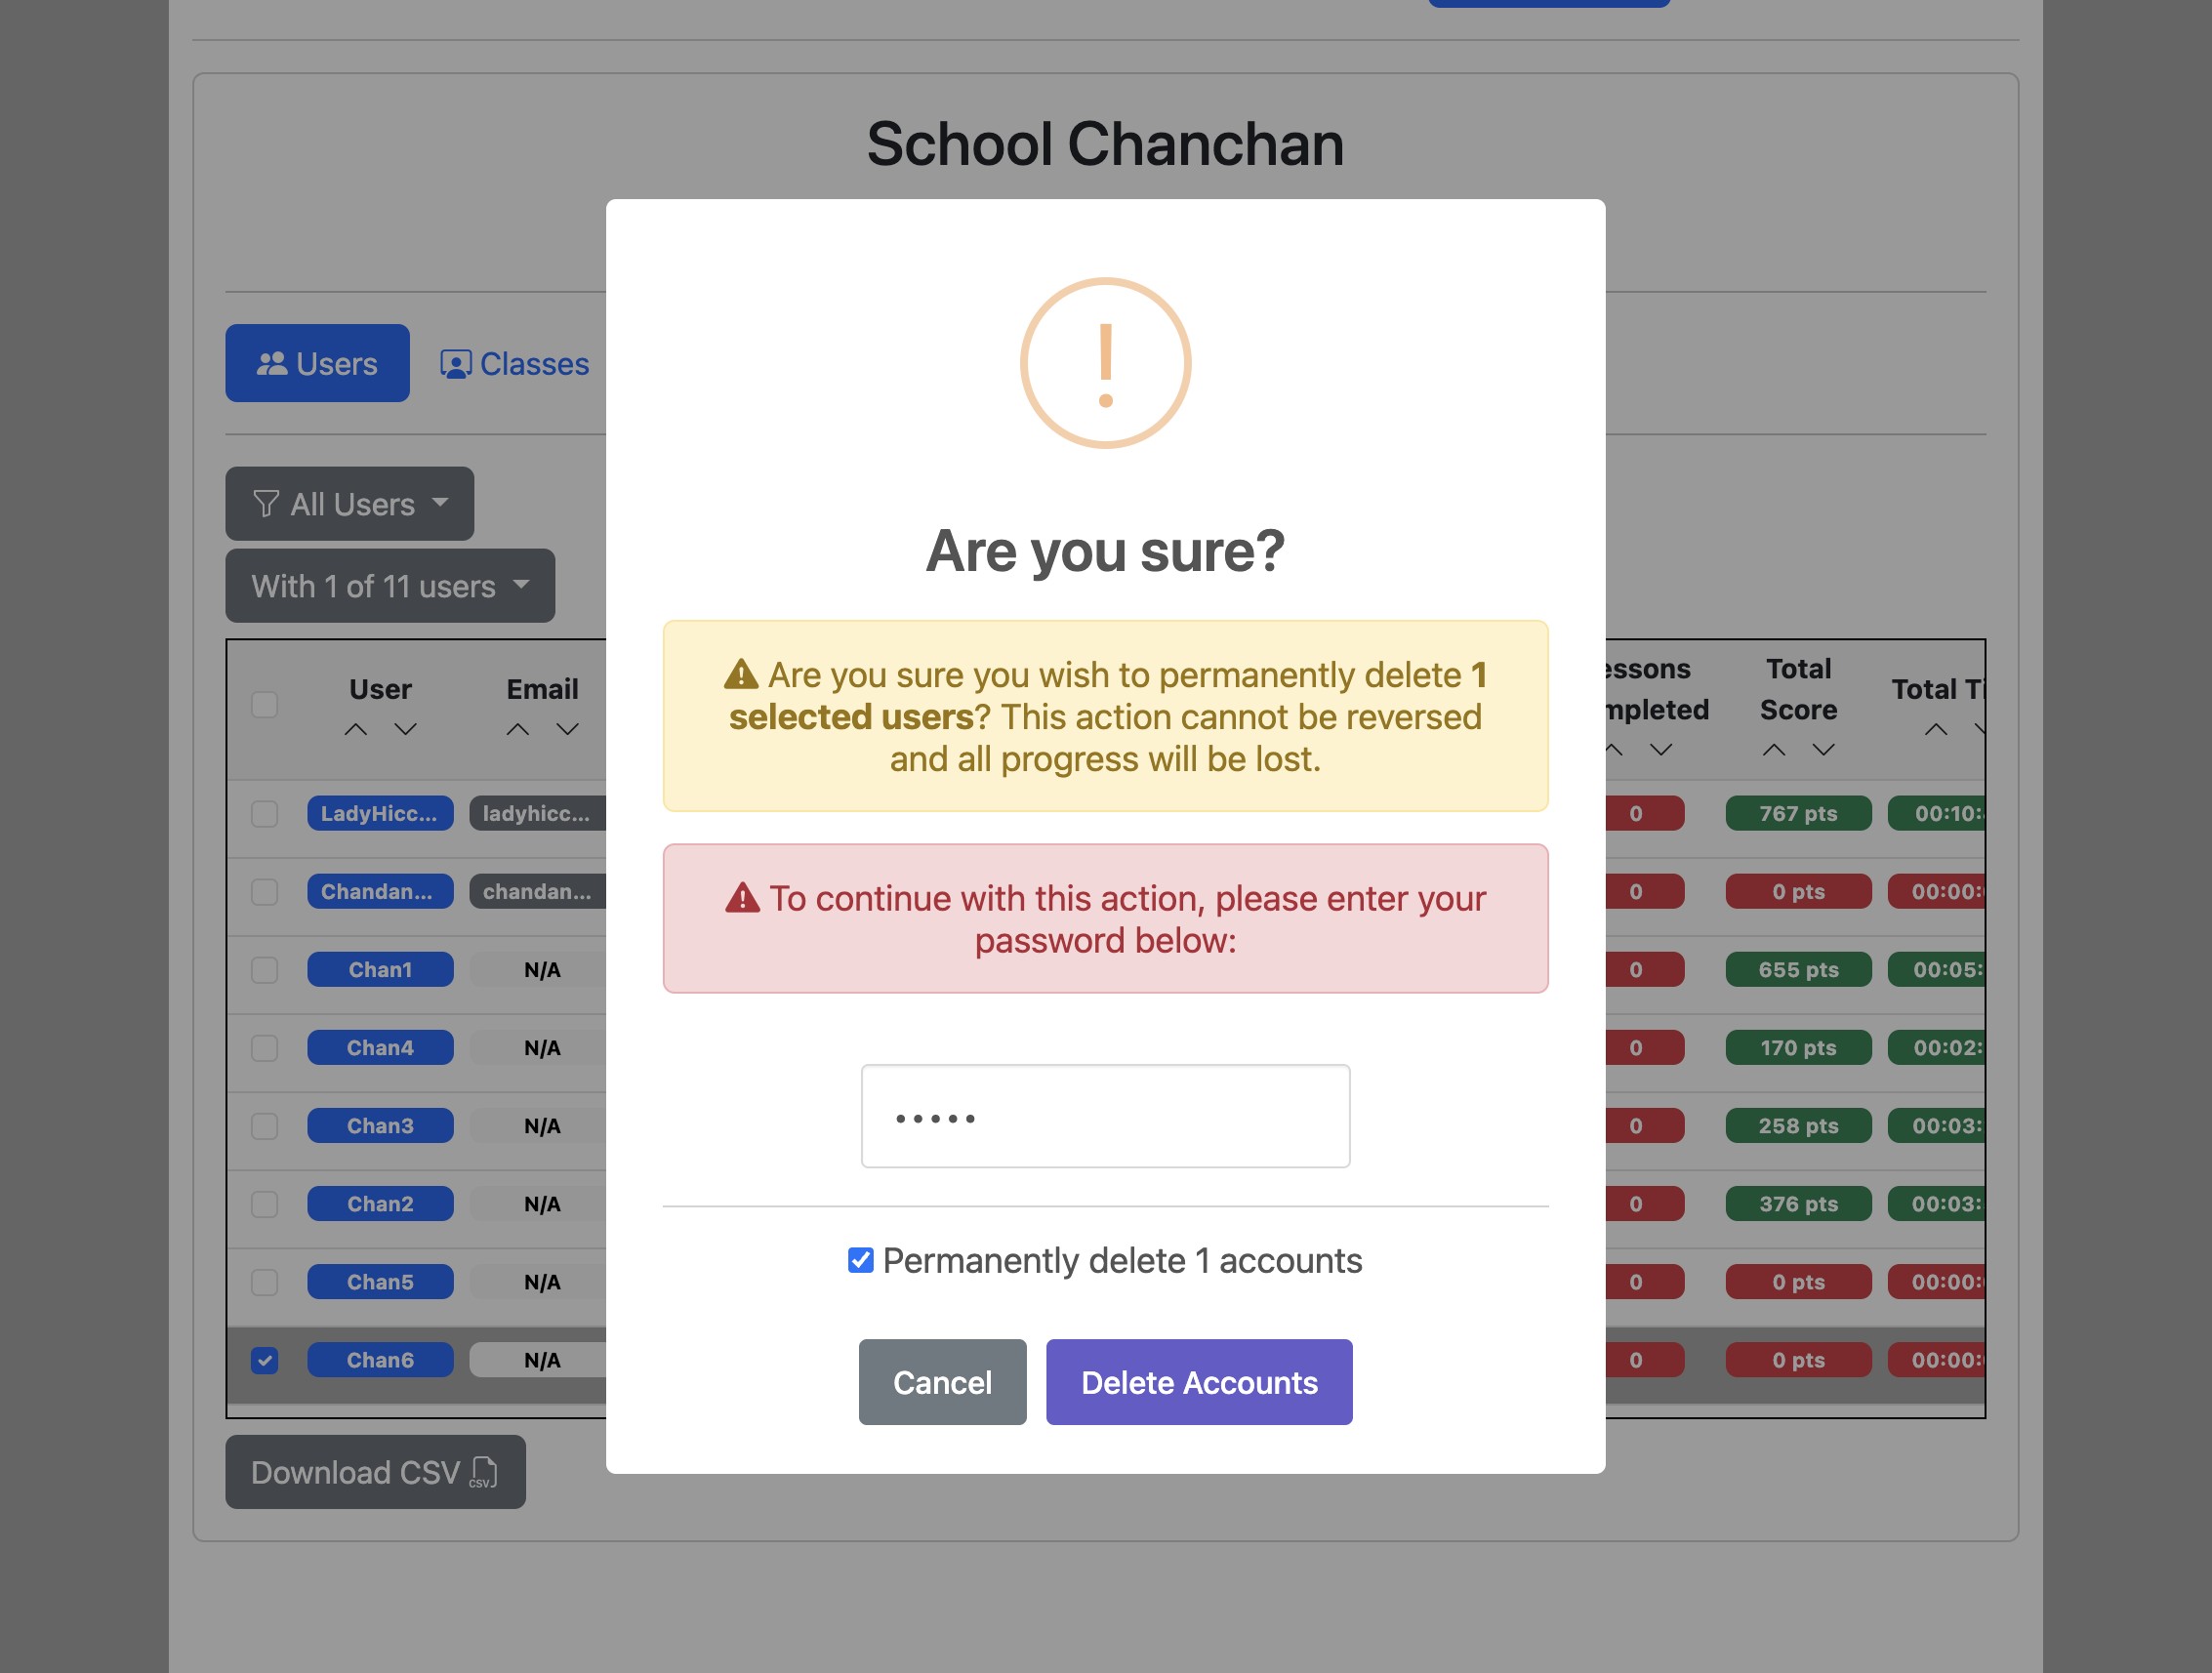
Enter your password and click the "Permanently delete 1 account" checkbox.
Click "Delete Accounts" to confirm.
Deleting user accounts will delete all associated progress records. This is a permanent action which cannot be undone. Teacher and manager accounts cannot be deleted. Contact us if you wish to delete these kinds of accounts.